background image

21

Vendor

Indicates the manufacturer of the node device.

Model Name

Indicates the model of the node device.

Model Nickname

Indicates and enables you to change the node nickname. You cannot use two-byte characters (such as 
Japanese or Chinese characters).

GUID

Indicates a unique ID for mLAN device nodes. If two nodes are mLAN devices of the same model, 
the IDs are different for each device.
If the node represents a computer, this field indicates the ID for the IEEE1394 card.

Version

If the node represents a computer, the field indicates the mLAN driver version.
If the node represents an mLAN device, the field indicates the device firmware version.

Maximum Number of Connected Nodes

Windows:

Display the maximm number of MIDI nodes that can be connected to the node MIDI input 
connectors.

Macintosh:

Displays the maximum number of audio nodes and MIDI nodes combined that can be connected to 
the nodes.
For more information, refer to page 23.

Connector Name

Enables you to select a MIDI input/output connector. The ID and nickname of the selected 
connector will be displayed in the [Connector ID] and [Connector Nickname] field.

If the node is a computer, the audio or MIDI [Connector ID] will match the 
number of an audio channel or MIDI connector specified on the DAW (that is, 
the number of the mLAN driver).

Number of Connectors

Displays the maximum number of MIDI input and output connectors available to the node.

Icon

Enables you to change the node icon (page 13).

For Windows Users

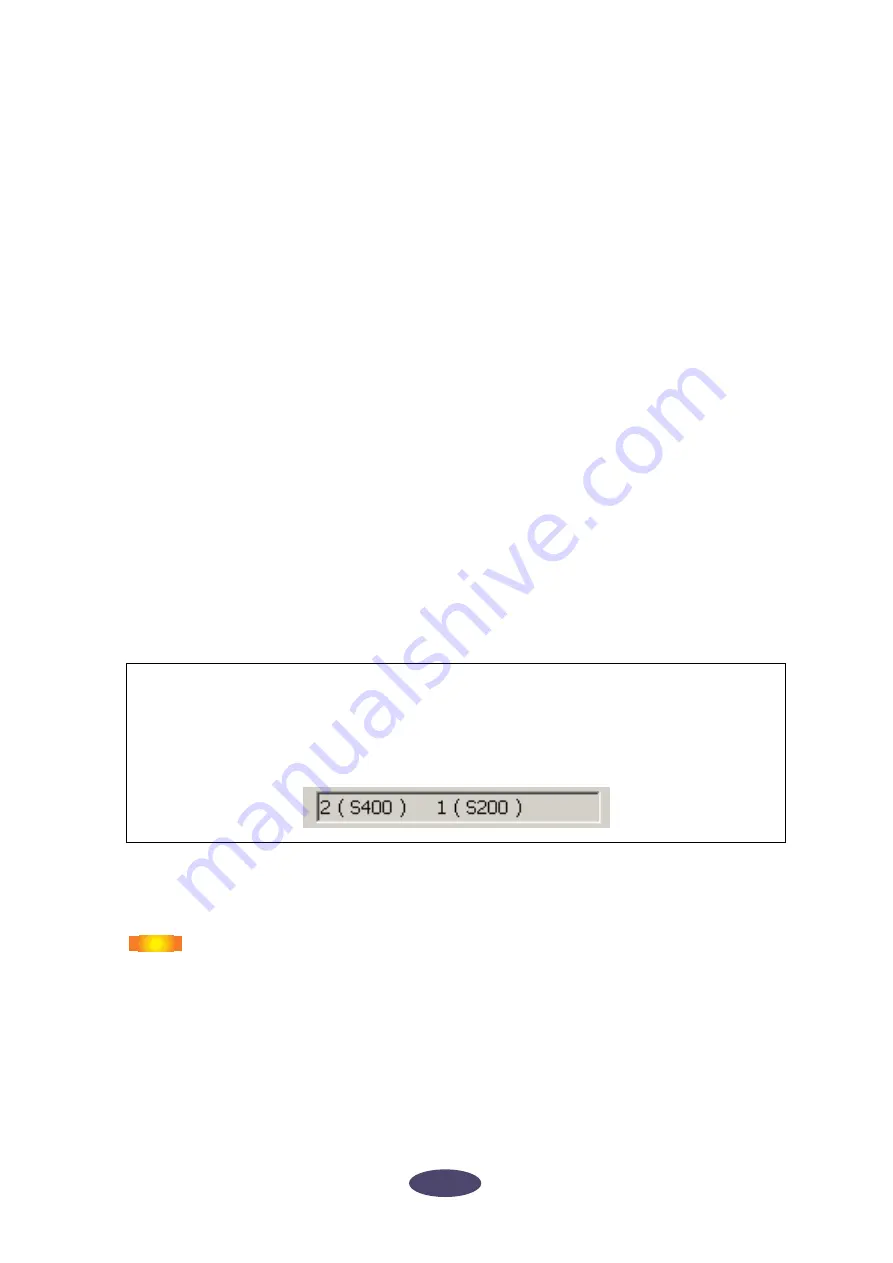
If the node represents a computer, this field indicates the maximum number of nodes that can be 
connected to an S400-compatible device and an S200-compatible device separately.
The following example indicates that up to two S400-compatible devices and one S200-
compatible device can be connected to the computer’s MIDI inputs.

NOTE

Содержание mLAN Driver

Страница 1: ...tly prohibited except for personal use Yamaha makes no representations or warranties with regard to the use of the software or doc umentation and is not responsible for damages that result from the use of this manual or the software The mLAN Graphic Patchbay software may be updated without notice You can download the latest version of the software from the following URL http www yamahasynth com do...

Страница 2: ...nal routing and wordclock settings much as if you were connecting physical cables Graphic View Introduction to mLAN Graphic Patchbay Menu and Tool bars These bars enable you to use various functions by selecting menu options or clicking Tool bar buttons pages 7 and 11 Node Computers and mLAN devices in an mLAN network are called nodes These graphics provide information about connected nodes page 1...

Страница 3: ...information see page 34 List View Audio Out and MIDI Out sections Provide information on audio and MIDI output connectors on all nodes in an mLAN network Destination Connector List Indicates connections between connectors in the Audio Out and MIDI Out sections and input connectors Audio In and MIDI In sections Provide information on audio and MIDI input connectors on all nodes in an mLAN network ...

Страница 4: ... work as expected if there is no corresponding function in the client application sequencer etc The highest level of implementation for the client application is indicated in the OPT logo which appears along with the version information in the application Using mLAN Graphic Patchbay as a Plug In Level 1 OPT Panels provides basic support for opening and displaying OPT control panels that can transm...

Страница 5: ...e 41 Operational Flow If multiple IEEE1394 interface cards have been installed on the computer mLAN Graphic Patchbay cannot simultaneously operate mLAN devices connected to multiple IEEE1394 interface cards Windows Before you start mLAN Graphic Patchbay select in the mLAN Driver Setup window the IEEE1394 interface card you wish to use page 20 Macintosh Connect an mLAN device to a single IEEE1394 i...

Страница 6: ...the YAMAHA mLAN Manager icon does not appear in the Task bar click the Start button then select Programs mLAN Tools mLAN Manager The Task bar now indicates the YAMAHA mLAN Manager icon Refer to the owner s manual for the client application for details on starting the mLAN Graphic Patchbay when using it as a plug in page 4 For Macintosh Users Open the mLAN Tools folder then click the mLANGraphicPat...

Страница 7: ...mation Select this option to configure a new mLAN network Open Opens an existing mLAN Graphic Patchbay ymp file and retrieves the stored mLAN connection settings Save Saves the current settings by overwriting the current mLAN Graphic Patchbay file ymp Save As Saves the current mLAN connection settings in a new file under a new name You can also save an existing file as a new file under a new name ...

Страница 8: ...ts Node Information available only in Graphic view Provides information on a selected node marked by a solid black frame and enables you to change various node settings page 18 Resource Information Provides information on current IEEE1394 BUS bandwidth using a pie chart and a list View this information to ensure that there is sufficient bandwidth for additional audio connections An error due to la...

Страница 9: ...y a solid black frame as the wordclock master and the other nodes as slaves Wordclock connections between nodes will be made automatically page 25 Typically you will use this function to specify the wordclock master in an mLAN network Input Connector Output Connector available only in Graphic view Displays the Input Connectors window or Output Connectors window for the selected node a node marked ...

Страница 10: ...10 Help Menu Manual Displays this PDF manual About Displays mLAN Graphic Patchbay version information ...

Страница 11: ...n also access this function by selecting File then Open Template File in the Menu bar E Save Template File Saves the current mLAN template file in a new template file under a new name You can also save an existing template file as a new file under a new name page 33 You can also access this function by selecting File then Save Template File in the Menu bar F Audio Displays the Audio Connection win...

Страница 12: ...lid black frame You can also access this function by selecting Connection then Output Connector in the Menu bar M Node Information available only in Graphic view Provides information regarding a selected node marked by a solid black frame and enables you to change various node settings page 18 You can also access this function by selecting View then Node Information in the Menu bar N Destination C...

Страница 13: ...up window displays the Node Information MIDI window You can also access this function via the Node Information option in the Menu and Tool bars B ID button Click this button to flash the ACTIVE indicator on the corresponding mLAN device This function is useful in mLAN networks that include multiple mLAN devices because it enables you to identify correspondences between nodes in the Graphic Patchba...

Страница 14: ... not assigned the product model name page 18 appears F Sample rate Displays the current operating sampling wordclock frequency 44 1 kHz 48 kHz 88 2 kHz or 96 kHz G Master Slave number Displays the wordclock master or slave number H M aster button The button indicator lights up when the node is operating as master The button indicator turns off when the node is operating as a slave To switch the no...

Страница 15: ...o relocate then press and hold down the mouse button 2 While you are holding down the mouse button mLAN Graphic Patchbay displays brown boxes to which you can relocate the selected node 3 While continuing to hold down the mouse button drag the node to a brown box The destination box will be highlighted ...

Страница 16: ...r the grayed out node will be applied to the new node The grayed out node will be deleted This saves you from patching nodes from scratch when you change an mLAN device or use a different mLAN device of the same model in a new location You can swap a grayed out node and a new node only if both nodes are for the same model To swap the nodes no input or output connectors of the new node should be co...

Страница 17: ... button a swappable grayed out node is indicated with a yellow frame 3 While holding down the mouse button drag the new node to the swappable grayed out node then release the mouse button 4 The grayed out node will be replaced by the new node ...

Страница 18: ...Connection window Vendor Indicates the manufacturer of the node device Model Name Indicates the model of the node device Model Nickname Indicates and enables you to change the node nickname You can assign any nickname up to 32 characters to help identify the node You cannot use two byte characters such as Japanese or Chinese characters GUID Indicates a unique ID for mLAN device nodes If two nodes ...

Страница 19: ...that is the number of the mLAN driver Sample Rate If the computer is operating as wordclock master you can change the sampling frequency here This field also indicates but does not allow you to change the sampling frequency of a computer operating as wordclock slave or the sampling frequency of other mLAN devices To change the sampling frequency of an mLAN device operating as wordclock master do s...

Страница 20: ...ion Guide Icon Enables you to change the node icon page 13 Bkgrnd Color Enables you to change the background color of the nodes OK Confirms the settings and closes the window Cancel Cancels the settings and closes the window Setup If the node represents a computer clicking the Setup button displays the mLAN Driver Setup window refer to Changing settings after installation in the Installation Guide...

Страница 21: ...lays the maximum number of audio nodes and MIDI nodes combined that can be connected to the nodes For more information refer to page 23 Connector Name Enables you to select a MIDI input output connector The ID and nickname of the selected connector will be displayed in the Connector ID and Connector Nickname field If the node is a computer the audio or MIDI Connector ID will match the number of an...

Страница 22: ...el window see the Installation Guide If you cannot change the sampling frequency or the number of output channels To change the computer s sampling frequency or the number of output channels you must first shut down the DAW that is using the mLAN driver 1 Shut down the DAW or audio sequencer 2 If you were using mLAN Graphic Patchbay as a plug in for the host application re start mLAN Graphic Patch...

Страница 23: ...nits The maximum number of connected nodes indicated in the Node information MIDI window two S400s and one S200 In this case you can connect up to four S400s and S200s combined as Audio nodes to the computer node You can connect up to two S400s and one S200 as MIDI nodes On a Windows computer you can connect only one S200 to a computer node For Macintosh users The Maximum Number of Connected Nodes...

Страница 24: ...IDI window opens from the MIDI Connection window Vendor Indicates the manufacturer of the node device Model Nickname Indicates the model of the node device Connector Nickname Indicates and enables you to change the connector nickname You cannot use two byte characters such as Japanese or Chinese characters If no nickname is assigned this field indicates the connector name Source Name Displayed onl...

Страница 25: ... can easily set up the wordclock by using the Single Master option You do not need to connect the wordclock connectors one by one Typically you will use this option to specify the wordclock master in an mLAN network If you wish to specify two wordclock masters in an mLAN network and connect the wordclock connectors manually follow the steps described in the Connecting the node inputs and outputs s...

Страница 26: ...ively in the View menu select Node Information The Node Information Audio window opens 6 Select the sampling frequency in the Sample Rate field in the Node Information Audio window The sampling frequency specified here will be automatically used by the slave nodes If the error message Cannot change is displayed refer to If you cannot change the sampling frequency or the number of output channels o...

Страница 27: ...e following procedure applies to the Audio Connection window However you can also follow this procedure to connect the MIDI and wordclock connectors 1 Click the OUT connector of the node that outputs the signal mLAN Graphic Patchbay displays the Output Connector window which shows enlarged node connectors and virtual cable connectors To connect the wordclock input and output connectors first turn ...

Страница 28: ...pears in the box 3 Click the IN connector of the node that receives the input signal mLAN Graphic Patchbay displays the Input Connectors window 4 In the Input Connectors window click the box next to the input connector to be connected The input and output connectors are now connected by a cable of the same color as the output node ...

Страница 29: ...st output connector to be connected 3 While pressing and holding down the Shift key on the computer keyboard click the box next to the number of the last output connector to be connected A virtual cable connector appears in each of the output connector boxes in the range specified in Steps 2 and 3 4 Click the IN connector of the node that receives the input signal mLAN Graphic Patchbay displays th...

Страница 30: ...d in this step The specified multiple input and output connectors are connected by a virtual cable of the same color as the output node For group connection be sure to specify the output connectors first Only a single cable appears in a group connection or when you connect consecutive input and output connectors NOTE ...

Страница 31: ...e connected 2 In the pop up menu click the number of the connector you wish to disconnect The cable connecting to the connector will be disconnected Selecting All will disconnect all connectors indicated in the pop up menu Using the Delete key on the computer keyboard 1 Click the cable you wish to disconnect The selected cable is now represented by a dotted line 2 Press the Delete key on the compu...

Страница 32: ...ork you can connect only one of them to the computer s MIDI IN connector For example if you connect MIDI OUT 1 on an mLAN16E an S400 compatible device to the computer s MIDI IN 5 all MIDI OUTs 1 4 on the mLAN16E will be automatically configured as connectors to the computer s MIDI INs 1 4 You cannot connect any other nodes to the computer s MIDI INs 5 8 You can connect the MIDI OUT connectors on t...

Страница 33: ...mLAN Graphic Patchbay template file enables you to store and retrieve all mLAN Graphic Patchbay settings other than model nicknames and connector nicknames If you replace a unit as long as the new unit is the same model as the previous unit you will be able to use the stored mLAN connection settings A template file is useful when you wish to recreate your home recording mLAN connections on devices...

Страница 34: ...the Change View button in the Tool bar To switch between the Audio Connection window and MIDI Connection window in the Connection menu select Audio or MIDI Alternatively click the Audio or MIDI button in the Tool bar In List view you cannot set up wordclock Some menus are also unavailable Unavailable menus and Tool bar buttons are grayed out Viewing the mLAN Connection Settings in List View NOTE 1...

Страница 35: ... between connectors in the Audio Out or MIDI Out sections and input connectors Model name Indicates the model nickname of the node Connector name Indicates the connector nickname Vendor Indicates the manufacturer of the node Format Indicates the sampling frequency and transmission format of a node WCLK Indicates the node s wordclock master or slave number An M represents that the node is operating...

Страница 36: ...connector in the output group to be connected then while holding down the Shift key on the computer keyboard click the last output connector in the group The selected connectors will be highlighted in the list 2 In the Audio In or MIDI In section click the input connector to which you wish to connect To connect multiple connectors simultaneously group connection click the first input connector in ...

Страница 37: ...isconnecting Connectors This section explains how to disconnect audio and MIDI connectors 1 Select the connector you wish to disconnect in the Audio Out or MIDI Out sections or in the Destination Connector List section To disconnect multiple connectors simultaneously group disconnection click the first output connector in the group to be disconnected then hold down the Shift key on the computer ke...

Страница 38: ...d Q View Graphic 1 Alt V G 2 Ctrl 1 Command 1 List 1 Alt V L 2 Ctrl 2 Command 2 Update 1 Alt V U 2 Ctrl 3 Command 3 Destination Connector List 1 Alt V C 2 Ctrl 4 Command 4 Node Information 1 Alt V N 2 Ctrl 5 Command 5 Resource Information 1 Alt V R 2 Ctrl 6 Command 6 Connection Audio 1 Alt C A 2 Ctrl 7 Command 7 MIDI 1 Alt C M 2 Ctrl 8 Command 8 Wordclock 1 Alt C W 2 Ctrl 9 Command 9 Single Master...

Страница 39: ...tible with S400 The number of available channels will decrease You may need to reduce the number of transmission channels to be able to make mLAN connections For more information refer to Error Messages or Troubleshooting in the mLAN Graphic Patchbay Online Manual If you connect even a single mLAN device that does not support S400 all other mLAN devices in the network will match the functions and ...

Страница 40: ...er s manual of your particular S200 device 2 Connect the S200 compatible device to the computer or the mLAN device in the network 3 To increase the number of output transmission channels of S400 compatible devices decrease the number of output channels of the S200 devices from the Node Information Audio window and change the number of output channels of the S400 devices The number of devices that ...

Страница 41: ... Installation Guide Have you changed the device Even if the model is the same if the actual device is dif ferent it is necessary to re enable connection by using Auto Connector and or Graphic Patchbay Refer to page 25 and Connecting the Computer and mLAN devices via mLAN in the Installation Guide Is there a loop connection Check the cabling and make sure none of the devices are connected in a loop...

Страница 42: ...VDevice exe mLANTFamily exe mLANSoftPH exe mLANManager exe To change mLAN settings select Start All Programs Start Up then start mLAN Manager When a message such as file cannot be found appears when uninstalling Try executing the installation once more then uninstall again Windows mLAN Manager the mLAN icon in the Task bar has disappeared Select Start All Programs Start Up or mLAN Tools then selec...

Страница 43: ...pdate menu option If you try to update the network information after you connect or disconnect an mLAN device that does not support S400 the system changes the mLAN transmission speed This extra process may slow down the operation However the process will not affect the subsequent performance ...

Отзывы: