background image

TRIGGER

Ref

erence

KIT

MIDI

V

OICE

UTILITY

W

A

VE

PA

TTERN

Internal Design

Owner’s Manual

35

7

Press the [VOICE] button, navigate to the Select Voice 
page (VCE1), and in the same way as described above, 
set “Cy013:Thin16Eg” as the voice to be played for MIDI 
notes with the MIDI note number 40 (E1). 

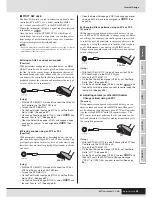
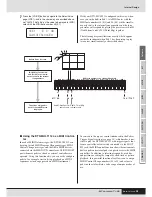
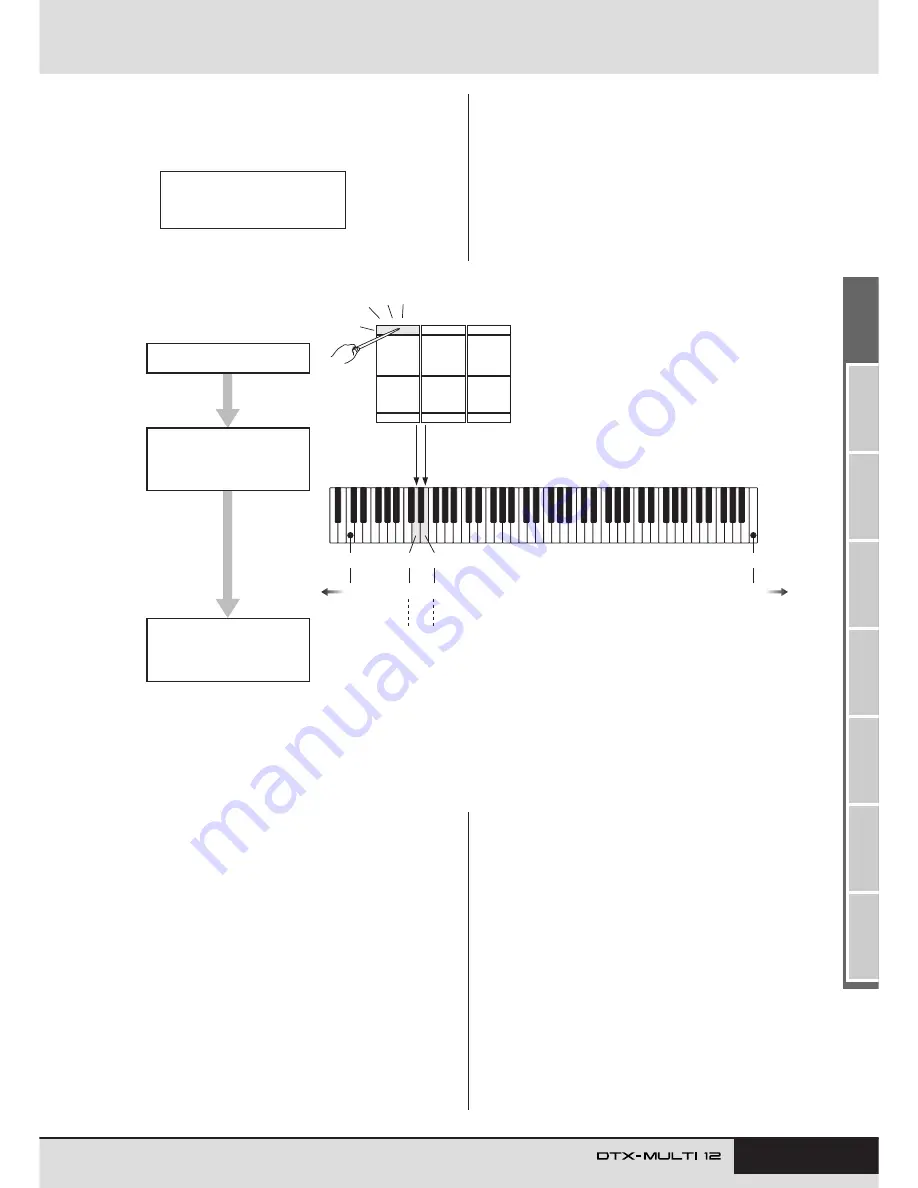
With your DTX-MULTI 12 configured in this way, when-
ever you strike built-in Pad 1, two MIDI notes with the 
MIDI note numbers 38 (D1) and 40 (E1) will be simulta-
neously sent to the internal tone generator, and the tone 
generator will respond by playing the preset voices Sn001 
(OakCustom) and Cy013 (Thin16Eg) together.

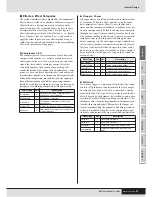
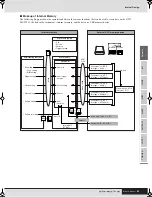
The following diagram illustrates exactly what happens 
inside the instrument when Pad 1 has been setup to play 
two voices simultaneously as described above.

Using the DTX-MULTI 12 as a MIDI Control-
ler

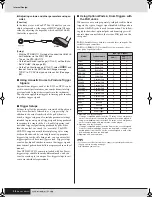
Instead of MIDI Note messages, the DTX-MULTI 12 can 
be setup to send MIDI Program Change messages, MIDI 
Control Change messages, and the like to MIDI devices 
connected via the MIDI OUT connector or USB TO HOST 
port whenever pads are struck or external controllers are 
operated. Using this functionality, you can easily configure 
pads to, for example, start and stop playback on a MIDI 
sequencer or to change presets on a MIDI instrument. 

In contrast to the type of control introduced in the Pads & 
Trigger Signals section (see page 28), which makes it pos-
sible to play the DTX-MULTI 12 with trigger signals sent 
from a controller or foot switch connected via the FOOT 
SW jack, the MIDI control function allows the instrument’s 
built-in pads and external pads to operate as versatile MIDI 
controllers. In addition to selecting frequently-used kits 
and patterns or setting the tempo for click-track or pattern 
playback, this powerful function also allows you to assign 
MIDI Control Change numbers (01 to 95) and values to 
pads in order to facilitate a wide range of unique modes of 
use.

VCE1≥≥≥≥E≥1/≥40

Cy013:Thin16Eg

C

0

24

0

D1

38

C

7

108

127

E1

40

Built-in Pad 1 is struck.

Two MIDI notes (“D1/38” 

and “E1/40”) are simulta-

neously sent to the internal 

tone generator.

MIDI note numbers on a standard keyboard.

The voices assigned to 

each of these MIDI notes 

are played.

Cy013: Thin16Eg 
cymbal sound

Sn001: OakCustom

snare sound

Содержание DTX-MULTI

Страница 1: ...Owner s Manual EN ...

Страница 2: ... a function or effect works when the unit is operating as designed are not covered by the manufacturer s warranty and are therefore the owners responsibility Please study this manual carefully and consult your dealer before requesting service ENVIRONMENTAL ISSUES Yamaha strives to produce products that are both user safe and environ mentally friendly We sincerely believe that our products and the ...

Страница 3: ...ipment Electronic Percussion Pad Model Name DTXM12 This device complies with Part 15 of the FCC Rules Operation is subject to the following two conditions 1 this device may not cause harmful interference and 2 this device must accept any interference received including interference that may cause undesired operation See user manual instructions if interference to radio reception is sus pected FCC ...

Страница 4: ...ury to you or others or damage to the instrument or other property These precautions include but are not limited to the following When removing the electric plug from the instrument or an outlet always hold the plug itself and not the cord Unplug the AC power adaptor when not using the instrument or during electrical storms Do not connect the instrument to an electrical outlet using a multiple con...

Страница 5: ...are and other content for which Yamaha retains the copyright or with respect to which has license to use others copyrights Such copyrighted materials include but are not limited to all computer software style files MIDI data wave data musical scores and sound recordings Any unauthorized use of said software and content for non personal applications is prohibited under applicable laws Any violation...

Страница 6: ... exciting ways Wide selection of patterns The DTX MULTI 12 comes complete with 128 ready to use melodic and rhythmic phrases including 3 demos known as patterns You can easily start and stop patterns by simply strik ing pads to which they are assigned greatly adding to the expressiveness of your performances In addition you can also record your own performances as patterns and assign them to pads ...

Страница 7: ...g Area VCE 55 Makeup of VOICE Setting Area 55 VCE1 Select Voice 56 VCE2 Voice Tuning Volume Pan 57 VCE3 Voice Timbre 58 VCE4 Effect Send Levels 59 VCE5 Other Voice Related Settings 60 MIDI Setting Area MIDI 61 Structure of MIDI Setting Area 61 MIDI1 Select Message Type 62 MIDI2 MIDI Destination Switches 66 MIDI3 Other MIDI Settings 67 WAVE Setting Area WAVE 69 Makeup of WAVE Setting Area 69 WAVE1 ...

Страница 8: ... area see page 82 In addition you can also access the Trigger setting area by holding down the SHIFT button and pressing the UTILITY button see page 99 0 SHIFT Button Hold down this button and press another button to access the setting area or function indicated above or below it 1 E E E E Button The Click track button is used to start and stop the built in click track or metronome In addition you...

Страница 9: ...3 to 7 These trigger input jacks are used to connect optional pads The PAD 3 jack is compatible both with mono and stereo two and three zone types meanwhile the PAD 4 5 and the PAD 6 7 jacks support standard mono output pads see page 30 7 AUX IN Jack External audio signals can be input via this standard stereo phone plug In this way you can connect an MP3 or CD player to play along with your favor...

Страница 10: ... a pair of stereo headphones The headphone volume can be adjusted using the VOLUME knob on the rear panel Connecting to Other Audio Equipment Audio input from an MP3 or CD player via the AUX IN jack can be mixed with the sound produced by the DTX MULTI 12 and output together from the OUTPUT L MONO and R and PHONES jacks This makes it very easy to play along with your favorite tunes If necessary fu...

Страница 11: ... USB memory devices and Yamaha cannot guar antee the operation of all such devices that can be purchased Before purchasing a USB device for use with this instrument therefore please check with your Yamaha dealer or an authorized Yamaha distributor see list at end of the Owner s Manual or visit the following web page http dtxdrums yamaha com Other USB devices such as a computer keyboard or mouse ca...

Страница 12: ...vice This instrument and other MIDI devices use an internal clock to control the tempo of playback and when two such devices are synchronized it is necessary to specify which clock will be used by both The device set to use its own internal clock serves as a reference for all con nected devices and is referred to as the master instrument Con nected devices set to use an external clock are referred...

Страница 13: ...ng to a computer via the USB TO HOST port be sure to observe the precautions listed below Failing to do so risks freezing your computer and corrupting or losing data If your computer or DTX MULTI 12 should freeze restart the applica tion being used reboot the computer or turn the instrument off once and then back on Making Music with a Computer Recording DTX MULTI 12 Performance Data using a DAW A...

Страница 14: ... it is also returned to the external MIDI system For example let s assume that performance data is being recorded on Track 3 by your DAW application In addition we ll also assume that MIDI Channel 1 has been set for the return of perfor mance data If MIDI Thru is now turned on for Track 3 the DAW application will return the performance data to the DTX MULTI 12 as it is being recorded and the instr...

Страница 15: ...etails refer to the owner s manual included in the downloaded package DTX MULTI 12 settings Whenever the Cubase Remote function is to be used the follow ing steps must be completed on the DTX MULTI 12 1 Within the UTILITY setting area navigate to the MIDI In Out page UTIL6 9 and set MIDI IN OUT to USB 2 Ensure that the DTX MULTI 12 is connected to your computer in the correct manner and then launc...

Страница 16: ...r and they will light up when the associated pad is struck Striking the Pads When playing Pads 4 to 9 i e the main pads aim to strike the center of the pad with the tip of the drum stick Meanwhile when playing Pads 1 to 3 and Pads 10 to 12 i e the rim pads aim to strike the center of the pad with the shoulder of the drum stick Do not place your fingers into the gaps between Pads 1 to 3 and the ins...

Страница 17: ...o a pad you can use also muting to switch between these sounds for more expressive performances For details on how to switch sounds by muting see page 51 Selecting a Preset Kit The term kit is used to refer to a collection of sounds i e pre set voices waves and patterns produced when you strike each of the pads and the DTX MULTI 12 comes complete with an impressive range of specially prepared pres...

Страница 18: ...ly you can move the flashing cursor to the pad number and then change it from to using the DEC and INC buttons 5 Select the voice you want to assign to Pad 4 Move the flashing cursor to the leftmost parameter from the lower row of text and using the DEC and INC buttons select the voice category and voice number of the voice you wish to assign KIT1 P001 PercsMaster KIT1 P009 Oak Custom VCE01 º Cy01...

Страница 19: ...I 12 features a number of different preset kits suitable for hand percussion that is for playing with hands instead of drum sticks As described below furthermore you can use a trigger setup at any time to adjust the sensitivity of the pads to suit playing by hand Setting pad sensitivity for playing by hand q Hold down the SHIFT button and press the UTILITY but ton to access the Trigger setting are...

Страница 20: ...attern will be dis played inside and characters on the upper row of text Furthermore the lower row of text will shown the name of the kit being used for playback of the demo pattern 3 To stop the demo pattern press any button other than SHIFT Listening to Preset Patterns 1 Press the PTN button to open the Select Pattern page 2 Select the Preset pattern you want to listen to using the DEC and INC b...

Страница 21: ... button will turn red If a Preset pattern is selected when you activate Record Mode your performance will be recorded to an empty User pattern 4 Set the required recording conditions On the Record Mode screen REC you can set the tempo and time signature of the click track to be played when recording the length of the pattern in measures or bars and a number of other important parameters Move the f...

Страница 22: ... new pattern assignment as a User kit As shown here select an empty User kit using the DEC and INC buttons and then press the ENTER button 10 When asked to confirm that you want to store the kit press the ENTER button to proceed 11 With the stored drum kit selected strike Pad 6 to hear the pattern that you assigned Up to 50 User patterns can be recorded on your DTX MULTI 12 If an attempt is made t...

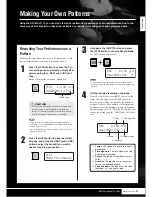
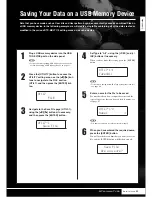
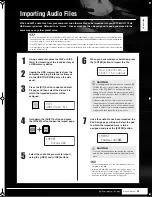
Страница 23: ...ype setting other than All see page 93 5 Enter a name for the file to be saved For more details on how to input characters and the types of character that can be used for file names see see page 47 File names can be up to eight characters in length 6 When you have entered the required name press the ENTER button You will be asked to confirm that you want to save the file and the ENTER button will ...

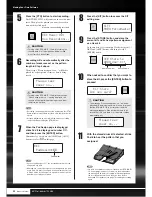
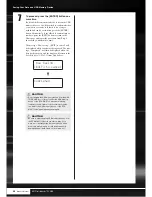
Страница 24: ...hile your data is being saved The mes sage Completed will then be displayed when the data has been saved and the display will return to the Save File page UTIL7 1 from Step 4 above Do not unplug the USB memory device from the USB TO DEVICE port or turn off either the USB memory device or the DTX MULTI 12 while data is being loaded or saved Failure to observe this precaution can lead to the USB mem...

Страница 25: ...LTI 12 while data is being loaded Failure to observe this precaution can lead to the USB memory device or the DTX MULTI 12 being permanently damaged If the selected file is not 16 bit the error message Illegal wave data will be displayed and the import process will be halted In such a case please convert the file to 16 bit using for example the bundled DAW software and then repeat the import proce...

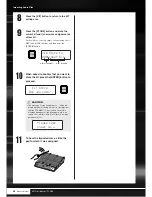
Страница 26: ...m that you want to store the kit press the ENTER button to proceed 11 To hear the imported wave strike the pad to which it was assigned The message Please keep power on will be dis played while data is being stored It is very important that the DTX MULTI 12 is not turned off until this message disappears If the instrument were to be turned off at this time data for all User kits could be permanent...

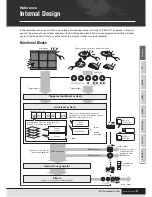
Страница 27: ...Waves Preset patterns User patterns MIDI messages MIDI messages MIDI messages Import Import Pattern recording Audio output SMF file Format 0 WAV file AIFF file MIDI output Portable music player etc Trigger setup Preset or User Kit Preset or User Internal tone generator Effects Reverb chorus variation and master EQ Preset voices patterns and waves are assigned to each of the built in pads external ...

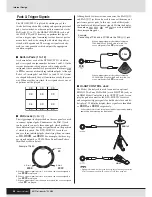
Страница 28: ... ger signals output by a TP65S Three Zone Drum Pad are identified as shown below A When a trigger signal from rim 1 is received the voices assigned to Pad are played B When a trigger signal from rim 2 is received the voices assigned to Pad are played C When a trigger signal from the head is received the voices assigned to Pad are played Although each features just one connector the PAD N O and PAD...

Страница 29: ...tterns and waves Setup With the DTX MULTI 12 turned off connect the FC4 or FC5 Foot Switch via the FOOT SW jack Turn on the DTX MULTI 12 On the Foot Switch Input page UTIL4 2 set FootSwIn Sel to ftSw See page 89 On the Pad Function page UTIL4 1 select and then set Func to off See page 88 Open the Select Voice page VCE1 and choose a preset voice pattern or wave to be assigned to See page 56 Changin...

Страница 30: ... are processed in an ideal manner Your DTX MULTI 12 comes pre loaded with five Preset trigger setups suitable for many different needs and you can also create up to ten unique User trigger setups to suit your own individual requirements Using Optional Pads Drum Triggers with the PAD Jacks Whenever you are using separately sold pads and or drum triggers the types of trigger signal handled will depe...

Страница 31: ... you to play sev eral different notes together to produce chords or with voices at different semitones assigned to the twelve pads to freely play melodic parts With the timing and strength of your playing reflected in the sound produced by preset voices you can perform with practically the same level of expressiveness as afforded by acoustic instruments Patterns The DTX MULTI 12 can also play rhyt...

Страница 32: ...n be sustained and turned off on each successive strike in Hold mode In order that the Layer function may be put to use the pad in question must first be setup to send multiple MIDI messages whenever struck Then voices are assigned to each of the layers and a layer playing mode is specified for the pad For more details refer to the section Specifying MIDI note numbers and assigning voices to each ...

Страница 33: ...ameters such as volume tun ing stereo pan and effect levels can be set for the voices assigned to the various pads and controllers 3 Once you have finished configuring a kit in this way you can store it as one of the instrument s User kits VCE1 º Cy013 Thin16Eg Voice assigned to the pad or controller Pad or controller being set Example Working with Preset kit 1 Kit name KIT setting area VOICE sett...

Страница 34: ...e pad to play individually in turn each time it is struck or hold which causes the notes to be alternately turned on and off each time the pad is struck See page 62 4 Press the C C C C button to navigate to the MIDI Note page MIDI1 2 On this page we can set the MIDI notes to be sent by the pad Specifically the Note parameter on the lower row of text is used to set a MIDI note number while the indi...

Страница 35: ...TO HOST port whenever pads are struck or external controllers are operated Using this functionality you can easily configure pads to for example start and stop playback on a MIDI sequencer or to change presets on a MIDI instrument In contrast to the type of control introduced in the Pads Trigger Signals section see page 28 which makes it pos sible to play the DTX MULTI 12 with trigger signals sent...

Страница 36: ...furthermore you can also specify the degree to which this effect is applied to each layer on the Reverb Send page VCE4 3 The degree to which User patterns are processed by these effect units can be specified on the Variation Send page PTN3 5 the Chorus Send page PTN3 6 and the Reverb Send page PTN3 7 furthermore these set tings can then be saved as part of the User pattern data Master EQ Processin...

Страница 37: ...s more suited to selective use in spe cific sections in order to add variety A phaser meanwhile introduces a phase shift into the sound being processed before returning it to the effect input using a feedback cir cuit in order to produce a characteristic animated yet mel low tone Gentler overall than a flanger this effect can be put to use in a wider range of situations and for example is often us...

Страница 38: ...d with organs In a rotary speaker the horn and rotor are spun in order to create highly unique sounds using the Doppler Effect Effect Type VAR Description AutoWah Vintage automatic wah effect TouchWah Classic volume responsive wah effect TouchWahDist Touch wah with distortion applied at the out put Effect Type Rev Var Description SPX Hall Emulation of hall acoustics using an algorithm derived from...

Страница 39: ...al PitchChange Changes the pitch of the input signal Parameter name Descriptions AMDepth This parameter is used to set the depth of amplitude modulation AmpType This parameter is used to set the type of amplifier to be simulated Attack This parameter is used to set the amount of time that elapses before compression is fully applied Bottom 1 This parameter is used to set the lowest point in the fil...

Страница 40: ...et the feedback delay time FBTime1 This parameter is used to set the delay time for feedback delay 1 FBTime2 This parameter is used to set the delay time for feedback delay 2 FBTimeL This parameter is used to set the delay time for the left feedback delay FBTimeR This parameter is used to set the delay time for the right feedback delay Feedback This parameter is used to set how much of the effect ...

Страница 41: ...vl This parameter is used to set the output level OutLvl1 This parameter is used to set the first stage output level OutLvl2 This parameter is used to set the second stage output level Output This parameter is used to set the output level Parameter name Descriptions OverDr This parameter is used to adjust the way in which the sound distorts Pan1 This parameter is used to set the first stereo panni...

Страница 42: ...can also store a number of original User trigger setups which you can conveniently prepare by customizing a Preset trigger setup In specific terms the instrument s internal memory can hold ten of these setups ensuring that they will always be available even after the power has been turned off and back on UTILITY area settings The parameter settings that you have configured within the UTILITY setti...

Страница 43: ... Voices Patterns Trigger setups User kits External USB memory device User memory Flash ROM User trigger setups Utility setting Waves User patterns File extension MTK file type AllKit All combined File extension MTA file type All File extension MTT file type AllTrigger File extension MTU file type Utility File extension MTW file type AllWave File extension MTP file type AllPattern Audio data WAV or...

Страница 44: ...to select and edit patterns WAVE setting area WAVE button This area is used to import and edit waves UTILITY setting area UTILITY button This area is used to set parameters affecting the overall system and to manage files TRIGGER setting area SHIFT UTILITY but tons This area is used to edit trigger setup data The button corresponding to each setting area will light up in green when that area is se...

Страница 45: ...ent parameter on the current page or an adjacent page Changing Parameter Settings By pressing the DEC or INC button you can increase or decrease the setting of the currently selected parameter A setting can be decreased in units of 10 by holding down the SHIFT but ton and pressing the DEC button or by holding down the DEC button and pressing the INC button Similarly it can be increased in units of...

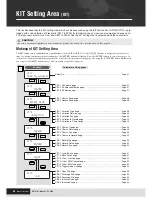
Страница 46: ...electing a new kit See page 45 CAUTION KIT1 P001 PercsMaster KIT2 COMMON KIT3 EFFECT SEND KIT4 VARIATION KIT5 CHORUS KIT6 REVERB KIT7 OTHER KIT8 JOB Select Kit Page 47 KIT4 1 Variation Type page Page 48 KIT4 2 Variation Return page Page 49 KIT4 3 Variation Pan page Page 49 KIT4 4 Variation to Reverb page Page 49 KIT4 5 Variation to Chorus page Page 49 KIT2 1 Kit Volume page Page 47 KIT2 2 Kit Sele...

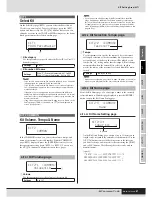
Страница 47: ...el 10 on the MIDI area s Volume page MIDI3 2 the Volume parameter on this page KIT2 1 will be automatically set to the same value The reverse does not apply however in other words the volume setting on the MIDI area s Volume page MIDI3 2 is not affected by changes made on this page KIT2 1 1 Tempo Use this parameter to specify the tempo to be set automati cally upon selection of the current drum ki...

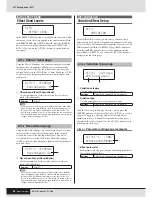
Страница 48: ...everb send level for MIDI channel 10 on the MIDI area s Reverb Send page MIDI3 7 the ReverbSend parameter on this page KIT3 1 will be automatically set to the same value The reverse does not apply however in other words the reverb send set ting on the MIDI area s Reverb Send page MIDI3 7 is not affected by changes made on this page KIT3 2 Variation Effect Setup In the VARIATION section you can sel...

Страница 49: ...orus type Use this parameter to select a chorus effect type With a chorus type selected you can press the ENTER button on the Chorus Type page KIT5 1 to access a range of setting pages allowing each of its parameters to be set The number of parameter setting pages depends on the type selected Use the B C buttons to navigate between these pages KIT5 1 1 Parameter setting page example 1 Effect param...

Страница 50: ... of setting pages allowing each of its parameters to be set The number of parame ter setting pages depends on the type selected Use the B C buttons to navigate between these pages KIT6 1 1 Parameter setting page example 1 Effect parameter Each parameter setting page contains a different parameter for the selected reverb type 1 Reverb return RevReturn Use this parameter to set the level of the retu...

Страница 51: ...uting for the pad indicated by 1 is to operate in conjunction with muting for other pads with the same setting When pad sensitivity is set for playing with sticks we recommend that you set MuteSw to on for at least two pads so that you can use the muting technique with out the fear of accidentally striking your hand As you make your selections the numbers in the Pad Indicator will light up to show...

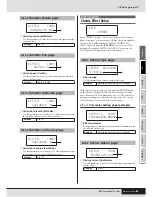
Страница 52: ...has been selected on the Hi hat Function page KIT7 3 use this parameter to set the type of MIDI message generated by the hi hat controller If hi hat has been selected on the Hi hat Function page KIT7 3 this setting will be displayed as and modification will not be possible 1 Trigger setup link TrgSetupLink Use this parameter to specify the trigger setup to be used when the current kit is selected ...

Страница 53: ...aced Use this parameter to select the pad whose settings are to be replaced Set to 01 12 to copy settings to all of the DTX MULTI 12 s built in pads i e Pad 1 to Pad 12 You can also set all to copy settings to all external pads 13 13R1 13R2 14 to 17 FTSW HHCL and HHSP in addition to all of the DTX MULTI 12 s built in pads All information set for the pad in question and the corresponding layers i e...

Страница 54: ... page 1 Pad number Use this parameter to select the pad to be initialized Once you have selected a pad press the ENTER button and when asked to confirm that you wish to proceed press the ENTER button once again From the Initialize Kit page you can initialize the drum kit cur rently being edited With the Initialize Kit page displayed press the ENTER button and when asked to confirm that you wish to...

Страница 55: ...IT setting area before entering the VOICE setting area The top most page within the VOICE setting area is the Select Voice page VCE1 and here you can assign voices i e preset voices waves and patterns to individual pads and layers On each of the parameter setting pages within this area furthermore you can select the pad and or layer to be modified Please note that when you store changes made to pa...

Страница 56: ...For details see page 32 The maximum number of layers that can be set for any pad is 4 To add a layer change its setting on the MIDI Note page MIDI1 2 from off to a MIDI note number C Voice category Use this parameter to specify the category of voice to be assigned as a preset voice preset pattern eP user pattern eU or wave Patterns cannot be assigned to MIDI note numbers D Voice number Voice name ...

Страница 57: ...a MIDI note number E Transpose Use this parameter to adjust the pitch of the assigned pattern in one semitone steps Patterns triggered using MIDI channels 7 to 11 cannot be transposed On the Voice Volume page you can set the volume of the selected voice 1 Pad number B Layer number C Volume Use this parameter to set the volume of the selected voice On the Voice Pan page you can set the stereo panni...

Страница 58: ... Release time Use this parameter to set the amount of time it takes for the voice to fade out after sending a MIDI Note Off message MIDI Note Off messages are not sent for pads and layers for which off is selected on the MIDI area s Receive Key Off page MIDI1 5 Therefore the release time setting has no effect in such a case 1 Pad number B Layer number C Filter cutoff frequency Fc Use this paramete...

Страница 59: ...sound pro duced by the layer indicated by 2 will be sent to the Chorus effect The chorus send level for the entire kit can be adjusted on the KIT area s Chorus Send page KIT3 1 1 Pad number B Layer number C Reverb send level RevSend Use this parameter to specify how much of the sound pro duced by the layer indicated by 2 will be sent to the Reverb effect The reverb send level for the entire kit ca...

Страница 60: ...her they should be assigned to the same alternate group Whenever voices from the same alternate group are triggered by playing the instru ment the latter voice is given priority and the earlier sound is silenced Set this parameter to off if you do not want to assign an alternate group The hhOpen and hhClose alternate groups operate in a special way If a voice from the hhClose group is triggered af...

Страница 61: ...ction MIDI3 affect individual MIDI channels which can be selected on screen Be sure to store any settings that you have edited before turning off the instrument or selecting a new kit See page 45 CAUTION MIDI1 º MessageType note MIDI2 TG MIDI SWITCH MIDI3 OTHER The parameter setting pages that make up the MIDI MESSAGE section will depend on the type of MIDI message selected on the Select Message T...

Страница 62: ... parameter to set Stack Alternate or Hold as the play ing mode for the pad indicated by 1 Some typical applica tions of these modes are explained on the following page stack When Stack mode is selected all notes assigned to the pad are triggered simultaneously For example you can use this mode to produce chords or to trigger multiple preset voices or waves with a single strike To produce just one ...

Страница 63: ...e time or to play a different layer on each succes sive strike The following are typical examples of how these modes can be used Playing just one sound when a pad is struck Select stack on the Playing Mode page MIDI1 1 and assign a MIDI note to Layer A only on the MIDI Note page MIDI1 2 Playing two sounds simultaneously when a pad is struck Select stack on the Playing Mode page MIDI1 1 and assign ...

Страница 64: ...annel other than 10 has been selected on the MIDI Channel page MIDI1 3 In such a case therefore this setting will be displayed as and modification will not be possible 1 Pad number B Layer number C Velocity lower limit D Velocity upper limit Use these parameters to set the range of velocities that will cause the layer indicated by 2 to send a MIDI note message The term velocity refers to the speed...

Страница 65: ...been assigned to any of the pad s layers A to D on the MIDI Note page MIDI1 2 this setting will be displayed as and modification will not be possible MIDI Note Off messages are not sent when off has been set on the Receive Key Off page MIDI1 5 If you want to use trigger alternate groups therefore be sure to set this parameter to on This will ensure that Note Off messages are sent to prevent overla...

Страница 66: ...dicate whether MIDI messages pro duced by playing pads and changing drum kits should be sent to the internal tone generator Choose on to send to the tone generator 1 MIDI channel Ch Use this parameter to select the MIDI channel 1 to 16 to be set B External MIDI switch MIDI Switch Use this parameter to indicate whether MIDI messages pro duced by playing pads and changing drum kits should be sent to...

Страница 67: ...splayed as and modification will not be possible 1 MIDI channel Ch B Pan Use this parameter to set the pan value to be sent whenever the current kit is selected If off or PC has been selected on the Transmit page MIDI3 1 this setting will be displayed as and modification will not be possible 1 MIDI channel Ch B Bank select MSB M Use this parameter to set a bank select MSB value to be sent whenever...

Страница 68: ...nd level RevSend Use this parameter to set the reverb send level to be sent whenever the current kit is selected 1 MIDI channel Ch B Control change number CCNo Use this parameter to set the type or number of MIDI Con trol Change message to be sent whenever the current kit is selected No control change messages are sent when off is set C Control change value Val Use this parameter to set a value fo...

Страница 69: ...TER button will light up Press the ENTER button to access these pages In certain cases a number of additional pages may be accessed from a parameter setting page also using the lit ENTER button Further more you can press the EXIT button to move back towards the top of the setting area Be sure to store any imported waves or settings that you have edited before turning off the instrument or selectin...

Страница 70: ...tton to access its three parameter setting pages WAVE2 1 to WAVE2 3 You can use the B C buttons to navigate between these pages If the selected wave contains no data the ENTER button will not open parameter setting pages 1 Playback mode PlayMode Use this parameter to set the way in which the selected wave will be played when assigned to a pad For details on editing start end and loop points see th...

Страница 71: ...n with the Trimming Settings page displayed From the Wave Name page you can assign a name to the cur rently selected wave With this page displayed press the ENTER button to open the Wave Name Setting page WAVE2 3 1 Wave Name Setting page On the Wave Name Setting page you can set a wave name of up to 10 characters in length Use the B C buttons to move the flashing cursor to the character you want t...

Страница 72: ...Import All Import All Are you sure Now Importing EXIT to cancel NOTE Importing Individual Audio Files The following describes how to import individual WAV or AIFF files from a USB memory device into the DTX MULTI 12 s internal memory Only WAV and AIFF audio files can be imported 1 Ensure that the WAV or AIFF file to be imported is located in the USB memory device s root direc tory using a computer...

Страница 73: ...at you wish to proceed press the ENTER button once again From the Optimize Memory page you can maximize the amount of unused wave memory In order to do this the content of the DTX MULTI 12 s internal wave memory is rearranged to make more memory available Optimization can be an effective way to increase the amount of memory available for waves Wave Memory Status The MEMORY INFO section allows you ...

Страница 74: ...NTER button to access these pages In certain cases a number of additional pages may be accessed from a parameter setting page also using the lit ENTER button Furthermore you can press the EXIT button to move back towards the top of the setting area NOTE Be sure to store any recorded patterns or settings that you have edited before turning off the instrument or selecting a new pattern See page 45 C...

Страница 75: ... patterns assigned to pads will be stopped whenever playback of a demo pattern is started Playback of demo patterns can be stopped by pressing any button other than SHIFT Looping Tempo Pattern Names In the COMMON section you can specify whether the currently selected pattern is to be played repeatedly as a loop and you can also set its tempo and name With the COMMON page PTN2 displayed press the E...

Страница 76: ...splayed press the ENTER button to access its seven parameter setting pages PTN3 1 to PTN3 7 You can use the B C buttons to navigate between these pages This section can be used only with User patterns If a Preset pattern has been selected the ENTER button will not open a parameter setting page 1 MIDI channel Ch Use this parameter to select the MIDI channel 1 to 16 to be set B Transmit Use this par...

Страница 77: ...rameter to set a program change number sent by the currently selected pattern on the MIDI channel indicated by 1 If off has been selected on the MIDI Transmit page PTN3 1 this setting will be displayed as and modification will not be possible To select a DTX MULTI 12 drum kit set parameters for MIDI channel 10 as follows Preset kits MSB 125 LSB 000 PC Preset kit number User kits between U001 and U...

Страница 78: ...s to navigate between these pages This section can be used only with User patterns If a Preset pattern has been selected the ENTER button will not open a parameter setting page From the Quantize Pattern page you can correct irregularities in the timing of notes making up the currently selected User pattern This is referred to as quantizing With the Quantize page dis played press the ENTER button t...

Страница 79: ... can delete all data from the cur rently selected User pattern To do so press the ENTER button with the Clear Pattern page displayed and when asked to confirm that you wish to proceed press the ENTER button once again From the Clear All Patterns page you can delete data from all User patterns To do so press the ENTER button with the Clear All Patterns page displayed and when asked to confirm that ...

Страница 80: ...irm that you wish to proceed 3 To import the selected SMF press the ENTER but ton Alternatively press the EXIT button to return to the previous page without importing If the currently selected User pattern already contains pattern data it will be overwritten with the imported data The message Now importing will be displayed during the import process Only standard MIDI files of Format 0 can be impo...

Страница 81: ...er patterns To do so navi gate to this section PTN5 and press the ENTER button 1 Memory usage ratio This indicates how much of the total User pattern memory is currently being used in percentage format B Used memory Total memory KB This indicates separately the amount of memory used and the total memory in kilobyte KB units PTN5 MEMORY INFO PTN5 1 Memory Info page PTN5 MEMORY INFO PTN5 1 0 0 0 4KB...

Страница 82: ...up Trigger page Page 83 UTIL1 6 Effect Bypass page Page 83 UTIL1 7 Pan Depth page Page 84 UTIL1 8 Auxiliary Output page Page 84 UTIL4 1 Pad Function page Page 88 UTIL4 2 Foot Switch Input page Page 89 UTIL4 3 Pad 10 12 Switch page Page 89 UTIL2 1 Click track Voice page Page 84 UTIL2 2 Click track Master Volume page Page 84 UTIL2 3 Click track Beat Volume page Page 84 UTIL2 4 Click track Output pag...

Страница 83: ... the pattern that will be automati cally set when the DTX MULTI 12 is turned on Patterns are identified using a category eP for Preset eU for User and a number and you can move the cursor using the B C buttons to set these individually 1 Startup trigger StartupTrg Use this parameter to select the trigger setup that will be auto matically selected when the DTX MULTI 12 is turned on Trigger setups a...

Страница 84: ...set volumes for different beat timings within the click track The meanings of the symbols used on this page are shown below Example Beat timings for four beats per bar If the time signature from the PATTERN setting area or for pattern recording is 3 8 6 8 9 8 12 8 or 15 8 this page will display ACC dot ted quarter notes eighth notes and sixteenth notes 1 Click track output selection ClkOutSel Use ...

Страница 85: ...ill be produced each time a MIDI note with the note number set here is received If off is selected on this page UTIL2 5 3 no click track accent sounds will be produced in response to received MIDI notes If the same value is set on this page UTIL2 5 3 and on the Quarter Note Note Number page UTIL2 5 4 the same sound will be pro duced for all beat timings If on is selected on the Click Track MIDI Ou...

Страница 86: ...ally determine the tempo based on the speed at which you strike the pads and this tempo will be displayed on screen 3 To check the tempo press the E E E E click but ton to start the click track The click track will be played at the tempo set using the Tap Tempo function Whenever you change the tempo using this function the new setting will be immediately applied to the click track and any patterns...

Страница 87: ... Shape parameter on the EQ Shape page UTIL3 2 the setting for Bandwidth Q will be displayed as and modification will not be possi ble On the EQ Shape page you can set an EQ type for each of the low and high bands 1 Frequency band Use this parameter to select the master EQ frequency band to be set B Shape Use this parameter to set an EQ type shelving Signals at all frequencies either above or below...

Страница 88: ...ntrol Change message CC01 to CC95 is specified as the pad function control change values and the MIDI send channel are set as follows C Control change value Use this parameter to set a value for the MIDI control change message indicated by 2 If setting a pad or external controller other than FTSW This value will be sent when the pad or external controller is struck or operated If setting FTSW and ...

Страница 89: ...s parameter to adjust the position at which the hi hat switches from open to closed when a hi hat controller is depressed The lower the value the smaller the virtual open ing between the top and bottom hi hats 1 Splash sensitivity SplashSens Use this parameter to set the degree of sensitivity for detect ing hi hat foot splashes The higher the value the easier it will be to produce foot splash soun...

Страница 90: ...response to signals from external MIDI devices Note that this setting is effective only when on is also selected on the Program Change Receive page UTIL6 2 1 Polyphonic aftertouch status PolyAfter Use this parameter to enable on or disable off the exchange of polyphonic aftertouch messages with external MIDI devices 1 Local control LocalCtrl Use this parameter to enable on or disable off playing o...

Страница 91: ...i e F8 Timing Clock via the MIDI OUT connector 1 Sequencer control SeqCtrl Use this parameter to specify whether or not System Realtime messages i e FA Start FB Continue and FC Stop will be sent and received via MIDI off System Realtime messages are neither sent nor received in System Realtime messages are received but not sent out System Realtime messages are sent but not received in out System R...

Страница 92: ... operations can be more easily understood File The term file is used to define a collection of data stored on a USB memory device or within the DTX MULTI 12 s internal memory The exchange of data with USB memory devices is car ried out in the form of files File name As with your computer the DTX MULTI 12 can assign names to individual files These names are used to tell files apart and for this rea...

Страница 93: ...matted for use with the DTX MULTI 12 on the Format page UTIL7 5 into the USB TO DEVICE port on the side of the instru ment 2 Navigate to the Save File page UTIL7 1 and press the ENTER button The Type page UTIL7 1 1 will open The Type parameter specifies the types of file to be saved All All user data i e all User kits all waves all User patterns all User triggers and utility settings AllKit All Us...

Страница 94: ... all User kits all waves all User patterns all User triggers and utility set tings AllKit All User kit data Kit A single User kit AllWave All wave data Wave A single wave AllPattern All User pattern data Pattern A single User pattern AllTrigger All User trigger data Trigger A single User trigger setup Utility Utility settings 3 Specify a file type using the Type parameter and press the ENTER butto...

Страница 95: ... be loaded 9 To proceed press the ENTER button The following message will be displayed as the data is being loaded When the data has been loaded the display will return to the Load File page UTIL7 2 Settings Kit U001 to U200 Wave WV001 to WV500 Pattern eU001 to eU050 Trigger U01 to U10 UTIL7 2 3 Src U001 MyKit UTIL7 2 3 Src WV001 MyWave UTIL7 2 3 Src U001 MyPtn UTIL7 2 3 Src U01 MyTrigger If Kit w...

Страница 96: ...ng cur sor and the DEC and INC buttons can be used to scroll through the available characters File names can be up to eight characters long Any space characters included in file names will be automatically replaced with _ i e an underscore 5 When you have set the new file name press the ENTER button You will be asked to confirm that the file is to be renamed 6 Press the ENTER button to rename the ...

Страница 97: ...mpleted the message Completed will be displayed Following this the display will return to the Delete File page UTIL7 4 Certain types of USB memory device must be formatted before they can be used with your DTX MULTI 12 The correct way to format such a device is as follows In certain cases USB memory devices formatted on a computer will not be recognized by the DTX MULTI 12 Be sure therefore to alw...

Страница 98: ...s to default settings 1 Navigate to the Factory Set page UTIL8 and press the ENTER button You will be asked to confirm that a Factory Set operation is to be performed 2 To proceed press the ENTER button Alterna tively you can press the EXIT button to cancel the process The messages Executing and Please keep power on will be displayed during the Factory Set process When the process has been complet...

Страница 99: ... area is subdivided into four different sections TRG1 to TRG4 Use the B C buttons to navigate between these sections If a section contains parameter setting pages the ENTER button will light up Press the ENTER button to access these pages In certain cases a number of additional pages may be accessed from a parameter setting page also using the lit ENTER button Furthermore you can press the EXIT bu...

Страница 100: ... level for the pad s being struck The Trigger Setup Link page KIT7 6 can be used to set a complete trigger setup for the current kit See page 52 Pad Setup In the PAD section you can set parameters affecting the sensitiv ity output and other characteristics of each of your DTX MULTI 12 s built in pads and of external pads connected via the PAD jacks With the PAD page TRG2 displayed press the ENTER ...

Страница 101: ...a tions in the softness or hardness with which the pad is struck can be smoothed out Meanwhile when a low setting is used the softness or hardness of playing will be reflected to a much greater degree in the output trigger signal allowing for more expressive performances TRG2 1 2 Velocity Curve page 1 Velocity curve VelCurve Use this parameter to select a velocity curve for the selected pad s A ve...

Страница 102: ...ntion page you can set input levels below which trigger signals will not be produced thus preventing crosstalk With this page displayed press the ENTER button to access the Global Crosstalk Level page TRG2 2 1 and the Individual Crosstalk Level page TRG2 2 2 You can switch between these parameter setting pages using the B C buttons The input level indicator shown on the upper row of text on the cr...

Страница 103: ...pads 4 to 9 2 MID i e pads 4 to 9 2 Hold down the SHIFT button and press the UP DOWN button to activate the input lock will change to The input lock must be activated here to prevent the selection from changing when one of the other pads from the MID group i e 4 to 9 is struck in the next step TRG2 2 2 Level 25 1 3 2 NOTE MID MID NOTE 3 While striking one of the pads from the MID group i e 4 to 9 ...

Страница 104: ...this parameter to set the pad whose settings are to be replaced You can also strike a pad to select it Copying of trigger setup data can only be carried out between the built in pads 1 to 12 or between the external pads 13 to 17 If you attempt to copy between a built in pad and an external pad the above parameters will be automatically changed to Pad 1 or Pad 13 in order to prevent this from occur...

Страница 105: ...or the TrgVel parameter is not too small resulting in low volumes See page 64 Open the Local Control page UTILITY UTIL6 UTIL6 5 and ensure that the LocalCtrl parameter is set to on See page 90 Open the MIDI Note page for each of the pads MIDI MIDI1 MIDI1 2 and ensure that all layers are not turned off See page 63 Check your pad settings as follows Open the Pad Function page for each of the pads UT...

Страница 106: ...meter is set for playing by hand See page 100 Check the following if the DTX MULTI 12 sounds out of tune or seems to be playing the wrong note Open the Master Tune page UTILITY UTIL1 UTIL1 2 and ensure that the setting for the M Tune parameter is not too far removed from 0 See page 83 If you are concerned about the pitch of a wave open the Voice Tuning page for that wave VOICE VCE2 VCE2 1 and ensu...

Страница 107: ...gger Alternate Group page for each of the pads MIDI MIDI1 MIDI1 9 and ensure that TrgAltGrp is set to off for both See page 65 Perform the following checks if consistent reliable trigger signals cannot be produced using an acoustic drum Ensure that a high quality drum trigger such as the DT20 is secured firmly in place using adhesive tape Remember to remove any old tape Carry out the checks listed...

Страница 108: ...EVICE port Invalid USB device This message is displayed if the plugged in USB memory device is not usable in its current condi tion As long as the device contains no irreplaceable data it should be formatted to make it usable MIDI buffer full This message is displayed if the amount of MIDI data received is too large to process MIDI data error This message is displayed if an error occurs while rece...

Страница 109: ...device was lost due to the occurrence of an abnormal electric current Unplug the USB memory device and press the ENTER button to return USB device full This message is displayed if a USB memory device is full and no more files can be saved on it In such a case use a new USB memory device or make space by erasing unwanted data from the cur rent device USB device not ready This message is displayed ...

Страница 110: ...WAV and AIFF Sequencer Sequence capacity 152 000 notes Note resolution Quarter note 480 Recording method Real time overdubbing Patterns Preset patterns 128 phrases including 3 demo patterns User defined patterns 50 phrases Sequence formats Proprietary SMF Format 0 for loading only Click track Tempo 30 to 300 BPM Tap tempo functionality Beats 1 4 16 4 1 8 16 8 1 16 16 16 Note timing Accent notes qu...

Страница 111: ...ice 84 ClkOutSel 84 Clock out 91 Close position 89 ClosePosi 89 Connector 9 Control change number 65 68 Control change value 65 68 88 Control change send channel 88 Copy Pad 53 Copy Pattern 80 Cord clip 9 10 Crosstalk 102 Crosstalk level 102 103 Crosstalk source 103 Cubase Remote Control 15 D DC IN terminal 9 10 Decay time 58 Delete 73 97 Device number 92 Display 8 Drum 30 31 E Edit Buffer 42 Effe...

Страница 112: ...e 18 31 56 Program change 66 67 77 Program change receive 90 Q Q Bandwidth 87 Q Resonance 59 Quantize 78 Quarter note note number Noteq 85 R Ratio 73 Rcv10ch 90 RcvKeyOff 64 RcvPC 90 RcvPC10ch 90 REC 21 Receive key off 64 Recording 13 21 43 Reject time 102 Release time 58 Rename 96 Resonance Q 59 rev Reverb 83 Reverb 36 83 Reverb pan 50 Reverb return 50 Reverb send level 48 59 68 78 Reverb type 50...

Страница 113: ... to reverb 49 Variation type 48 VarPan 36 49 VarReturn 36 49 VarToCho 36 49 VarToRev 36 49 VelCurve 101 Velocity 102 Velocity curve 101 Velocity Limits 64 Velocity lower limit 64 Velocity upper limit 64 VOICE 55 Voice 31 Voice category 56 Voice Layer 32 Voice name 56 Voice number 56 Voice Volume 57 Volume Click track 84 Volume kit 47 Volume MIDI 77 Volume Voice 57 VOLUME dial 8 VOLUME knob headpho...

Страница 114: ...114 Owner s Manual MEMO ...

Страница 115: ... 031 89 34 00 DENMARK YS Copenhagen Liaison Office Generatorvej 6A DK 2730 Herlev Denmark Tel 44 92 49 00 FINLAND F Musiikki Oy Kluuvikatu 6 P O Box 260 SF 00101 Helsinki Finland Tel 09 618511 NORWAY Norsk filial av Yamaha Scandinavia AB Grini Næringspark 1 N 1345 Østerås Norway Tel 67 16 77 70 ICELAND Skifan HF Skeifan 17 P O Box 8120 IS 128 Reykjavik Iceland Tel 525 5000 RUSSIA Yamaha Music Russ...

Страница 116: ...te http www yamaha co jp english product drums ed Yamaha Manual Library http www yamaha co jp manual U R G Pro Audio Digital Musical Instrument Division Yamaha Corporation 2009 Yamaha Corporation WR85360 907PO 01A0 Printed in China ...

Отзывы: