


14
velocity. Therefore, increasing the offset value also increases
the sound’s harmonic overtones. Beware – many other
sounds exhibit this behaviour too when their touch sensitiv-
ity values are changed.
Many sound creators take particular pride in their famous
Velocity Switch sounds. To prove the point we have created
four sounds, which will demonstrate the practical uses of
velocity switching.
Résumé
We’ve made it – that was a lot to take in! Now spoil your-
self, relax to a little demo sequence we prepared earlier
(DEMO1.MID), and listen out for special guest appearances
by the Analogue Workshop All-stars!
(A)
The song begins with a Performance with two oscil-
lators that are detuned against each other in real-time using
Assign2 (Knob 6). We‘d like to point out once again that fine
tuning the VCOs can sound interesting in itself and provides
for many yet unexplored possibilities. In general, today‘s
approach to VCOs is quite different from what is was in the
‘70s and ‘80s. Most TB-303 type bass sounds were pro-
grammed with just a single VCO, something that has
become fashionable once again. Back then, mighty Mini-
moog basses using three oscillators (!) were very popular.
Today, two VCOs are commonly detuned against each other,
particularly with lead or sequencer sounds.
(B)
You will hear a little sequencer theme starting at bar
9, which we will use to demonstrate a little trick: the sound
is initially programmed without Filter Resonance, but this
becomes active in the second half (bar 13-17). Note how the
sound is changed. It suddenly sounds fresher and as a result
is more discernible in the arrangement. If you wish to apply
this little artistry to other sounds, you need to ensure that the
cutoff frequency used is set to the maximum value, other-
wise you will hear the typical synth bass or sweep sound res-
onance filter effect.
(C)
Now we move onto a good example of the interac-
tion between the Filter and Amplitude Envelopes: at first
you can hardly hear this sound‘s filter sweep as the ampli-
tude isn‘t set correctly for it. At bar 21, however, the sound‘s
fade-out time is increased (Assign1: AEGDcyTime) and now
the filter sweep‘s development has become audible. To sum-
marise: the filter envelope is only fully effective when the
amplitude envelope is stable enough.
(D)
Bar 33 introduces a pad sound. The sound does
seem a little bland, despite the lively beating produced by its
two detuned VCOs. This becomes even more obvious in bar
39, where the same chords are played by a synth pad for
comparison. The sound‘s richness here is due to intensive
LFO Pitch Modulation. In the most extreme cases you can
even forgo the Chorus effect altogether, which can be a great
help, especially with the Multi mode‘s tricky effect assign-
ment.
(E)
The next example will show just how and when the
Amplitude LFO can be applied: it doesn‘t always have to
involve synth sounds. An acoustic guitar sound can be invig-
orated with Tremolo effects, too, especially when blended in
authentically with Knob6. Pay particular attention to when
the Tremolo is applied. With a little practice you‘ll be able to
play many sounds authentically using real-time control.
(F)
Bar 54 introduces an extra classy analogue sound:
no, you‘re not listening to the CS1x effects here, these echo
effects are part of the sound! This is done with the aid of the
Amplitude LFO, here using the sawtooth LFO waveform to
imitate this effect. The effect is emphasised six bars later
with determined filter modulation. This trick can be espe-
cially useful in the Multi mode (as in example D), where the
Variation effect may already be assigned to other tasks and
no “Delay” is available.
(G)
We‘re now playing a simple chord sequence with
two different LFO Phase settings: you won‘t notice anything
special in the first instance, as all voices start with their
respective triggering as expected (Phase Init: Retrigger). If
you set the LFO to “Free Run” however, the notes are trig-
gered irregularly. This is demonstrated by the repeated chord
sequence, which is now played by Performance TP064. We
have reinforced these irregularities with random Pan move-
ments (“Random”).
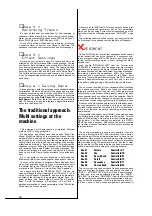
Illustration: The CS1x Mono Function –
ideal for Solo or Bass Sounds.
(H)
The focus shifts to the Portamento and Poly/
Mono functions at bar 80: here we are switching between
the two modes whilst playing a lead sound, to make studying
these functions easier. Compare the differences between the
two modes; the Portamento function is very revealing here.
It would be better still to try out the behaviour of Mono and
Poly sounds for yourself, so stop the sequencer and select
Performances TP049/050. If you prefer to stay inactive for a
while, then at least listen to the modulations of the following
solo part‘s fade-out, Portamento speed, as well as Filter fre-
quency and Resonance.
(I)
Whilst the finale may not be grandiose, it is cer-
tainly informative: note the Single Trigger mode‘s speciali-
ties, here shown with a typical synth bass sound. Hand on
heart, have you ever investigated this subject? If you haven‘t,
you really should spend some time on it. Until you have, you
will not be able to arrange your bass lines for this style. espe-
cially if you want to produce the unmistakable bass slide
effects. So, aquaint yourself with the Single Trigger mode
(also known as Legato mode) and its properties. Bar 118
sees a slide effect without the use of the Single Trigger
mode, which kicks in however at the next bar. Take note of
the two different sounds produced. The previous sequences
also will clarify this interesting phenomenon.