Operation
Turb 430 IR/T
32
ba75507d09
08/2021
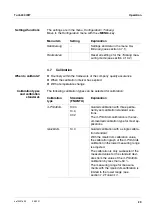
Calibration record
At the end of each calibration procedure a calibration info (
i
symbol) and the
calibration record is displayed.
For each calibration type the last calibration is stored in the calibration mem-
ory.
Display calibra-
tion data and out-
put to interface
You can view the data of the last calibration on the display. Subsequently,
you can download the displayed calibration data to the interface, e. g. to a
printer or PC, with the
<PRT>
key.
7
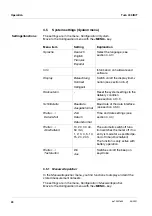
Release the
<START/ENTER>
key.
Measurement of the calibration standard begins.
Before measuring the third calibration standard of 0.02 FNU/NTU
you can exit the calibration with
<ESC>
at any time.
The new calibration data are discarded. The old calibration data
are used.
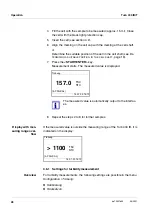
8
Repeat the steps 4 - 6 with the calibration standards 10.00 FNU/NTU
and 0.02 FNU/NTU.
After measuring the 0.02 FNU/NTU calibration standard, the calibra-
tion result is displayed.
The calibration is complete.
9
Confirm the calibration result with
<START/ENTER>
.
The calibration record is displayed.
10
Confirm the calibration record with
<START/ENTER>
.
The display shows instructions for the first measurement.
The valid calibration is indicated on the display as a status, e.g. [3-P
StdCAL].
i
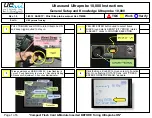
Trüb.
= 1000 FNU/NTU
i
Kalibrierung auslösen durch
Loslassen von <START>
Trübung Kalibrierung
i
Probe stecken
i
<START> gedrückt halten
i
Probe ausrichten
[3-P StdCAL]
Trübung


