background image

©2019 Sensus. All products purchased and services performed are subject to Sensus’ terms of sale, available at 

either 

sensus.com/TC

 or 1-800-638-3748. Sensus reserves the right to modify these terms and conditions in 

its own discretion without notice to the customer. 

The Sensus logo is a registered trademark of Sensus.

This document is for informational purposes only, and SENSUS MAKES NO EXPRESS WARRANTIES 

IN THIS DOCUMENT. FURTHERMORE, THERE ARE NO IMPLIED WARRANTIES, INCLUDING 

WITHOUT LIMITATION, WARRANTIES AS TO FITNESS FOR A PARTICULAR PURPOSE AND 

MERCHANTABILITY. ANY USE OF THE PRODUCTS THAT IS NOT SPECIFICALLY PERMITTED 

HEREIN IS PROHIBITED.

637 Davis Drive 
Morrisville, NC 27560
1-800-638-3748  

sensus.com

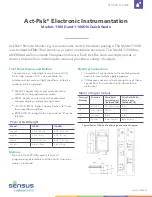
Act-Pak® Electronic Instrumentation

Models 1100D and 1100DN Quick Guide

Connection Instructions for Models 1100D and 
1104 Version E Instruments

1.  Remove the four (4) screws securing the terminal 

cover plate to the enclosure. 

2.  Observe the orange connectors on the rear of the 

printed circuit board. 

3.  Note that the AC line cord is attached to terminals 

#1,#2 and #3.

4.  Use the tables in the manual to connect the meter 

and control devices.

5.  To attach wires, loosen the appropriate screw on 

the connector. 

6.  Run the wires through the enclosure and place 

in the opening on the connector at the proper 
location and tighten the screw. 

7.  Do not leave bare wires extending outside the 

connector. 

8.  Replace the terminal cover and secure with the four 

(4) screws. 

9.  Apply power to the instrument.

Connection Instructions for Models 1100DN


1.  Remove the two (2) screws that secure the 

enclosure door. 

2.  Note the wiring diagram located on the inside of 

the door. 

3.  Loosen the plastic nut on the water tight grommet 

and run the meter connecting cable through the 
grommet.

4.  Attach the wires to the appropriate terminals.
5.  Do not leave bare wires extending beyond the 

terminal strip. 

6.  Tighten the nut on the water tight grommet to 

insure the NEMA-4 integrity.

7.  If options are to be connected mount additional 

water tight grommets in the enclosure. Do not run 
multiple wires through a single connector. 

8.  Apply Power to instrument.

 CAUTION:


t

CAUTION

DO NOT connect the 4-20 mA output into a powered loop.

Содержание SENSUS Act-Pak 1100D

Страница 1: ...o the metering device and instrument before applying power 2 If it becomes necessary to disconnect any of these connections first remove the AC power to the instrument Meter or Signal Output Terminal Number Function Wire Color Switch Inputs Belden 8760 Wire Color Solid State Inputs Belden 8770 13 12VDC No Connection Red 16 Input Signal White White 14 Ground Black Black 15 Shield Bare Shield Bare S...

Страница 2: ...17 VAC All resistive loads Option C1 SS 50 mA at 24 VDC Typical Series 1100 Act Pak Wiring Connection Diagrams AC Power Inputs Terminal Number Function 3 Earth Ground 2 117 VAC 1 117 VAC Proportional Output Terminal Number Function 5 Positive 6 Negative Option B Terminal Number Function 10 Normally Closed Contact 11 Common 12 Normally Open Contact Option C1 C1 SS Terminal Number Function Relay Fun...

Страница 3: ...ext digit To start the least significant digit flashing momentarily depress the RST button To exit the programming mode and save all parameters step through the module until one of the four main modules is displayed then press the RST button until Pro nO displays Pressing the SEL button at this point enters the data and closes the program mode Program Menus Module 1 1 inPUt InP A b dual cnt CntA d...

Страница 4: ... a contact closure based on the flow rate set to rATE For pulsed outputs based on total set to Count A SPt ACT If rate was selected above to bound if contacts are to close when the setpoint is exceeded Act Pak Electronic Instrumentation Models 1100D and 1100DN Quick Guide and open below the setpoint To latch or hold the contacts closed once the flow rate is exceeded set to LAtCH A manual reset is ...

Страница 5: ...t binary number from the chart that does not exceed the balance continue selecting and subtracting until the balance equals zero At this point all factors subtracted must be set into the instrument by placing the associated switch in the ON position Act Pak Electronic Instrumentation Models 1100D and 1100DN Quick Guide Adjusting Option M Multiplier The multiplier circuit is configured in binary co...

Страница 6: ...caution when working with disassembled AC electrical components Act Pak Electronic Instrumentation Models 1100D and 1100DN Quick Guide Calibration Proportional Output 4 20 mA with a Voltmeter 1 Connect a load resistor across terminals 5 and 6 2 This resistor may be of any value less than or equal to 500 ohms 3 Connect a digital voltmeter across terminals 5 and 6 4 Apply power to the instrument wit...

Страница 7: ... circuit board 3 Note that the AC line cord is attached to terminals 1 2 and 3 4 Use the tables in the manual to connect the meter and control devices 5 To attach wires loosen the appropriate screw on the connector 6 Run the wires through the enclosure and place in the opening on the connector at the proper location and tighten the screw 7 Do not leave bare wires extending outside the connector 8 ...

Отзывы: