background image

Xtreme Power Conversion Corporation

P80 User’s Manual

Page 33

Uninterruptible Power Supply

Xtreme Power Conversion Load Protection Policy

THIS POLICY IS NOT A WARRANTY. REFER TO 

THE XPC CORPORATION, INC. LIMITED WARRANTY

 FOR 


INFORMATION CONCERNING THE WARRANTY FOR YOUR XPC PRODUCT. THE LIMITATIONS AND CONDITIONS 

CONTAINED IN THIS POLICY DO NOT AFFECT 

THE TERMS OF THE XPC LIMITED WARRANTY.

Definitions:

1. 

“Product” means a Standard 120, 208, or 240 Volt power protection device that is used in the United 

States and Canada.  This policy does not include custom manufactured products.

2. 

“Power Disturbance” means an AC power line transient (telephone line or Local Area Network, if appli-

cable), spike or surge.

3. 

“Connected Equipment” properly connected electronic equipment

4.  “Fair Market Value” of damaged Connected Equipment as determined by XPC shall be the lower of (a) the 

average price the same or similar items are being sold for on eBay, (b) the price list of Orion Blue Book (or 

if such price list is no longer published, a published or announced price list reasonably selected by XPC), 

(c) the lowest price the same or similar items can be purchased for in the United States or (d) the total 

amount of all payment(s) you have or are entitled to receive from insurance, other warranties, extended 

warranties, a legal liability claim or from other sources or persons for the damaged Connected Equipment.

5. 

“Purchaser” means the person or entity that originally purchased the Product from an authorized reseller 

or distributor of XPC Products.   

The Purchaser of this Product is protected, for the term of the XPC Limited Warranty, against certain losses caused 

by a Power Disturbance for properly connected electronic equipment (referred to as the "Connected Equipment") 

subject to certain terms and conditions provided below. 

This policy applies only to the original purchaser of the Product.  If the Product is transferred or sold to another 

person or entity, this policy is void.  

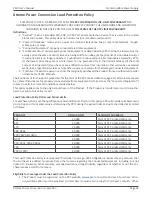
Load Protection Policy Dollar and Period Limits

For purchasers that meet the qualifications and conditions set forth in this policy, XPC will provide reimbursement 

(cost of repair or fair market value as determined by XPC) during the period limits and up to the dollar limits stated 

as follows:

PRODUCT

DOLLAR LIMIT

PERIOD OF COVERAGE

XVT

25,000

Term of XPC Limited Warranty

XST

25,000

Term of XPC Limited Warranty

S70

25,000

Term of XPC Limited Warranty

P80, P80g

50,000

Term of XPC Limited Warranty

XPRT 6kVA & 10kVA

50,000

Term of XPC Limited Warranty

NXRT

50,000

Term of XPC Limited Warranty

P90, P90L, P90g, P90Lg

50,000

Term of XPC Limited Warranty

T90

50,000

Term of XPC Limited Warranty

TX90, TX90i

50,000

Term of XPC Limited Warranty

This Load Protection Policy is not deemed "first dollar" coverage. XPC’s obligation is reduced by any amounts that 

the Purchaser is entitled to recover, from other sources regarding the Connected Equipment, including, but not 

limited to, insurance, other warranty, extended warranty, or legal liability, regardless of whether or not the Pur-

chaser makes a claim for recovery. 

Eligibility for Coverage Under the Load Protection Policy

1. 

The Product must be registered on the XPC website, 

www.xpcc.com

, within 10 days of purchase. All re-

quired information must be provided, and Purchaser should retain a copy for Purchaser’s records.  When 

Содержание 800VA P80 Series

Страница 1: ...P80 Pure Sine Wave Line Interactive UPS 800VA 1100VA 1500VA 2200VA 3000VA Models User Installation Manual www xpcc com 2016 Xtreme Power Conversion Corporation All rights reserved Rev 6 29 16...

Страница 2: ...ation and Setup 5 Rear Panel View 6 Operating Principle 6 Install the UPS 7 Setup the UPS 10 Battery Replacement 12 Battery Kit Assembly 15 Operations 19 Button Operation 19 LCDPanel 20 Audible Alarms...

Страница 3: ...Xtreme Power Conversion Limited Warranty 32 Xtreme Power Conversion Load Protection Policy 33 Appendix A P90 BP48 P90 BP72 User Guide 36 Important Safety Instructions 36 Product Overview and Setup 36...

Страница 4: ...ust be easily accessible and close to the UPS system Please use only VDE tested CE marked mains cable e g the mains cable of your computer to connect the UPS system to the building wiring outlet shock...

Страница 5: ...no voltage is present Batteries may cause electric shock and have a high short circuit current Please take the precautionary measures specified below and any other measures necessary when working wit...

Страница 6: ...Input circuit breaker 5 Network Fax Modem surge protection 6 Emergency power off function connector EPO 7 USB communication port 8 RS 232 communication port 9 SNMP intelligent slot 10 External battery...

Страница 7: ...Supply Install the UPS For safety consideration the UPS is shipped out from factory without connecting battery wires Before install the UPS please follow below steps to re connect battery wires first...

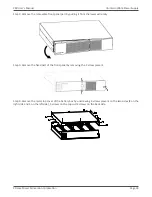
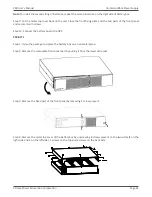
Страница 8: ...Manual Page 8 Uninterruptible Power Supply Step 3 Put the front panel back to the unit Rack mount Installation CAUTION Do NOT use the mounting brackets to lift the unit The mounting brackets are only...

Страница 9: ...Xtreme Power Conversion Corporation P80 User s Manual Page 9 Uninterruptible Power Supply Tower Installation Step 1 Step 2 Step 3...

Страница 10: ...ion connection Communication ports USB port RS 232 port Intelligent slot To allow for unattended UPS shutdown start up and status monitoring connect the communication cable one end to the USB RS 232 p...

Страница 11: ...o External Battery shall be installed by SERVICE PERSONNEL only NOTE It s only allowed to connect external battery boxes up to 1 units Step 7 Turn on the UPS Press the ON Mute button on the front pane...

Страница 12: ...l appear as an orange plug icon located in the system tray near the clock Battery Replacement NOTICE This UPS is equipped with internal batteries and only service person can replace the batteries CAUT...

Страница 13: ...ion Corporation P80 User s Manual Page 13 Uninterruptible Power Supply Step 3 Pull out the battery box by removing two screws on the front panel Step 4 Remove the top cover of battery box and replace...

Страница 14: ...nversion Corporation P80 User s Manual Page 14 Uninterruptible Power Supply Step 5 After replacing the batteries put the battery box back to original location and screw it tightly Step 6 Re connect th...

Страница 15: ...he front panel back to the unit Battery Kit Assembly NOTICE Please assemble battery kit first before installing it inside of UPS Please select correct battery kit proce dure below to assemble it Two B...

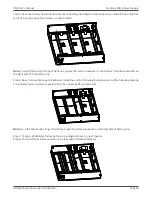
Страница 16: ...ible Power Supply Step 3 Put assembled battery packs on one side of plastic shells and insert one more defect battery on the space Step 4 Cover the other side of plastic shell as below chart Then batt...

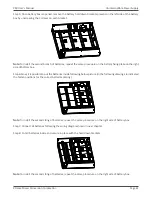
Страница 17: ...17 Uninterruptible Power Supply Step 2 Connect all battery terminals by following below diagram Step 3 Put assembled battery packs on one side of plastic shells Step 4 Cover the other side of plastic...

Страница 18: ...ion P80 User s Manual Page 18 Uninterruptible Power Supply Six Battery Kit Step 1 Remove adhesive tapes Step 2 Connect all battery terminals by following below diagram Step 3 Put assembled battery pac...

Страница 19: ...PS setting mode Switch to UPS self test mode Press and hold ON Mute button for 3 seconds to enter UPS self testing while in AC mode OFF ENTER Button Turn off the UPS Press and hold this button at leas...

Страница 20: ...us Backup time info Input output and Battery info Warning Fault info Setting operation Battery info Display Function Backup Time Information Indicates the backup time in pie chart Indicates the backup...

Страница 21: ...ble management outlets are working Indicates that the UPS alarm is disabled Indicates the UPS powers the output directly from the mains Indicates the battery charger is working Indicates the UPS is wo...

Страница 22: ...Disable ESC Escape ON ON OK OK EP EPO TP Temperature CH Charger RAC Rack display TOE Tower display SF Site Fault EE EEPROM error BR Battery Replacement UPS Setting Parameters 1 Parameters 2 There are...

Страница 23: ...sents output voltage as 115VAC 120 presents output voltage as 120VAC Defualt 127 presents output voltage as 127VAC 02 Programmable Outlets Enable Disable Interface Setting ENA Programmable outlets ena...

Страница 24: ...per charger 05 LCD Display Direction Setting Interface Setting RAC the LCD display is horizontal TOE the LCD display is vertical 06 Autonomy Limitation Setting Interface Setting Parameter 2 Set up bac...

Страница 25: ...on for 3 seconds to enter Setting mode Step 3 Press the Up button ON MUTE to switch to 02 of program list Then press Enter button to enter value setting of parameter 2 Press the Up button to change th...

Страница 26: ...n battery is fully charged the fan will stop working for energy saving Buck mode when AC is normal When the input voltage is higher than the voltage regu lation range but lower than high loss point th...

Страница 27: ...too high 27 X Bus under 03 x Battery voltage too low 28 Inverter soft start fail 11 x Over temperature 41 X Inverter voltage high 12 x Overload 43 Inverter voltage Low 13 x Charger failure 45 X Warni...

Страница 28: ...are reversed Have a qualified electrician correct the input receptacle wiring The icon and are flashing on LCD display and alarm is sounding every second The internal battery is incorrectly connected...

Страница 29: ...ser serviceable parts If the battery service life 3 5 years at 25 C ambient tempera ture has been exceeded the batteries must be replaced In this case please contact your dealer Be sure to deliver the...

Страница 30: ...ICAL Dimensions W x D x H 17 2 x 16 1 x 3 5 in 17 2 x 20 1 x 3 5 in 17 2 x 24 8 x 3 5 in Weight 29 3 lbs 28 7 lbs 44 7 lbs 63 7 lbs 61 9 lbs Line cord 6 ft 5 15P 6 ft 5 15P 6 ft 5 15P 6 ft 5 20P 6 ft...

Страница 31: ...sk you for the above information and if possible help solve your problem over the phone In the event that the unit requires factory service the technician will issue you a Return Mate rial Authorizati...

Страница 32: ...ipment is repaired or modified by anyone other than XPC Corporation or a XPC Corporation approved third party b the equipment is damaged by the customer is improperly used or stored is subjected to an...

Страница 33: ...otected for the term of the XPC Limited Warranty against certain losses caused by a Power Disturbance for properly connected electronic equipment referred to as the Connected Equipment subject to cert...

Страница 34: ...scretion that the Product has been tampered with or altered in any way What is Not Covered Under the Load Protection Policy The following damage is not covered by this Policy 1 Restoration of lost dat...

Страница 35: ...er Disturbance XPC will in its sole discretion issue payment to the Purchaser for either the cost of repair of the Connected Equipment or the Fair Market Value of the damaged Connected Equipment up to...

Страница 36: ...ox enclosure The battery will discharge naturally if the system is unused for a period of time It should be recharged every 2 3 months if unused If this is not done then the warranty will be null and...

Страница 37: ...necessary to select a proper environment to install the unit in order to minimize the possibility of damage to the battery box and extend the life of the batteries Please follow the instructions belo...

Страница 38: ...ed to operate with the following types of batteries 48V 9Ah Version 4 pieces of 12V 9Ah batteries per string 72V 9Ah Version 6 pieces of 12V 9Ah batteries per string Battery Replacement If your batter...

Страница 39: ...panel part by pulling it from the lower extremity Step 3 Remove the fixed part of the front panel by removing the 2 screw present Step 4 Remove the metal top cover of the battery box by unscrewing 8...

Страница 40: ...e on the battery hold down brackets on the right side of the battery box Step 6 Now it is possible to put all batteries inside the unit by following the below picture the following drawing are indicat...

Страница 41: ...nel and secure it with screws Step 10 Connect the battery box to the UPS P90 BP72 Step 1 Open the package and place the battery box on a horizontal plane Step 2 Remove the removable front panel part b...

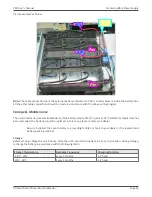
Страница 42: ...side of battery box Step 6 Now it is possible to put the batteries inside following below picture in the following drawing are indicated the fasten positions for the correct batteries placing Note To...

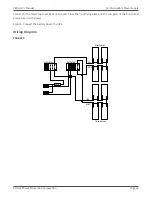
Страница 43: ...tep 9 Put the metal top cover back on the unit Close the front fixing plate and the two parts of the front panel and secure it with screws Step 10 Connect the battery box to the UPS Wiring Diagram P90...

Страница 44: ...80M M 220MM 4 260MM 300MM Note The cable connection from the external battery connector to PCB is already present inside the battery box All the other cable connections should be made in accordance wi...

Страница 45: ...le parts If the battery service life 3 5 years at 25 C ambient temperature has been exceeded the batteries must be replaced In this case please contact your dealer Be sure to deliver the spent battery...

Отзывы: