background image

Page 

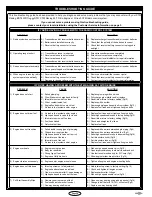
IF yOU'rE HAVIng A PrOBlEM WITH THE CHASSIS

PrOBlEM 

CAUSE 

SOlUTIOn

1) 

X

ST 4WD Truggy RTR pulls 

A)  Steering trim out of adjustment 

A)  Readjust trim to centre both wheels (Pg10)


to one side 

B)  Toe angle out of adjustment 

B)  Readjust toe angle (Pg18)


C)  One wheel is hanging or has damaged bearing 

C)  Remove wheel and clean or replace bearing

2)  Brakes seem ineffective 

A)  Brake linkage out of adjustment 

A)  Readjust brake linkage (Pg19)


B)  Brake disc(s) worn 

B)  Replace affected brake disc(s)

3)  Clutch does not engage 

A)  Clutch shoes damaged or worn 

A)  Replace clutch shoes


B)  Clutch bell damaged or worn 

B)  Replace clutch bell


C)  Clutch shoes glazed 

C)  Remove glaze using fine sandpaper and reinstall

4)  Clutch does not disengage 

A)  Clutch spring(s) worn or damaged 

A)  Replace clutch springs

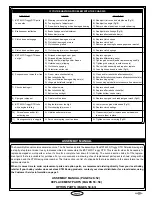
5) 

X

ST 4WD Truggy RTR does  

A)  Stripped or damaged spur gear 

A)  Replace spur gear


not 'go' 

B)  Stripped differential gear(s) 

B)  Replace differential gear(s)


C)  Swing shaft(s) slipping and/or broken 

C)  Tighten grub screw(s) and/or replace swing shaft(s)


D)  Outdrive cup(s) slipping 

D)  Tighten grub screw(s) in outdrive cup(s)


E)  Clutch not engaging 

E)  Check clutch assembly and repair or replace


G)  Carburettor set too rich 

G)  Lean high speed needle valve (Pg16)

6)  Suspension not smooth or free  A)  One or more shocks sticking 

A)  Clean and/or rebuild the affected shock(s)


B)  Bent shock shaft(s) 

B)  Rebuild affected shock(s)/replace affected shock shafts(s)


C)  Bent or otherwise damaged hinge pin(s) 

C)  Replace hinge pin(s)


D)  Hinge pin bolts/nuts too tight 

D)  Loosen hinge pin bolts/nuts to ensure free movement

7)  Shocks leaking oil 

A)  Shock seals worn 

A)  Replace shock seals


B)  Bent shock shaft(s) 

B)  Replace affected shock shaft(s)


C)  Bottom cap not tight 

C)  Tighten bottom cap securely

8)  Spur gear strips out 

A)  Gear mesh too loose 

A)  Replace spur gear and readjust gear mesh (Pg23)

9) 

X

ST 4WD Truggy RTR rolls  

A)  Engine idle is set too high 

A)  Lower your engine's idle speed (Pg12) 


while engine is idling 

B)  Clutch spring(s) worn out 

B)  Replace clutch springs

 
10)  Screws loosen and/or fall 

A)  Vibration under normal use 

A)  Clean screw(s) and/or replace and use threadlock


out during use 


to secure them in place

11)  Steering sensitivity is 'sluggish'  A)  Servo saver spring is set too loose 

A)  Tighten servo saver spring (Pg22)

ASSEMBly MAnUAl

The Assembly Manual contains several sections. The first section details the assembly of the 

X

ST 4WD Truggy RTR. Detailed drawings in 

a step-by-step format make it easy to disassemble and reassemble the 

X

ST 4WD Truggy RTR. This is useful when it’s necessary to 

replace damaged or worn parts or when it’s time for a complete tear down for cleaning. The second section lists all of the replace-
ment parts that are available for purchase. For your convenience, a drawing of each replacement parts pack is shown, along with a 
description and the XTM Racing order number. The third section is a list of option parts that are available, in the same format as the 
replacement parts.

When it comes time to order replacement parts and option parts, we recommend ordering directly from your local hobby 
retailer.


If your hobby retailer does not stock XTM racing products, contact your closest distributor for a local dealer, using 

the Customer Service Information on page 3.

ASSEMBly MAnUAl (PAgES 26~52)

rEPlACEMEnT PArTS (PAgES 53~58)

OPTIOn PArTS (PAgES 59~63)

Содержание XST 4WD Truggy RTR

Страница 1: ...d Steering Servo l Lay Down Steering Servo for Lower Centre of Gravity l Aluminium Threaded Shocks w 3 5mm Shock Shafts l Bevel Differentials Front Rear and Centre l Heavy Duty Aluminium Front and Rear Chassis Bracing l Dust Resistant Receiver and Battery Boxes l Adjustable Toe in Front and Rear l Adjustable Camber l 3mm Aluminium Chassis w Kicked Up Front End l 4mm Aluminium Shock Towers l Chrome...

Страница 2: ...proof therefore do not drive through water wet grass mud or snow l Because your model is operated by radio control it is important to make sure you are always using fresh and or fully charged batteries if using NiCDs or NiMHs Never allow the batteries to run low or you could lose control of the model l If your model becomes stuck allow the engine to idle then retrieve your model by hand l To preve...

Страница 3: ...s Option Parts List with detailed Exploded View Assembly Drawings You will find good tips and recommendations throughout this booklet so keep it handy for future reference If you should have trouble with any of the steps listed in these Operating Instructions or if you find a missing or damaged part in your kit or require additional information please contact your local distributor at the address ...

Страница 4: ...DO I USE Fuel can make a big difference in the way your engine performs For the break in period you should use a fuel specifically designed for R C car engines that contains no more than 20 nitromethane and 10 14 oil content Once the engine has been adequately broken in about 45 minutes of run time you can switch to an R C car fuel containing up to but no more than 30 nitromethane and 10 14 oil co...

Страница 5: ...le batteries not supplied Battery Cover This cover houses the 8 AA Alkaline batteries not supplied that power the transmitter Channel 3 Button Used to operate a third function like switching to reverse function on a model that features reverse The channel 3 button is not utilised with the XST 4WD Truggy RTR Crystal This is the frequency crystal of the transmitter You can change crystals in both th...

Страница 6: ...ifferent driving conditions The shocks come standard with 400 40 weight oil and 1 6mm yellow springs Shock Tower Secures the shock absorber while allowing many different geometry settings to suit different track conditions Steering Servo Controls the XST 4WD Truggy RTR s steering A servo saver is used to help prevent the servo gears from being stripped out The XST 4WD Truggy RTR features a high to...

Страница 7: ...loose when doing jumps etc l If you have difficulty sliding the receiver antenna wire through the antenna support tube first pull the antenna wire through your fingers several times to straighten it then lightly wet the antenna wire with glass cleaner The glass cleaner will make the antenna wire slide through the support tube much easier l When testing the steering lift the front of the XST 4WD Tr...

Страница 8: ...nd or a nylon cable tie around the battery holder This will prevent the batteries from coming loose when doing jumps etc q Install 4 AA Alkaline batteries into the battery holder double checking to make sure that the polarity is correct q Reinstall the battery holder into the battery box and secure the battery box cover back into place using the retaining clip IMPORTANT Make sure that the batterie...

Страница 9: ...able have sufficient power to operate the transmitter Never attempt to recharge Alkaline batteries Doing so could cause them to explode q Slide the transmitter s ON OFF switch forward to turn the transmitter on The red LED should glow brightly and the LCD screen display transmitter information Before driving your XST 4WD Truggy RTR always turn on the transmitter first followed by the receiver Afte...

Страница 10: ...carburettor barrel should open completely and the brakes should be disengaged i e the XST 4WD Truggy RTR should roll forward smoothly when pushed q Let go of the throttle trigger and the carburettor barrel should return to its idle position open about 1mm 1 16 The brakes should still be disengaged too If the brakes are not disengaged when the throttle is at the idle position see page 19 Adjusting ...

Страница 11: ... foam air filter element when it gets dirty l To clean the air filter remove the air filter element and wash it thoroughly in warm water and a small amount of liquid detergent After it s clean allow it to dry then reoil it and install it back onto the air filter housing To wet the air filter element simply squeeze an ample amount of air filter oil onto the air filter element and work it through th...

Страница 12: ...meters the air fuel mixture at idle and during transition from idle to full throttle Turn the needle valve clockwise to lean the mixture Turn the needle valve counterclockwise to richen the mixture The low speed needle valve is preset from the factory but minor adjustments may need to be made to suit your application fuel used glow plug and environment all contribute to the setting Do not adjust t...

Страница 13: ...lve turn clockwise until it bottoms out Do this gently Don t force it l Remove the glow plug and its washer from the cylinder head l With a rag over the top of the engine pull the pull starter cord several times to expel the excess fuel from the engine l Check to make sure that the glow plug has not been fouled then reinstall it and its washer l Reset the high speed needle valve 3 full turns out f...

Страница 14: ...and hold it The engine will rev up quickly then stop We suggest holding the XST 4WD Truggy RTR firmly whilst doing this so that it doesn t lurch out of your hands q Once the engine is running to stop the engine carefully pinch the fuel line with your fingers until the engine stops Make sure to pinch the fuel pick up line and not the fuel pressure line The fuel pick up line is the one connected to ...

Страница 15: ...starter attached to the glow plug and let the engine run for about 10 seconds without giving it throttle This will allow the engine to warm up q After the engine has been running for about 10 seconds remove the glow starter from the glow plug Advance the throttle in short quick bursts and drive the XST 4WD Truggy RTR for about 2 3 minutes If the engine is running rich enough you should notice smok...

Страница 16: ...perature gun to ensure that the engine is within the suggested temperature range 99 110ºC 210 230ºF and always make sure that you run the engine slightly rich you want to be able to see a faint exhaust trail at all times setting the high speed needle valve q Start the engine and lean out the high speed needle valve as per the procedures above Close the throttle until the engine slows down enough s...

Страница 17: ...4WD Truggy RTR flips over the cable ties will help prevent the cylinder head from being scratched ENGINE TIP chassis tuning guide IMPORTANT It s very important when making changes to the settings of your XST 4WD Truggy RTR that you make the settings the same for each side For example if you change the spring tension on the right front shock you should change the spring tension on the left front sh...

Страница 18: ...le as described in the procedures below For convenience the degree of toe angle is moulded into the back of each suspension holder adjusting the toe angle l 0 degrees toe in on the front and 2 degrees on the rear for overall best 4WD driveability on most surfaces 2 degrees toe in on the rear is stock Adding more than 3 degrees of toe in or toe out on the front will result in excessive loss of spee...

Страница 19: ...y By adjusting the spring tension of the shocks you can increase steering sensitivity adjust the ride height of the XST 4WD Truggy RTR and fine tune the damping quality of the suspension system How you drive your XST 4WD Truggy RTR will dictate what settings you should be using As an example if you re driving your XST 4WD Truggy RTR off road and going over lots of jumps you may want to increase th...

Страница 20: ...shock feel stiffer or softer as the XST 4WD Truggy RTR rolls from side to side In general moving the shocks toward the outside will make the shock stiffer and moving the shock toward the inside will make the shock softer You will need to experiment with these settings to find something that suits both your track and driving style A good starting point is to adjust the rear shocks Moving the rear s...

Страница 21: ...n of the differential assembly q Remove the upper hinge pins then remove the two 3x38mm TP screws that hold the upper suspension plate in place Remove the upper and lower suspension plates q Pull the front half of the differential case straight out then remove the hinge pins drop the lower suspension arms and pull the differential assembly straight out q Remove the four 4x18mm F H TP screws from t...

Страница 22: ...acceleration In addition if you use smaller diameter tyres there will be less rotating mass and the engine will spool up faster This means that you ll have better off the line power but at a price you ll lose top end speed because of the smaller diameter tyres To compensate for this you might want to use a 14T clutch bell On smaller tight tracks you might want to use smaller diameter tyres for qui...

Страница 23: ...ge anodised and or plated parts Test on an inconspicuous area first l After cleaning the chassis and engine with Nitro Car Cleaner you should oil the moving parts of the chassis Do not oil the clutch bell spur gear drive shafts dog bones or the brake discs l Always use new fuel and keep the cap on the fuel tightly closed As fuel ages it absorbs water which degrades the fuel s performance and will ...

Страница 24: ... fuel D Replace with new fuel E Engine flooded with too much fuel E Remove glow plug and expel fuel from cylinder Pg13 F Air leak in fuel system and or engine F Replace fuel lines and or tighten all engine bolts 2 Engine does not draw fuel A Air leak in fuel system and or engine A Replace fuel lines and or tighten all engine bolts B High speed needle valve fully closed B Reset high speed needle va...

Страница 25: ...nt 7 Shocks leaking oil A Shock seals worn A Replace shock seals B Bent shock shaft s B Replace affected shock shaft s C Bottom cap not tight C Tighten bottom cap securely 8 Spur gear strips out A Gear mesh too loose A Replace spur gear and readjust gear mesh Pg23 9 XST 4WD Truggy RTR rolls A Engine idle is set too high A Lower your engine s idle speed Pg12 while engine is idling B Clutch spring s...

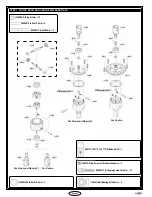
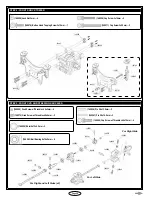
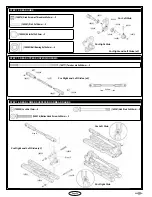
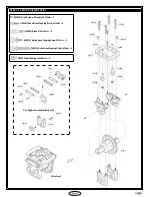
Страница 26: ...49899 149563 148623 148602 148602 148764 149905 For Centre Differential Oil STEP 1 FRONT REAR AND CENTRE DIFFERENTIALS 149899 O Ring 3x1mm 12 149895 Pin 2 5x12 8mm 6 146712 146714 146710 Differential Oil 1 148570 Grub Screw w Threadlock 4x4mm 3 148602 F H Tapping Screw 3x16mm 12 149563 Ball Bearing 8x16x5mm 6 148623 Shim 8x12x0 4mm 3 Differential Oil For Centre For Front and Rear x2 For Front and ...

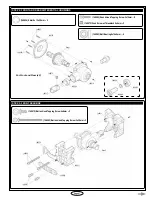
Страница 27: ...d Head Tapping Screw 2x10mm 8 148572 Grub Screw w Threadlock 5x4mm 2 STEP 3 FRONT GEARBOX 148615 Button Head Tapping Screw 4x8mm 2 148583 Button Head Tapping Screw 3x38mm 2 148593 149778 148593 149563 149918 148624 149898 149563 148572 149317 Step 1 149275 148583 148615 149916 149911 Step 2 149911 For Front and Rear x2 ...

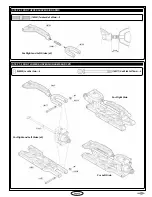
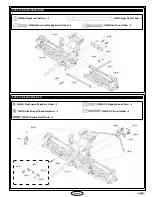
Страница 28: ... 8x12x0 2mm 2 149506 Grub Screw w Threadlock 4x3mm 4 148574 Grub Screw w Threadlock 5x5mm 2 149506 Pin 2 5x13 8mm 2 149261 Pin 2 5x16 8mm 2 149499 Cap Screw w Threadlock 4x12mm 4 148558 148558 149762 149762 148511 148761 148576 149307 148506 Step 3 149261 149261 148574 148624 149563 149343 149563 149506 149506 149506 149963 149506 149963 149499 149499 149489 149499 149499 For Right and Left Sides ...

Страница 29: ...5x25mm 2 149788 149491 149788 11 4mm STEP 7 FRONT LOWER SUSPENSION ARMS AND CVD 148558 Lock Nut 3mm 4 149377 Hub Stub 3x37 5mm 4 149377 Step 6 148558 149781 149377 148558 Step 5 For Right Side For Left Side For Right and Left Sides x2 For Right and Left Sides x2 ...

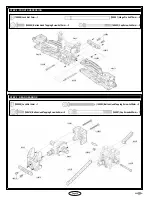
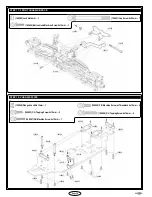
Страница 30: ...3x42mm 2 149901 Hinge Pin 4x67 2mm 2 STEP 9 REAR GEARBOX 148615 Button Head Tapping Screw 4x8mm 2 148559 Lock Nut 4mm 1 148583 Button Head Tapping Screw 3x38mm 2 148507 Cap Screw 4x50mm 1 Step 4 148584 149915 148558 149901 148650 Step 7R Step 7L 149911 148615 149916 149274 148559 148507 149907 148583 149911 Step 2 ...

Страница 31: ... 149271 149271 148612 149271 148612 149271 STEP 11 REAR SHOCK TOWER 148558 Lock Nut 3mm 4 148559 Lock Nut 4mm 1 148576 Button Head Tapping Screw 3x10mm 4 148511 Cap Screw 3x25mm 4 148649 Cap Screw 4x45mm 1 148559 Step 10 148511 148649 149762 149762 148511 148762 149307 148576 Step 9 148558 148558 ...

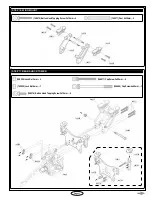
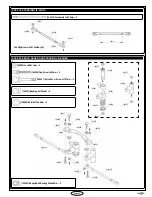
Страница 32: ...t Side For Left Side STEP 13 REAR UPPER SUSPENSION ARMS 148771 Turnbuckle 5x84 5mm 2 STEP 14 REAR LOWER SUSPENSION ARMS AND HUBS 148558 Lock Nut 3mm 4 148636 Button Head Screw 3x25mm 2 149381 Hub Stud 3x43 5mm 2 149543 148771 149497 149497 149543 64 6mm 148636 148558 149783 148558 149381 Step 13 For Right Side For Left Side For Right and Left Sides x2 For Right and Left Sides x2 For Right and Left...

Страница 33: ...mm 2 148508 149791 149901 148560 149915 148584 Step 11 Step 14R Step 14L STEP 16 REAR SWAY BAR 148566 Grub Screw w Threadlock 3x3mm 2 148570 Grub Screw w Threadlock 4x4mm 2 148780 Threaded Stud 3x12mm 2 148596 F H Tapping Screw 3x12mm 4 148542 F H Screw 3x20mm 2 148566 148780 148780 148780 148780 148780 148542 Step 15 148780 148780 148596 148570 148596 ...

Страница 34: ... 148651 149273 148634 Step 8 STEP 18 CHASSIS PLATE 148560 Flanged Lock Nut 3mm 1 148600 F H Tapping Screw 3x10mm 2 148547 F H Machine Screw 3x12mm 1 148548 F H Machine Screw w Threadlock 4x10mm 6 148598 F H Tapping Screw 4x16mm 4 149926 149926 149894 148598 148548 148600 148547 148548 149471 148560 148760 148598 149894 149455 149455 148766 ...

Страница 35: ...9567 Bushing 6x10x3mm 4 148625 Shim 8x12x0 8mm 2 149559 Flanged Ball Bearing 5x8x2 5mm 2 149334 Turnbuckle 5x90 5mm 2 149731 149549 149334 149549 149543 76mm 149567 149455 149453 149453 149455 149455 149567 149567 149453 149567 149457 148558 149559 149923 148625 149559 149457 148558 148625 148558 148558 148509 Step 19R Step 19L 148509 For Right and Left Sides x2 ...

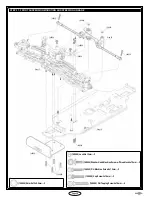
Страница 36: ...Nut 3mm 2 148554 Washer Head Machine Screw w Threadlock 4x10mm 2 148540 F H Machine Screw 3x15mm 2 148506 Cap Screw 3x16mm 2 148609 F H Tapping Screw 4x18mm 4 148624 Shim 8x12x0 2mm 2 148506 148624 148624 Step 20 148506 148554 148558 148554 Step 17 148540 148609 149906 Step 18 ...

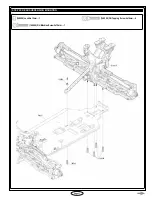
Страница 37: ...Page 37 STEP 22 REAR SUSPENSION MOUNTING 148558 Lock Nut 3mm 1 148540 F H Machine Screw 3x15mm 1 148598 F H Tapping Screw 4x16mm 4 Step 16 Step 21 148540 148598 148558 ...

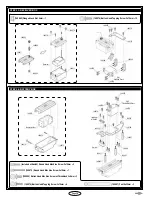
Страница 38: ...ering Servo STEP 24 BATTERY BOX Included w Switch Round Head Machine Screw 2x10mm 2 149870 Round Head Machine Screw 2x15mm 1 148525 Button Head Machine Screw w Threadlock 3x8mm 3 148576 Button Head Tapping Screw 3x10mm 6 149467 Post 6x32mm 3 148576 148576 148525 148768 149467 149471 149467 149467 149471 148525 148576 148576 CH 2 Throttle Brake Servo Switch 149870 149319 149870 149870 Battery Holde...

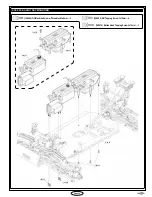
Страница 39: ... 39 STEP 25 RADIO TRAY MOUNTING 148546 F H Machine Screw w Threadlock 3x8mm 3 148600 F H Tapping Screw 3x10mm 4 148576 Button Head Tapping Screw 3x10mm 1 148600 148600 148546 Step 22 148576 Step 23 Step 24 ...

Страница 40: ...Brake Pin 3x10mm 4 148576 Button Head Tapping Screw 3x10mm 2 148616 Button Head Tapping Screw 3x25mm 4 148889 Ball Bearing 3x6x2 5mm 2 148616 148593 148616 148593 148566 148566 148770 149328 149328 148889 148889 Step 1 148576 149281 149283 149284 149469 149284 149284 149284 149284 149281 Finished For Right and Left Sides x2 ...

Страница 41: ...Page 41 STEP 27 CENTRE DIFFERENTIAL AND DRIVE SHAFTS 148607 F H Tapping Screw 4x12mm 4 149501 Step 26 148772 148607 Step 25 ...

Страница 42: ...chine Screw w Threadlock 3x8mm 2 148550 Washer Head Machine Screw w Threadlock 3x10mm 2 149287 Post 6x27 5mm 2 148620 Washer 3x8x1mm 2 148550 148769 148550 148620 149287 148620 149287 148546 148546 Step 27 Silicone Tubing Silicone Tubing 6mm ...

Страница 43: ... Shim 5x8x0 2mm 2 149414 Shim 5x8x0 4mm 1 149559 Flanged Ball Bearing 5x8x2 5mm 2 148334 Collet for SG Shaft 149414 Engine Nut for SG Shaft 148506 148506 148558 149925 148558 149925 148334 149528 149408 149414 149408 149408 149559 149414 149525 149559 149414 149414 148502 STEP 30 EXHAUST HEADER 149577 149415 149577 148346 Step 29 ...

Страница 44: ...31 AIR FILTER 148600 F H Tapping Screw 3x10mm 1 149571 Air Filter Oil Not Included 149409 149409 149410 Step 30 149411 149409 149409 148600 Air Filter Oil Not Included STEP 32 TUNED PIPE Step 31 149717 149717 145823 ...

Страница 45: ...45 STEP 33 ENGINE MOUNTING 148570 Grub Screw w Threadlock 4x4mm 1 148514 Button Head Machine Screw w Threadlock 5x10mm 4 Step 32 148570 148514 148514 Step 28 Insert a Sheet of Notebook Paper to Set Gear Mesh ...

Страница 46: ...ock Nut 2 6mm 4 149842 Washer 2 5x5 9x0 5mm 4 149850 O Ring 3mm 4 149850 O Ring 3 5mm 8 149847 Shock Body 14x53mm 4 149842 Shock Shaft 3 5x61mm 4 149842 149842 149842 149842 149847 149847 149850 149842 149850 149847 149909 For Front and Rear x4 3mm 3 5mm 3 5mm One 3mm O Ring is installed between the two 3 5mm O Rings to improve the seal ...

Страница 47: ...cone Shock Oil Not Included After filling with shock oil GENTLY pump shaft up and down to eliminate air bubbles STEP 37 SHOCK SPRINGS 149363 Shock Spring 80 5x1 6mm Yellow 4 Step 36 149312 149363 149850 For Front and Rear x4 For Front and Rear x4 ...

Страница 48: ...TING 148560 Flanged Lock Nut 3mm 2 148542 F H Machine Screw 3x20mm 2 STEP 39 REAR SHOCK MOUNTING 148560 Flanged Lock Nut 3mm 2 148542 F H Machine Screw 3x20mm 2 149347 148560 Step 37 Step 37 148542 149347 148560 Step 37 Step 37 148542 ...

Страница 49: ...8634 Step 39 149333 149731 149333 148560 149333 149312 148558 Servo Arm Included with Servo Retaining Screw Included with Servo STEP 41 THROTTLE AND BRAKE LINKAGE 148566 Grub Screw w Threadlock 3x3mm 2 148760 Spring 18mm 1 148578 Button Head Tapping Screw 3x12mm 1 148760 148566 148566 148760 149553 149553 149555 149555 148578 148760 50mm 22mm 5mm 100mm Finished Servo Arm Included with Servo ...

Страница 50: ...RAKE LINKAGE MOUNTING 148566 Grub Screw w Threadlock 3x3mm 4 Step 41 Retaining Screw Included with Servo 148566 148760 149553 32mm 37mm STEP 43 THROTTLE AND BRAKE LINKAGE ADJUSTMENT High Throttle Neutral Throttle Full Brake Step 40 ...

Страница 51: ...upport tube then push the antenna support tube into the antenna mount Important DO NOT cut the excess antenna shorter Allow the excess antenna wire to hang out beyond the end of the antenna support tube STEP 45 WHEELS AND TYRES 148773 148773 148774 C A Tyre Glue Not Included Outside Inside For Front and Rear x4 ...

Страница 52: ...Page 52 STEP 46 WHEELS BODY AND WING MOUNTING 149259 Wheel Nut 17mm 4 149321 149522 149319 149319 148776 149319 149319 Step 45 149259 Step 44 149259 Step 45 ...

Страница 53: ...ntial Shim 8x12x0 4mm Pk10 148624 Differential Shim 8x12x0 2mm Pk10 148625 Differential Shim 8x12x0 8mm Pk10 Also for option 2 Speed Transmission 148760 Linkage and Tuned Pipe Mount Set 148761 Front Shock Tower 4mm 6061 Black 148762 Rear Shock Tower 4mm 6061 Black 148764 Spur Gear 53T Aluminium 148766 Chassis 3mm 6061 Black 148767 Radio Plate Front 2mm 6061 Black 148768 Radio Plate Rear 2mm 6061 B...

Страница 54: ...k10 L 27mm 149317 Pinion Output Joints Pk2 149312 Balls 6 9x4 9mm Steel Pk4 149307 Shock Mounting Studs Pk4 L 14 2mm 149301 Rear Wheel Shafts Pk2 149287 Fuel Tank Post L 27 5mm 149288 Transponder Mount 149286 Servo Saver Plate 3mm 6061 Black 149284 Brake Pad Set 149283 Brake Disc Guard Pk2 149275 Upper Suspension Plate Front 149271 Wing Mount 149261 Hex Hubs 17mm Black Pk2 149259 Wheel Nuts 17mm B...

Страница 55: ... Joint Rebuild Kit 149501 Swing Shaft Centre Rear Pk2 L 97 8mm 149491 Turnbuckles 5mm Upper Front Pk2 L 25mm 149489 Front Hub Carriers Left and Right 149483 Rear Hubs Left and Right 149471 Servo Mount Throttle Brake 149469 Brake Disc 149467 Radio Tray Post 149457 Servo Saver Screw Set 149414 3 Shoe Clutch Nut SG Shaft L 80 5mm Fr Rr 149347 Shock Spring Spacer Bushing Set 149409 Air Filter Assembly...

Страница 56: ...ng Shaft Rear Pk2 L 138 6mm 149778 Differential Housing Cover Aluminium 149762 Body Mount Set 3 Hole 149717 Exhaust Coupler Yellow 149567 Bushing 6x10x3mm Pk4 149563 Ball Bearing 8x16x5mm 149559 Flanged Ball Bearing 5x8x2 5mm Pk2 149553 Rod Stopper Set 149555 Plastic Parts Accessories 149543 Balls 7x3mm Steel Pk4 L 22 5mm 149528 Flywheel for 3 Shoe Clutch 149525 Clutch Bell 13T 149577 Exhaust Head...

Страница 57: ...ront or Rear 149909 Ball Ends 3 5mm for 7mm Ball Pk4 L 25 5mm 149907 Wing Mount Stabiliser Rod 149905 Gaskets for Bevel Differentials Pk5 149906 Bumper Front 149901 Lower Hinge Pins Pk4 149899 O Rings for Diff Output Shafts Pk10 149898 Pinion Gear 13T Straight Cut 149897 Ring Gear 43T Straight Cut 149895 Differential Set Bevel Type 149891 Brake Output Joints Pk2 149893 Differential Output Joints P...

Страница 58: ... H Tapping Screws 4x16mm QTY 10 148609 F H Tapping Screws 4x18mm QTY 10 148550 Washer Head Machine Screws with Threadlock 3x10mm QTY 5 148554 Washer Head Machine Screws with Threadlock 4x10mm QTY 5 148502 Button Head Machine Screws 3x6mm Also for option 2 Speed Transmission QTY 10 148525 Button Head Machine Screws with Threadlock 3x8mm QTY 5 148634 Button Head Machine Screws 3x12mm QTY 10 148636 B...

Страница 59: ... 1 7mm Black Pk2 L 80 5mm 149366 Shock Springs 1 5mm White Pk2 L 80 5mm Fr Rr 149268 Steering Knuckles 7075 Left Right 149269 Front Hub Carriers 7075 Left Right 149454 Servo Saver 7075 with Bearings Replaces 149894 149994 Suspension Holder Support 7075 Hardened 7075 Aluminium Parts 149484 Rear Hubs 7075 Left and Right Replaces 149483 Replaces 149343 149496 Outer Arms 7075 Upper Front Replaces 1497...

Страница 60: ...d and Yellow 149544 Switch Covers Blue Pk2 149718 Exhaust Coupler Blue 149746 Shock Bump Stops 60lbs Yellow Pk4 149747 Shock Bump Stops 40lbs Blue Pk4 Silicone Parts Protects against Moisture Dust and Dirt Use with 150016 150015 Exhaust Header w Springs Polished Use with 150015 150016 Tuned Pipe Polished 150017 Retainer Spring Pk3 Tuned Pipe Tuned Pipe Parts Power Boosting Use in Place of 149717 F...

Страница 61: ...Conversion Kit Use with 149313 149826 2 Speed Gear 45T Replacement Part for 149825 149827 2 Speed Gear 50T Replacement Part for 149825 149313 Output Joint Pk2 Use With 149825 149816 Pinion Gear 16T 2 Speed 149300 2 Speed Main Gear Shaft Replacement Part for 149825 2 Speed Transmission 149563 Ball Bearing 8x16x5mm Replacement Part for 149825 150009 Ball Bearing 5x8x2 5mm Replacement Part for 149825...

Страница 62: ...ock Shafts 149520 Bi Level Wing White 149521 Bi Level Wing Yellow 149277 Spur Gear 48T 148778 Dish Wheels White Pk2 146110 Axle Adapters 14mm Rear Use in Place of 148764 Use with Aluminium Ball Ends Replaces 149491 149492 Turnbuckle 5mm Upper Front Pk2 149547 Ball Ends 3mm for 7mm Ball Pk4 L 22 5mm 149726 Ball Ends 3mm for 7mm Ball Pk4 L 25 5mm 148765 Differential 53T Centre 148775 Body Shell Clea...

Страница 63: ...ilicone Oil 1000 2 5oz standard for rear differential 146711 Silicone Oil 2000 2 5oz 146712 Silicone Oil 3000 2 5oz standard for front differential 146713 Silicone Oil 4000 2 5oz 146714 Silicone Oil 5000 2 5oz standard for centre differential 146715 Silicone Oil 7000 2 5oz 146716 Silicone Oil 10000 2 5oz 149500 Tool Set 149187 Hex Wrench Set Metric 4pcs 1 5 2 2 5 3mm Tools 149959 Clutch Tool for L...

Страница 64: ...ime you return it for service An omission of this request implies permission for Global Services Ripmax Ltd to service your XST 4WD Truggy RTR at our discretion l Include a method of payment for any service charges l Send the unit to us by United Parcel Service Federal Express or by Insured Mail Postage is nonrefundable Send your package to In North America Global Services 18480 Bandilier Circle F...

Отзывы: