background image


The telephone company may make changes in its facilities, equipment, operations or procedures that could affect 
the  proper  functioning  of  your  equipment.  If  they  do,  you  will  be  notified  in  advance  in  order  for  you  to  make 
necessary modifications to maintain uninterrupted service. 


This equipment may not be used on coin service provided by the telephone company. Connection to party lines is 
subject to state tariffs. 


Important Safety Instructions


CautionThe direct plug-in wall transformer serves as the main product for disconnecting. The socket outlet shall be 
installed near the product and be readily accessible. 
CautionUse only the power supply included with this product. In the event the power supply is lost or damaged 
In the United States, use only with CSA certified or UL listed Class 2 power supply, rated 12Vdc 1A or above. 
IN Europe, use only with CE certified power supply, rated 12Vdc 1A or above. 
Do not use this equipment near water, for example in a wet basement. 
Avoid using a telephone during an electrical storm. There may be a remote risk of electrical shock from lightning. 
Do not use the telephone to report a gas leak in the vicinity of the leaking area. 
If you experience trouble with this unit, please contact customer service at the address and phone listed below. DO 
NOT DISASSEMBLE THIS EQUIPMENT. It does not contain any user serviceable components. 


FCC Warning


This equipment has been tested to comply with the limits for a Class A digital device, pursuant to Part 15 of the FCC 
Rules. These limits are designed to provide reasonable protection against harmful interference when the equipment 
is operated in a commercial environment. This equipment can generate, use, and radiate radio frequency energy 
and, if not installed and used in accordance with the instruction manual, may cause harmful interference to radio 
communications. Operation of this equipment in a residential area is likely to cause harmful interference in which 
case the user will be required to correct the interference at owner’s expense. 


71 


Содержание XL-VCF104M

Страница 1: ...XL VCF104M CO XL VCF104S CPE VDSL2 CO CPE modem User s Guide...

Страница 2: ...2 VDSL2 is the newest and most advanced standard of DSL broadband wireline communications Designed ITU T G 993 2 VDSL2 is an enhancement to G 993 1 VDSL that permits the transmission of asymmetric an...

Страница 3: ...t Advanced Setup 12 4 4 Select LAN 13 5 Building a VDSL2 System 16 5 1 Connect the CPE and the CO to the Line 16 5 2 Connect the CPE and the CO to LAN Devices 17 5 3 Run Demos and Tests 17 6 Operating...

Страница 4: ...dem VDSL2 CO Modem VDSL2 CPE Modem Two plastic feet User s Manual AC to DC 12V Power Adapter RJ 45 cable RJ 11 cable Please inform your dealer immediately for any missing or damaged parts If possible...

Страница 5: ...can provide the right operating environment including power requirements sufficient physical space and proximity to other network devices that are to be connected Verify the following installation req...

Страница 6: ...ol PC For this purpose you needa PC with an Ethernet network interface and a DB 9 RS232 serial interface Two programs are required A Web browser is mandatory and a terminal program should be available...

Страница 7: ...Figure 2 1 VDSL2 Point to Point application 6...

Страница 8: ...scribes the important parts of the VDSL2 CO CPE MODEM It features the front indicators and rear connectors Front Indicators The following figure shows the front panel Figure Chapter 3 1 VDSL2 CO Modem...

Страница 9: ...the product is power good and system reset OK E1 E4 Ethernet LED Steady Green Flashing LINK ACT Each RJ 45 station port on the Ethernet is assigned an LED light for monitoring port Good Linkage LED i...

Страница 10: ...Line For connecting to the VDSL Modem Using a RJ 11 cable RJ 11 Phone For connecting to the telephone or FaxISDN Modem RJ 11 E1 E4 For connecting to a Ethernet equipped device RJ 45 Console port For c...

Страница 11: ...ODEM provides a built in web browser You can use Web browser to configure the VDSL2 CO CPE Modem First please input the IP address 192 168 16 249 VDSL2 CO Modem and 192 168 16 250 VDSL2 CPE Modem in t...

Страница 12: ...2 Select the Menu Level There is a simple Setup Wizard for end users and an Advanced Setup The focus of this manual is on the Advanced Setup Figure 4 2 Select the Advanced Setup in the Entry Screen 1...

Страница 13: ...re 4 3 Advanced Setup Attention The settings in the following Chapter 4 4 only need to be performed in order to change LAN settings Such a change may be necessary when connecting the VDSL2 CO CPE Mode...

Страница 14: ...want to go through the following steps in order to make the IP address previously set by ifconfig in the terminal console permanent Or on some later occasion you may want to change it again without us...

Страница 15: ...is the address changed by an ifconfig command via the shell running in the terminal The Subnet Mask display can be ignored In case the DHCP checkbox is checked some additional data and options will be...

Страница 16: ...he Settings Dialog After the APPLY button has been hit the displayed IP address adm0 port will be stored in a non volatile memory on the VDSL2 CO CPE Modem Also the Ethernet link between the control P...

Страница 17: ...the VDSL2 CPE Modem to the Line The objective for VDSL2 is passing data over a twisted pair cable at high speed In the setup either such a cable connects the VDSL2 CO Modem and the VDSL2 CPE Modem or...

Страница 18: ...s representation of the LAN side as well as representation of the WAN side 5 3 Run Demos and Tests The Ethernet tester may send data downstream as well as upstream It also receives the data in order t...

Страница 19: ...upported by an graphical user interface 6 1 Configuration Settings Configure and start the VDSL2 CO Modem and the VDSL2 CPE Modem Configuration As a minimum configuration usually selecting the bandpla...

Страница 20: ...6 1 1 Channel Configuration Figure 6 1 1 Channel Configuration Menu 19...

Страница 21: ...r To which bearer channel number shall the settings apply Channel 0 Direction To which direction shall the settings apply Upstream Downstream Min Data Rate Minimum Payload Data Rate Max Data Rate Maxi...

Страница 22: ...ne Configuration Figure 6 1 2 Line Configuration Menu for SNR Margin Selection Line Configuration Setting Description Direction Select the target direction Target SNRM Set the required SNR Margin 10 5...

Страница 23: ...6 1 3 Profile Configuration Figure 6 1 3 Profile Configuration 22...

Страница 24: ...6 1 4 Band Configuration Figure 6 1 4 Band Configuration 23...

Страница 25: ...Loop Back Activation Deactivation Menu Loop Back Setting Description Channel Number To which bearer channel number shall the settings apply Channel 0 xTC Activate or deactivate loopback within the Tr...

Страница 26: ...ine Activation Figure 6 1 6 Activation and Deactivation of the Line Line Activation Deactivation Setting Description Line Activate or deactivate the line Select the activity and the press the APPLY bu...

Страница 27: ...lowing status messages may occur not_initialized exception idle request idle silent request silent handshake full init discovery training analysis exchange showtime no sync showtime tc sync fast retra...

Страница 28: ...6 2 2 Channel Status Figure 6 2 2 Channel Status Display Data Rate Delay Error Counters and Impulse Noise Protection 27...

Страница 29: ...6 2 3 XTC Status Figure 6 2 3 Display of xTC Status 28...

Страница 30: ...6 2 4 Version Info Figure 6 2 4 Display of Version Data 29...

Страница 31: ...6 2 5 Graphs Figure 6 2 5 Display of SNR per Carrier 30...

Страница 32: ...e different from the examples in the previous chapters The password used in this chapter is different from the examples in the previous chapters The VDSL2 CO CPE Modem of course has no menu option for...

Страница 33: ...up Wizard An easy to use setup wizard provides the most common configurations 2 Advanced Setup Advanced setup features allow the user to configure all the functions that are supported by the VDSL2 CO...

Страница 34: ...link in the homepage in case you want to configure a wider range of settings The following configuration options are displayed in the left navigation bar as shown in Figure 7 2 2 System WAN LAN NAT Fi...

Страница 35: ...the left navigation bar The following are the options available under System as shown in Figure 7 2 3 Host Name System Time Administrator Settings Firmware Upgrade System Status System Log Reset Figu...

Страница 36: ...link in the left navigation bar A screen is displayed as shown in Figure 7 2 3 1 Figure 7 2 3 1 Host Name Configuration Field Description The screen contains the following details Fields in Hostname...

Страница 37: ...ime link in the left navigation bar A screen is displayed as shown in Figure 7 2 3 2 Figure 7 2 3 2 System Time Configuration Field Description The screen contains the following details Fields in Syst...

Страница 38: ...the left navigation bar A screen is displayed as shown in Figure 7 2 3 3 Figure 7 2 3 3 Administrator Settings Configuration While adding a user each user must be assigned a separate port Hence the nu...

Страница 39: ...rator This is enabled only for the user Administrator login Password This is the password of the login administrator Re type Password This is the password verification Auto Logout Time The auto logout...

Страница 40: ...cessor used in the reference system is able to act as either a switch or a router Clicking on Device Mode on the left navigation bar allows the user to change the mode of operation as shown in the fol...

Страница 41: ...rade link in the left navigation bar A screen is displayed as shown in Figure 34 NEW Image JTC Figure 7 2 3 5 Firmware Update The screen contains the following detail Click Browse to select a specifie...

Страница 42: ...shown in Figure 7 2 3 6 NEW IMAGE JTC Figure 7 2 3 6 Status Window This screen displays the status of certain important system parameters It also offers control over the current DHCP lease for the IP...

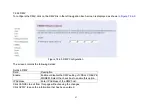
Страница 43: ...ft navigation bar A screen is displayed as shown in Figure 7 2 3 7 Figure 7 2 3 7 Security Logs Field Description The screen contains the following details Fields in Security Logs Log File This lists...

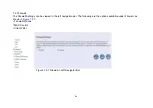
Страница 44: ...eve system event and update the log file 7 2 3 8 Reset To restart the system click on the Reset link in the left navigation bar A screen is displayed as shown in Figure 7 2 3 8 Figure 7 2 3 8 Reset VD...

Страница 45: ...The WAN settings can be viewed in the left navigation bar The following are the options available under WAN as shown Figure 7 2 4 Dynamic IP Static IP PPPoE DNS Figure 7 2 4 WAN Setting in Left Naviga...

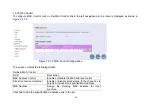
Страница 46: ...click on the Dynamic IP link in the left navigation bar A screen is displayed as shown in Figure 7 2 4 1 Figure 7 2 4 1 Dynamic IP Configuration The screen contains the following details Click APPLY...

Страница 47: ...navigation bar A screen is displayed as shown in Figure 7 2 4 2 Figure 7 2 4 2 Static IP Configuration The screen contains the following details Fields in Static IP Field Description IP Address assign...

Страница 48: ...nter the Gateway address of the VDSL2 CO CPE MODEM Does ISP provide more IP Address Provides more IP Addresses of the WAN interface Select the check box to enable this option A screen is displayed as...

Страница 49: ...yed as shown in Figure 7 2 4 3 Field Description Figure 7 2 4 3 PPPoE Configuration The screen contains the following details Fields in PPPoE User Name Enter a name to use the PPPoE session Password E...

Страница 50: ...tted If no packets are transmitted between LAN port and WAN port or between VDSL2 CO CPE MODEM and WAN the connection is disconnected after the Maximum idle time If the Auto reconnect check box is sel...

Страница 51: ...on Field Description The screen contains the following details Fields in DNS Domain Name Server DNS Address Enter the DNS address of the primary DNS server Secondary DNS Address optional Enter the add...

Страница 52: ...AN The LAN Setting can be viewed in the left navigation bar The following are the options available under LAN as shown in Figure 7 2 5 LAN Settings DHCP Client List Figure 7 2 5 LAN in Left Navigator...

Страница 53: ...tings link in the left navigation bar A screen is displayed as shown in Figure 7 2 5 1 in case of the VDSL2 CO CPE Modem Figure 7 2 5 1 LAN Settings The screen contains the following details Fields in...

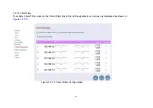
Страница 54: ...tion that has been entered 7 2 5 2 DHCP Client List To view the DHCP client list click on the DHCP Client List link in the left navigation bar A screen is displayed to list all DHCP client connection...

Страница 55: ...T The NAT Settings can be viewed in the left navigation bar The following are the options available under NAT as shown in Figure 7 2 6 Virtual Server Port Mapping DMZ Figure 7 2 6 NAT in Left Navigato...

Страница 56: ...ield Description Private IP Enter a private IP Address of specified entry Private Port Enter a private Port number of the specified entry Type Select virtual server protocol type of the specified entr...

Страница 57: ...e screen contains the following details Fields in Port Mapping Field Description Server IP Enter the IP Address of a specified local machine Mapping Port Assign a range of port or specific port number...

Страница 58: ...uration Field Description The screen contains the following details Fields in DMZ Enable Enable or disable the DMZ setting of VDSL2 CO CPE MODEM Select the check box to enable this option IP Address E...

Страница 59: ...all Settings can be viewed in the left navigation bar The following are the options available under Firewall as shown in Figure 7 2 7 Firewall Options MAC Control Client Filter Figure 7 2 7 Firewall i...

Страница 60: ...ollowing details Fields in Firewall Options Enable Hacker Attack Protect Select the check box to log and drop all the hacker attack events Discard PING from WAN Select the check box to drop all PING f...

Страница 61: ...ield Description The screen contains the following details Fields in MAC Control MAC Address Control Enable or disable the MAC address control Block Connection to Internet Enable or disable block stat...

Страница 62: ...7 2 7 3 Client Filter To enable Client Filter click on the Client Filter link in the left navigation bar A screen is displayed as shown in Figure 7 2 7 3 Figure 7 2 7 3 Client Filter Configuration 61...

Страница 63: ...the filter IP Address range of the local machines under VDSL2 CO CPE MODEM Port Enter the filter Port number range of the local machines under VDSL2 CO CPE MODEM Type Select TCP or UDP to filter the p...

Страница 64: ...gs The Route Settings can be viewed in the left navigation bar The following are the options available under Route as shown in Figure 7 2 8 Static Routing Routing Table List Figure 7 2 8 Route in Left...

Страница 65: ...8 1 Figure 7 2 8 1 Static Routing Configuration Field Description The screen contains the following details Fields in Static Routing Destination LAN IP Enter the IP Address of routing entry Subnet Ma...

Страница 66: ...O CPE MODEM click on the Routing Table by link in the left navigation bar A screen is displayed as shown in Figure 7 2 8 2 Figure 7 2 8 2 Routing Table List The screen contains the following details C...

Страница 67: ...9 UPnP Settings The UPnP Settings can be viewed in the left navigation bar The following are the options available under UPnP as shown in Figure 7 2 8 Settings Figure 7 2 9 UPnP in Left Navigator Bar...

Страница 68: ...uration The screen contains the following details Table 22 Fields in UPnP Settings Field Description Enable UpnP To enable or disable UPnP Setting Select the check box to Enable or Disable the UPnP fu...

Страница 69: ...peed for VDSL2 port Supports Web management HTTP Supports TFTP Supports PPPOE Supports uPnP Supports NAT DHCP DMZ Supports Firewall Supports Route Switch mode Supports Loop back Supports SNR indicator...

Страница 70: ...t RS 232C 115200bps Dimension L x W x H 184mm x 146mm x 40mm 7 2 x 5 74 x 1 57 Operating temperature 0 C to 50 C 32 to 122F Operating humidity 10 to 90 non condensing Storage temperature 20 to 65 C 4F...

Страница 71: ...by turning the equipment off and on the user is encouraged to try to correct the interference by taking one or more of the following measures 1 Reorient or relocate the receiving antenna 2 Increase th...

Страница 72: ...use this equipment near water for example in a wet basement Avoid using a telephone during an electrical storm There may be a remote risk of electrical shock from lightning Do not use the telephone to...

Страница 73: ...not apply to any products which have been subjected to any misuse neglect or accidental damage or which contain defects which are in any way attributable to improper installation or to alteration or...

Отзывы: