

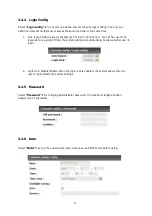


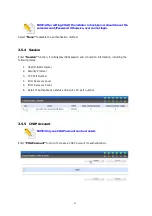
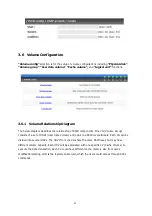

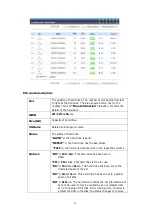


46
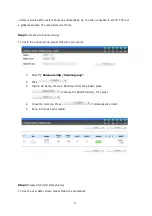
No.
Number of volume group. The blue square button next to the No.
is
“More Information”
indication. It shows the details of the
volume group.
Name
Volume group name. The blue square button next to the Name is
“Rename”
function.
Total(GB)
Total capacity of this volume group.
Free(GB)
Free capacity of this volume group.
#PD
The number of physical disks of the volume group.
#UDV
The number of user data volumes related to the volume group.
Status
The status of volume group.
“Online”
volume group is online.
“Fail”
volume group is fail.
Status 1
“DG”
D
e
G
raded mode. This volume group is not completed.
The reason could be lack of one disk or failure of disk.
Status 2
“R”
R
ebuild. This volume group is doing rebuilding.
Status 3
“M”
M
igration. This volume group is doing
migration.
RAID
The RAID level of the volume group. The blue square button next
to the RAID level is
“Migrate”
function. Click
“Migrate”
can add
disk(s) to do expansion or change the RAID level of the Volume
group.
VG operations description:
CREATE
Create a volume group
DELETE
Delete a volume group
Содержание xl-raid-2804issa
Страница 1: ...XL RAID 2804ISSA iSCSI SATA II SUBSYSTEM Installation and Configuration Manual Revision 1 0 ...
Страница 84: ...84 4 Click OK 5 Click Targets ...
Страница 93: ...93 Click Advanced Select Target Portal to iSCSI data port 1 192 168 11 229 Then click OK ...
Страница 95: ...95 ...
Страница 101: ...101 Log on Enable Enable multi path checkbox Then click Advanced ...
Страница 102: ...102 Select Target Portal to iSCSI data port 1 192 168 11 229 Then click OK Log on again ...
Страница 104: ...104 iSCSI device is connected Click Details Click Device tab then click Advanced ...
Страница 105: ...105 Click MPIO tab select Load Balance Policy to Round Robin Click Apply ...
Страница 108: ...108 After connected click Details then in the Session tab click Connections Choose Round Robin for Load Balance Policy ...
Страница 110: ...110 The MC S setting is done ...
Страница 112: ...112 Disable Immediate Data and enable Initial R2T Click OK ...
Страница 113: ...113 Click Save settings and click Yes on next page Click Refresh and find a new target with iSCSI name ...
Страница 115: ...115 Then run Computer Management in Windows Make sure the disk appears ...
Страница 119: ...119 block size 512B for 64bit OS setting block size 4K for 32bit OS setting Attach LUN for iSCSI controller Attach LUN ...