40
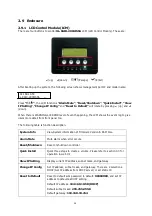
1.
Multi-homed
: The two LAN ports are connected to two different networks. Multi-
homed is default.
2.
Trunking
: Trunking links 2 LAN ports together to be a single link. Trunking could
multiply the bandwidth. They will be aggregated to one IP. If clicking the blue square
button
at “No. 1” row, the IP setting will be set to default value after setting
trunking, and vice versa. For detailed setup steps, please refer to Appendix E:
Trunking/LACP setup instructions.
3.
LACP
: Link Aggregation Control Protocol (LACP) could balance the bandwidth. IP
setting concept is the same as trunking. For detailed setup steps, please refer to
Appendix E: Trunking/LACP setup instructions.
CAUTION! Each of gigabit LAN ports must have IP address in different
subnet for backplane solutions.
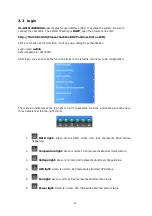
3.5.3 Node
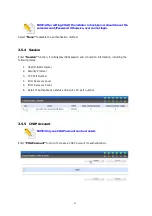
Select
“Node”
to view the target name for iscsi initiator. Press
“Auth”
to enable CHAP
authentication.
CHAP
is the abbreviation of Challenge Handshake Authorization Protocol. CHAP is
a strong authentication method used with point-to-point for user login. It’s a type of authentication
in which the authentication server sends the client a key to be used for encrypting the username
and password. CHAP enables the username and password to transmitting in an encrypted form for
protection.
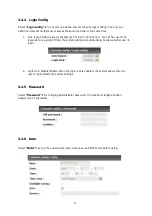
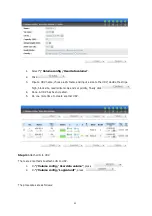
To use CHAP authentication, please follow the procedures.
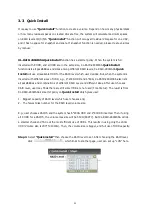
1.
Click
in Auth column.
2.
Select
“CHAP”
.
3.
Go to \iSCSI config\CHAP account to create account and password.
Содержание xl-raid-2804issa
Страница 1: ...XL RAID 2804ISSA iSCSI SATA II SUBSYSTEM Installation and Configuration Manual Revision 1 0 ...
Страница 84: ...84 4 Click OK 5 Click Targets ...
Страница 93: ...93 Click Advanced Select Target Portal to iSCSI data port 1 192 168 11 229 Then click OK ...
Страница 95: ...95 ...
Страница 101: ...101 Log on Enable Enable multi path checkbox Then click Advanced ...
Страница 102: ...102 Select Target Portal to iSCSI data port 1 192 168 11 229 Then click OK Log on again ...
Страница 104: ...104 iSCSI device is connected Click Details Click Device tab then click Advanced ...
Страница 105: ...105 Click MPIO tab select Load Balance Policy to Round Robin Click Apply ...
Страница 108: ...108 After connected click Details then in the Session tab click Connections Choose Round Robin for Load Balance Policy ...
Страница 110: ...110 The MC S setting is done ...
Страница 112: ...112 Disable Immediate Data and enable Initial R2T Click OK ...
Страница 113: ...113 Click Save settings and click Yes on next page Click Refresh and find a new target with iSCSI name ...
Страница 115: ...115 Then run Computer Management in Windows Make sure the disk appears ...
Страница 119: ...119 block size 512B for 64bit OS setting block size 4K for 32bit OS setting Attach LUN for iSCSI controller Attach LUN ...

