3
①
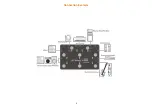
Smart foot switches:
6 MIDI foot switches with LED indicator A, B, C, D, E, F; When the foot switch is pressed, the corresponding LED lights up and Pro
sends MIDI commands outward. You can specify any features that you want to control via MIDI in software effects. For more details, please refer to the MIDI
chapter below.
②
Working mode indicator:
If Pro is to work normally, this indicator must light up, otherwise it will not enter the normal working condition. This indicator lights
up when the smart device is connected. At the same time, the indicator has 3 light colors:
green
,
blue
and
red
, indicating that they are in different MIDI
command groups. For more details, please refer to the MIDI chapter below.
③
Output volume control:
This knob controls the output master volume, including stereo line, XLR, and headphone output.
④
HW monitor indicator:
This indicator lights up when the hardware monitor function is on. Long press the E foot switch to turn on/off the hardware monitor
function.
⑤
Phantom power indicator:
This indicator lights up when the phantom power is on. Long press the F foot switch to turn on/off the phantom power.
⑥
Preamp gain control:
This knob is used to adjust the gain of the microphone preamp and only acts on the INR input. The gain range is 4 ~ 50dB.
⑦
Clip Indicator:
This indicator lights up when the input signal amplitude exceeds the limit. Only acts on the INR input.
Содержание XTONE Pro
Страница 1: ...XTONE Pro User Manual XSONIC RELOAD YOUR TONE...
Страница 2: ...Visit www xsonicaudio com to view the online manual...
Страница 5: ...2 Function Description...
Страница 7: ...4...
Страница 9: ...6 Connection Example...
Страница 33: ...30 Turn on the record enable button and the input monitoring button All the settings are completed...
Страница 35: ...32...
Страница 36: ...33 XSONIC RELOAD YOUR TONE...


