background image

CAUTION:

• This product is not suitable for children except under the direct supervision of

an adult.

• First-time builders should seek advice from people who have building

experience in order to assemble the model correctly and to allow the model 
to reach its performance potential.

• Assemble this kit only in places away from the reach of very small children.
• Exercise care when using any hand tools and sharp instruments during

construction.

• Carefully read all manufacturers warnings and cautions for any parts used in

the construction and use of your XRAY T1 EVO2.

• Take adequate safety precautions prior to operating this model. You are

responsible for this model's assembly and safe operation! XRAY MODEL
RACING CARS does not take responsibility for any injury, damage,
or misuse of this product while assembling or operating it.

• Take care when building; some parts may have sharp edges. Keep small

parts out of reach of small children.

• Do not put fingers or any objects inside rotating or moving parts!
• Right after use, do NOT touch equipment on the model because they may

generate high temperatures!

• When learning to drive, go to an area that has no obstacles that can

damage your car if you crash.

• Always turn off the receiver/speed control or disconnect XRAY T1 EVO2's

battery pack before turning your transmitter off.

• Disconnect the battery pack before storing.
• Remove any sand, mud, dirt, grass or water before putting your model away.
• Use a recommended charger for the batteries and follow the instructions

correctly. Over-charging or charging incorrectly using inferior chargers can
cause the batteries pack to become dangerously hot.

• Regularly check the charger for potential hazards such as damage to the

cable, plug, casing or other defects. Ensure that any damage is rectified
before using the charger again.

• Do not allow the transmitter batteries to run flat so you don't lose control of

the car, otherwise you may lose control of the car.

• Do not allow any metal part to short circuit the batteries or speed control.
• Be sure that your operating frequency is clear before running and never

share the same frequency with somebody else at the same time!

• When the model is behaving strangely immediately stop the model and

check and clear the problem.

• Do not stall the motor. The speed control will fail within seconds if power is

applied to the motor when the car cannot move.

• Do not use your model:

- near real cars, animals, or people that are unaware 

that an R/C car is being driven.

- in places where children and people gather.
- in residential districts and parks.
- indoors and in limited space.
- in wet conditions.
- in the street.

Disregard of the above cautions may lead to accidents, personal injury, or
property damage! XRAY MODEL RACING CARS does not take responsibility
for any injury, damage, or misuse of this product while assembling or
operating it.

C

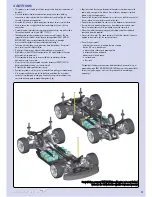
Coonnggrraattuullaattiioonnss,,  yyoouurr  nneew

w  XXRRA

AYY  TT1

1  EEVVO

O2

2  m

mooddeell  rraacciinngg  ccaarr  iiss  nnoow

w  ffiinniisshheedd..

PPrroocceeeedd  ttoo  tthhee  SSeett--U

Upp  BBooookk  ttoo  aaddjjuusstt  tthhee  ssuussppeennssiioonn  ggeeoom

meettrryy..

22

Содержание T1 EVO2

Страница 1: ......

Страница 2: ...assembly steps again to ensure all parts have been used properly We have made every effort to make the instructions and Set Up Book as easy to understand as possible However if you have any difficulti...

Страница 3: ...hread in the plastic We recommended you stop tightening a screw when you feel some resistance Ask your local hobby shop for any advice Please support your local hobby shop We at XRAY Model Racing Cars...

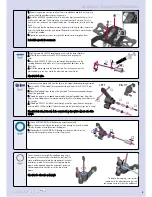
Страница 4: ...Bo oo ok k 1 1 The diff locknut is pre installed in the short diff output shaft If you need to replace the diff locknut push it out from the opposite side with the tip of a wrench Insert a new one int...

Страница 5: ...a at t a allll t th he e s st te ep ps s t to o b bu uiilld d a a s se ec co on nd d d diif ff fe er re en nt tiia all Tighten the diff until you feel some resistance To check the diff hold both wrenc...

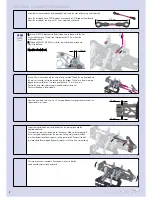
Страница 6: ...r the small ball bearings into the bulkheads as shown The plastic holder with the hole through it goes in the right bulkhead the plastic holder without the hole through it goes in the left bulkhead 2...

Страница 7: ...Install the two 309314 ST 6x12 cone washers making sure they face the right way Check the detail for the correct orientation 8 8 Install the 30 5540 one way adjustment nut Thread the nut onto the lay...

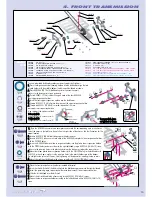
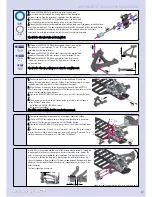
Страница 8: ...on holders A Af ft te er r a allll t th he e s sc cr re ew ws s a ar re e t tiig gh ht t c ch he ec ck k t th he e a ar rm ms s f fo or r f fr re ee e m mo ov ve em me en nt t 305310 305230 305320 305...

Страница 9: ...on both sides of the wheel axle 4 4 Install the plastic cap onto the drive shaft pin First insert one hole of the plastic cap over a pin then stretch the other hole over the other pin R Re ep pe ea a...

Страница 10: ...ads The holes in the arm are pre tapped for easy installation Turn each pivot ball only 1 2 turns at a time Position the drive shaft s plastic cap in the differential outdrive slot Continue threading...

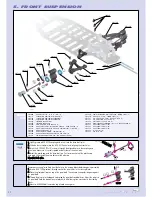
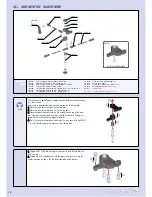
Страница 11: ...SPENSION HOLDER SET 2 1 1 30 2053 ALU LOWER SUSP HOLDER 30 2060 FRONT UPPER SUSPENSION HOLDER SET 4 8 30 2065 ALU ECCENTRIC FRONT UPPER PIVOT PIN HOLDERS 4 30 2070 ECCENTRIC NYLON HUB FOR BULKHEAD COV...

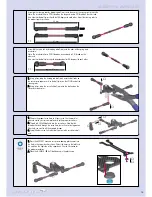
Страница 12: ...4 HEX SCREW SB M3x8 10 30 9358 HEX SCREW SB M4x8 10 30 9425 O CLIP 10 10 30 9452 PIN 2x10 10 Remove any excess plastic flash from the holes in the steering blocks before beginning assembly 1 1 Insert...

Страница 13: ...flat on a table Put one end of the snap ring into the groove on the opposite side of the wheel axle cutout and use a slotted screwdriver to work the rest of the clip into the groove R Re ep pe ea at t...

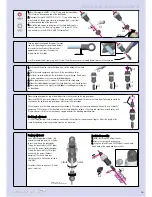
Страница 14: ...snaps into a groove on the steering post 1 1 Thread a 30 2650 ball end into the lower servo saver Be sure that the ball is on top 2 2 Thread two 30 2650 ball ends into the upper servo saver arm into...

Страница 15: ...n 2 2 Thread a 302650 ball end into the servo horn Note that the thread will extend through the servo horn but will not affect operation If desired you can file off the exposed threads 3 3 Snap the ot...

Страница 16: ...4 XRAY SPRING SET D 1 4 WHITE SOFT OPTION 30 8395 XRAY SPRING SET D 1 5 BLUE SOFT MEDIUM OPTION 30 8396 XRAY SPRING SET D 1 6 VIOLET MEDIUM OPTION 30 8397 XRAY SPRING SET D 1 7 PURPLE MEDIUM HARD OPTI...

Страница 17: ...cks fully extend the shock rod and turn it slightly to lock the piston in the shock body Turning the shock rod fully CCW aligns 4 holes in the pistons softest damping Turning the shock rod fully CW al...

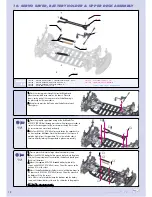
Страница 18: ...SET 30 3091 ULTRA TUNE SHOCK TOWER REAR 2 5 MM GRAPHITE 30 9333 HEX SCREW SH M3x6 10 30 9334 HEX SCREW SH M3x8 10 30 9335 HEX SCREW SH M3x10 10 30 9393 NUT M3 10 30 9452 PIN 2x10 10 30 8300 XRAY SHOCK...

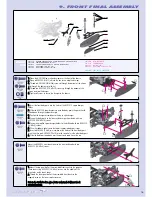
Страница 19: ...ER 2 5 MM GRAPHITE CNC MACHINED 30 1320 FRONT BODY MOUNTS SET 30 2092 SHOCK TOWER FRONT 2 5 MM FOR LARGER TIRES 30 9333 HEX SCREW SH M3x6 10 30 9345 HEX SCREW SFH M3x10 10 30 1200 NYLON BUMPER 30 1220...

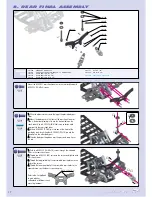
Страница 20: ...e ball ended battery holder mounts with battery straps to the chassis with 309343 SFH M3x6 screws Orient the mounts so the battery will fit in the cutout Note If there is a lot of play between the bat...

Страница 21: ...cure it with the 309350 SB M3x3 set screw 3 3 Put one 309317 S 3 2 washer each on two 309334 SH M3x8 screws Use these to mount the motor to the right rear bulkhead 4 4 Adjust the motor and the pinion...

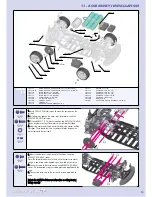
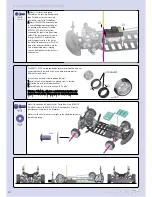
Страница 22: ...orientation of the washer in the illustration Make sure the wheel screws are very tight so the wheels do not come loose during racing The XRAY T1 EVO2 is a top competition racecar and therefore does n...

Страница 23: ...tructions correctly Over charging or charging incorrectly using inferior chargers can cause the batteries pack to become dangerously hot Regularly check the charger for potential hazards such as damag...

Отзывы: