


XR Series Wireless Arrays
3
Keep the unit away from electrical devices or appliances that generate RF noise-at least 3 to
6 feet (1 to 2 meters).
Install the Locking Slug (Optional)
If you are using a mounting kit and you wish to secure (lock) the XR-600 to its mounting plate
after it is installed on the ceiling or wall, complete the following steps:
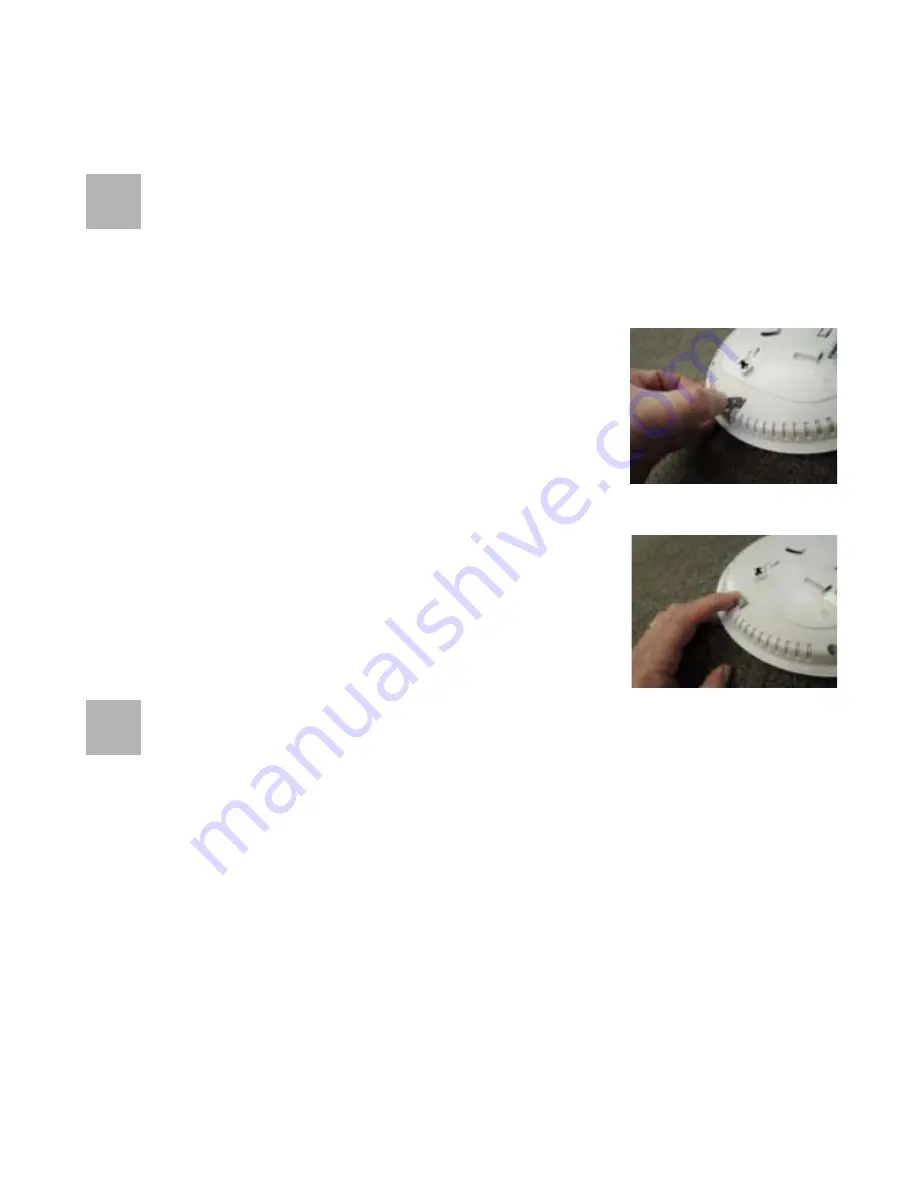
1.
Insert the locking slug (provided in the accessory kit) into
the slot on the back of the XR-600 chassis as shown here:
Note the orientation of the bubble on the locking slug. It should
be facing toward the label at the bottom of the XR-600.
2.
Push the slug in until it clicks in place.
When you attach a ceiling locking plate or wall mounting bracket to
the XR-600 mounting plate and install the XR-600, the hole in the
top of the locking slug will align with the hole on the tab in the
locking plate or wall bracket.
You can then use a customer-supplied zip tie, lock, or other locking
hardware to permanently secure the AP to the mounting plate.
Install Mounting Hardware and XR-600
The XR-600 can be installed directly on a normal ceiling or on a standard 15/16” suspended
ceiling grid as described in the next section:
4A-Direct Ceiling or Grid Mount without Mounting Plate
Use one of the optional mounting brackets if you wish a more secure mounting, the ability to
lock the AP in place, or an easy to dismount and remount installation. Kits are available for
ceiling, wall, or grid mount, as described in these sections:
4B-Suspended Ceiling Grid Mount with Mounting Plate
4C-Ceiling Mount with Mounting Plate
3
4
Содержание XR Series
Страница 14: ...XR Series Wireless Arrays 2 12 Drawings XR 600 Mounting Bracket Wall Mounting Bracket 8 ...
Страница 15: ...XR Series Wireless Arrays 3 13 Direct Mounting Template ...
Страница 17: ......


