


XR Series Wireless Arrays
8
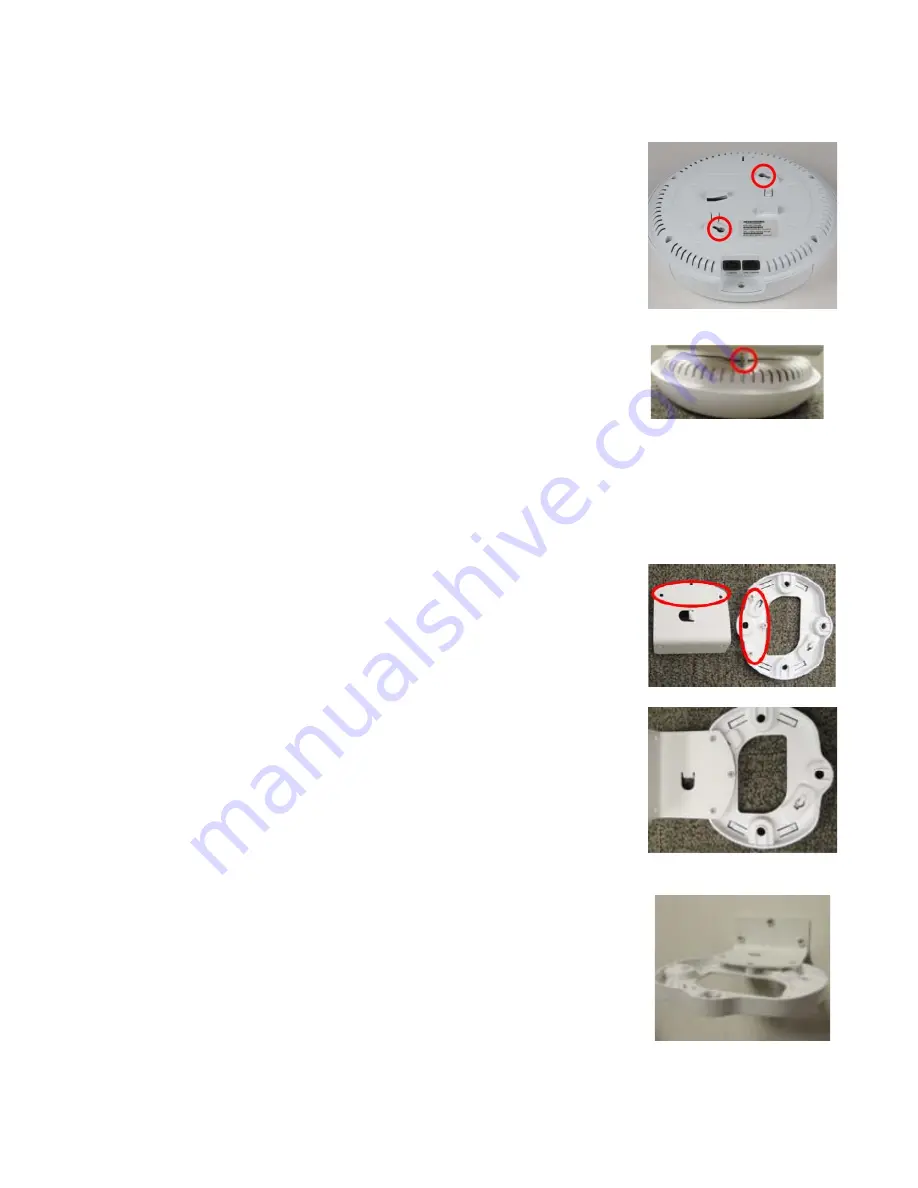
4D-Wall Mount with Bracket
7.
Align the two slots in the back of the XR-600 chassis shown
here with the corresponding tabs in the XR-600 mounting
plate.
8.
Push the XR-600 chassis up on the mounting plate tabs and
rotate the XR-600 to the right until it snaps in place.
9.
To secure the XR-600 to the mounting plate, feed a customer-
provided zip tie or other locking hardware through the hole in
the top of the locking slug and the matching hole in the
locking plate.
10.
Proceed to
“Connect the Cables” on page 9
1.
Align the three holes in the wall mount bracket over the
corresponding mounting plate holes.
NOTE: Use only the screws provided in the accessory kit. Other
screws that seem equivalent in size may damage the mounting
plate.
2.
Use the three screws provided in the accessory kit to attach the
wall mounting plate to the XR-600 mounting plate as shown
here.
3.
Use the Wall Mounting Bracket as a template and mark the
locations on the wall for the mounting holes. The bracket must
be secured to the wall in 3 places. When marking the holes,
make sure the mounting plate is level.
4.
Attach the mounting plate to the wall using a screwdriver and
user-supplied screws as shown here.
NOTE: The mounting location must be capable of supporting the
weight of the XR-600 and the mounting bracket (about 2 pounds
total).
Содержание XR Series
Страница 14: ...XR Series Wireless Arrays 2 12 Drawings XR 600 Mounting Bracket Wall Mounting Bracket 8 ...
Страница 15: ...XR Series Wireless Arrays 3 13 Direct Mounting Template ...
Страница 17: ......


