


REQUIRED TOOLS
1. Toner approved vacuum
2. A small common screwdriver
3. Phillips head screwdriver (#1)
4. Needle nose pliers
5. Spring hook
REQUIRED SUPPLIES
1. Replacement toner for use in Xerox 3600
2. Replacement chip (make sure you have the correct yield chip for your cartridge)
3. New replacement wiper blade
4. New replacement doctor blade
5. New replacement OPC drum
6. Sealing strip
7. Shipping lock
8. Drum lubricant
9. PCR cleaner
10. Conductive grease
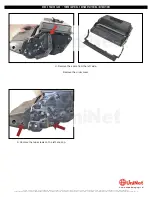
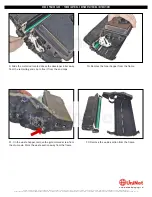
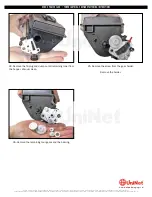
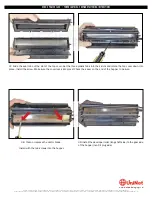
1. Remove the shipping lock (if you keep your cores stored that
way). Place the cartridge with the handle facing up and close
to you (the waste is away from you).
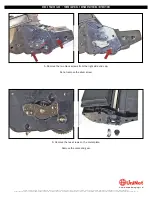
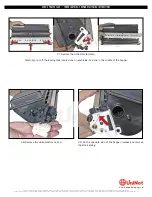
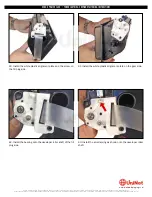
2. On the right side remove the drum cover arm.
XEROX PHASER 3600
•
TONER CARTRIDGE REMANUFACTURING INSTRUCTIONS
© 2012 UniNet Imaging Inc. All trademark names and artwork are property of their respective owners. Product brand names mentioned are intended to show compatibility only.
UniNet Imaging does not warrant downloaded information. Unauthorized sale, reproduction or distribution of this article is prohibited. For additional support, please contact [email protected]
www.
uninet
imaging.com