


Xerox
®
N60w Scanner
Maintenance
16-16
User Guide
541001
542001
543001
544001
545001
546001
547001
548001
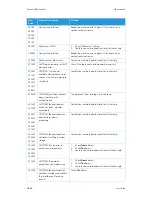
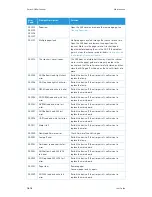
Command exceeds maximum
size of 256
Reboot the machine, and try later. If the error persists,
technical service.
541002
542002
543002
544002
545002
546002
547002
548002
The command transfer fails
Check network environment.
541003
542003
543003
544003
545003
546003
547003
548003
The command reply read fails
Check network environment.
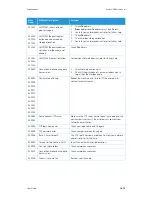
541004
548004
542004
543004
544004
545004
546004
547004
The FTP server doesn't reply
message.
Check network environment.
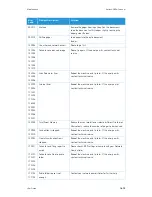
546005
File transfer fails
Check network environment.
541421
542421
543421
544421
545421
546421
548421
[421] Service not available,
closing control connection
Too many connections from this IP, contact your network
administrator.
Error
Code
Problem Description
Solution
Содержание N60w
Страница 1: ...Xerox N60w Scanner Scanner User Guide for Microsoft Windows AUGUST 2020 05 0987 000...
Страница 14: ...Xerox N60w Scanner Welcome 2 4 User Guide...
Страница 26: ...Xerox N60w Scanner LCD Buttons and Shortcuts 6 4 User Guide...
Страница 28: ...Xerox N60w Scanner Cloud 7 2 User Guide...
Страница 34: ...Xerox N60w Scanner Email 8 6 User Guide...
Страница 36: ...Xerox N60w Scanner File 9 2 User Guide...
Страница 40: ...Xerox N60w Scanner OneTouch 11 2 User Guide...
Страница 42: ...Xerox N60w Scanner Hotspot 12 2 User Guide...
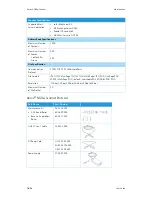
Страница 83: ...Maintenance Xerox N60w Scanner User Guide 16 25 Ethernet Cable 35 0265 000 Part Name Part Number...
Страница 84: ...Xerox N60w Scanner Maintenance 16 26 User Guide...
Страница 92: ...Xerox N60w Scanner PC Installation 17 8 User Guide...


