3 - 1 2
Operator Guide
Managing the system
•
Never place cartridges near electric motors or any other
magnetic sources that may erase data.
•
To clean a cartridge, wipe off dust, dirt, and moisture with a
lint-free cloth.
•
If you must use a cleaning solution, make sure it is formulated
for tape cartridges. Never allow the solution to touch the tape.
•
If a leader block comes off and there is no other damage, you
can use a leader block repair kit to reattach the block. You can
then use the cartridge one more time to copy the data onto a
new cartridge.
•
If a label starts to peel, replace it immediately.
•
Do not write on a label that is on a cartridge. Write a new label,
remove the old one, and replace it with the new one.
•
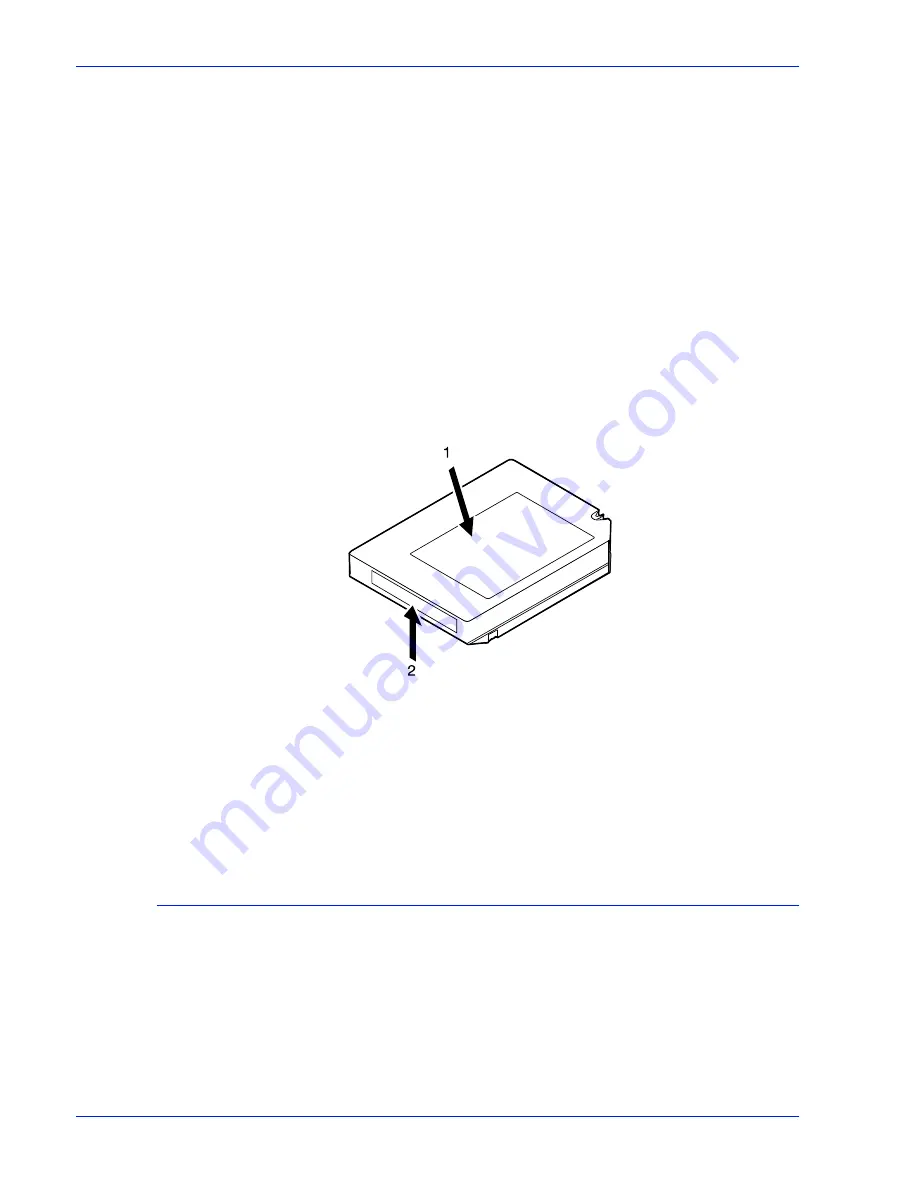
Place the two labels in the recessed areas of the cartridge as
shown below:
Figure 3-9
Placement of labels
1. Customer label on top
2. Volume/serial number label opposite side of thumbwheel
•
Write on labels with markers that do not smear.
•
Use only labels that leave no residue when removed.
Setting file protection
To make a tape read-only, turn the thumbwheel on the side of the
cartridge until a white dot appears in the window.
To enable writing to the tape, turn the thumbwheel until the dot is
not visible.
Содержание DocuPrint 100 EPS
Страница 1: ...operator Xerox DocuPrint 100 115 135 180 EPS 701P24790 April 2005 guide...
Страница 16: ...xiv Operator Guide Introduction...
Страница 54: ...1 38 Operator Guide Overview...
Страница 60: ...2 6 Operator Guide Managing the printer Figure 2 7 Rear and side guides in trays 3 4 5 and 6...
Страница 66: ...2 12 Operator Guide Managing the printer...
Страница 80: ...3 14 Operator Guide Managing the system...
Страница 121: ...Operator Guide 5 19 Troubleshooting Figure 5 4 Area 3 Figure 5 5 Area 4...
Страница 122: ...5 20 Operator Guide Troubleshooting Figure 5 6 Area 5...
Страница 123: ...Operator Guide 5 21 Troubleshooting Figure 5 7 Area 6...
Страница 124: ...5 22 Operator Guide Troubleshooting Figure 5 8 Area 7...
Страница 128: ...5 26 Operator Guide Troubleshooting Figure 5 13 Area 12 all feeder stackers Figure 5 14 Area 13...
Страница 130: ...5 28 Operator Guide Troubleshooting Figure 5 17 Area 16 Figure 5 18 Area 17...
Страница 140: ...5 38 Operator Guide Troubleshooting Figure 5 28 Hold printed sheets...
Страница 141: ...Operator Guide 5 39 Troubleshooting Figure 5 29 Paper curl chart...
Страница 154: ...A 6 Operator Guide Supplies...


