


Xerox 700 Digital Color Press User Guide
4-30
Copy
Page Layout
Off
Multiple-Up
Save
Cancel
Repeat Image
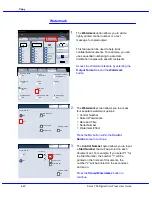
Multiple-Up
2 Up
4 Up
8 Up
Reading Order
1
2
1
2
1.2.3
1.2.3
2.2.
1.1.
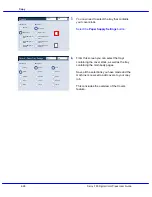
Paper Supply
Reduce / Enlarge
Output Color
Copy Output
100
Plain
100%
%
Auto%
64%
78%
129%
More...
More...
Plain
Plain
Plain
Auto Detect
Color
Black and White
More...
Dual Color
Single Color
(Red/Black)
(Red)
2 Sided Copying
Original Type
Lighten / Darken
Auto Paper Select
Quantity
Image Quality
Layout Adjustment
Output Format
Job Assembly
Copy
Auto Paper Select
1
2
3
4
1 > 1 Sided
Copy
All Services
Ready To Copy
C o p y
DocuColor 700
N e t w o r k
S c a n n in g
H o m
e
W
e b
A p p lic a t io n s
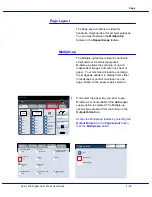
Booklet Creation
Page Layout
Image Quality
Layout
Adjustment
Output Format
Job Assembly
General
Settings
Off
1 Up
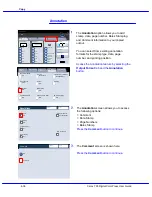
Annotation
Off
Poster
Folding
Covers
Off
Transparency Options
No Separators
No Covers
Tab Margin Shift
Off
Off
Face Up/Face Down
Off
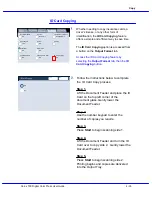
ID Card Copying
Off
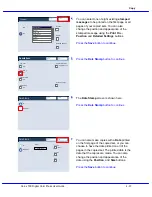
Watermark
Page Layout
Save
Cancel
Off
Multiple-Up
Repeat Image
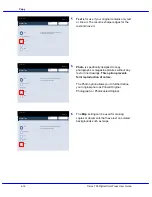
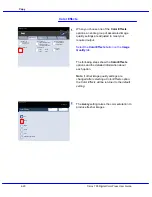
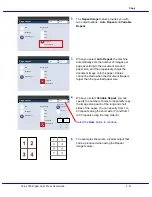
You can simply touch the number of images
you want printed on each sheet - from 2 Up to
8 Up - on the Multiple Up screen. You can also
select the Reading Order options on this
screen.
When you have made your selections you
must select Save so that you can program any
other features you may require from the control
panel.
Select the Save button to continue.
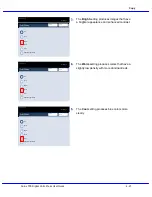
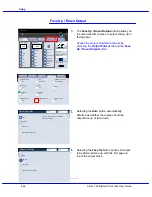
The examples shown are typical output that
can be produced when using the Multiple-up
feature.
This completes the review of the Multiple-up
feature.
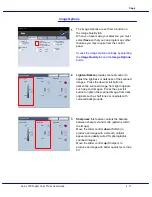
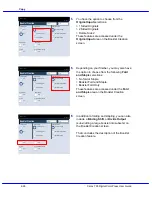
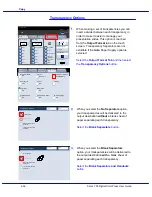
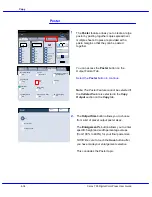
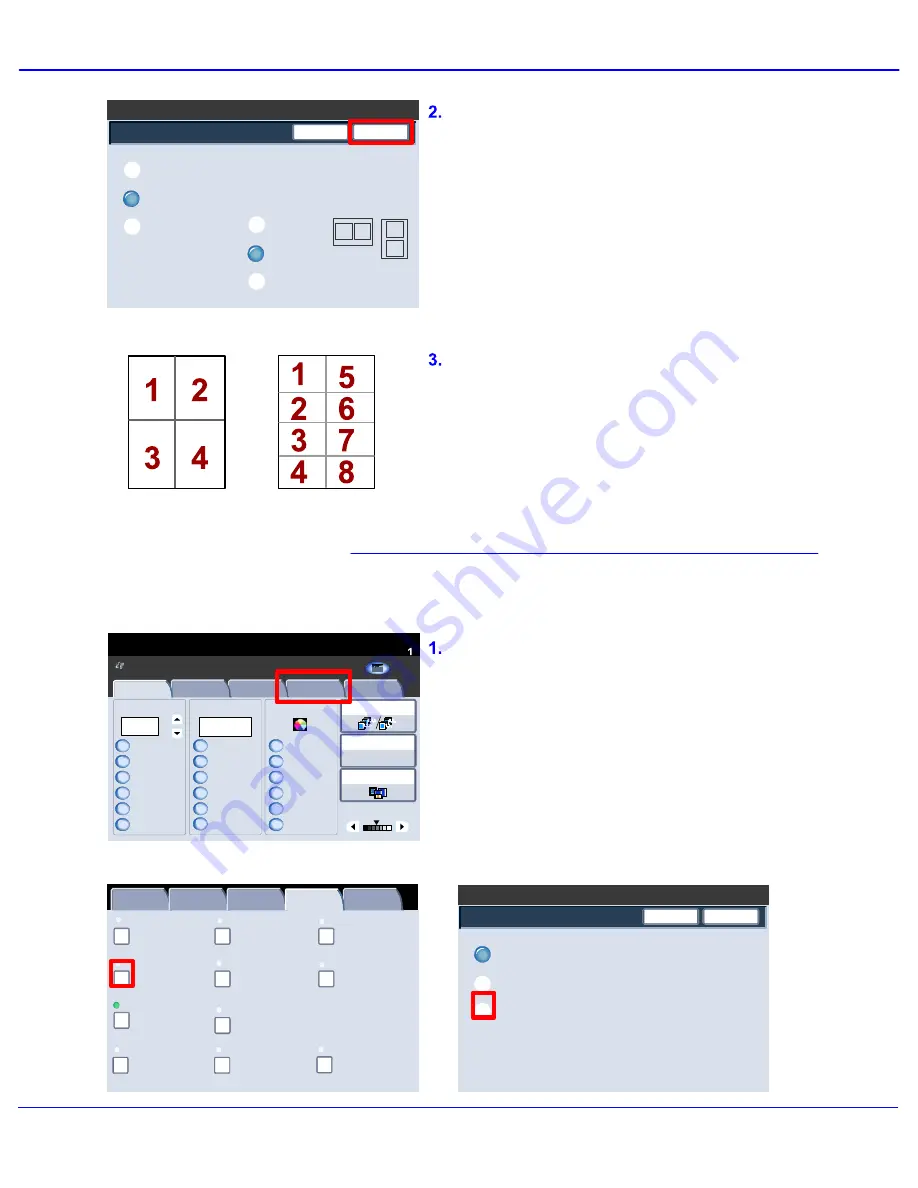
The Repeat Image feature allows you to copy
a single image up to eight times onto one
page.
Repeat Image
First select the paper tray you want to use.
Repeat Image is not available if the Auto
Paper option is selected. The Repeat Image
options are accessed from a button on the
Output Format tab.
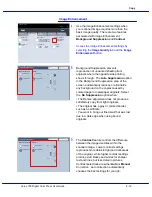
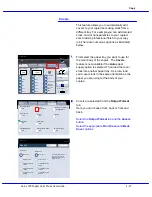
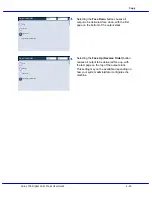
Access the Repeat Image feature by selecting
the Output Format tab, the Page Layout
button, then the Repeat Image button.
Содержание DocuMate 700
Страница 1: ...Xerox 700 Digital Color Press User Guide Version 1 0 June 2008...
Страница 42: ...Xerox 700 Digital Color Press User Guide 3 22 Paper...
Страница 110: ...Xerox 700 Digital Color Press User Guide 4 68 Copy...
Страница 126: ...Xerox 700 Digital Color Press User Guide 6 14 Machine Job Status...
Страница 150: ...Xerox 700 Digital Color Press User Guide 7 24 Maintenance...
Страница 200: ...Problem Solving Xerox 700 Digital Color Press User Guide 8 50...
Страница 208: ...Xerox 700 Digital Color Press User Guide 9 8 Specifications...
Страница 229: ......
Страница 230: ......


