5
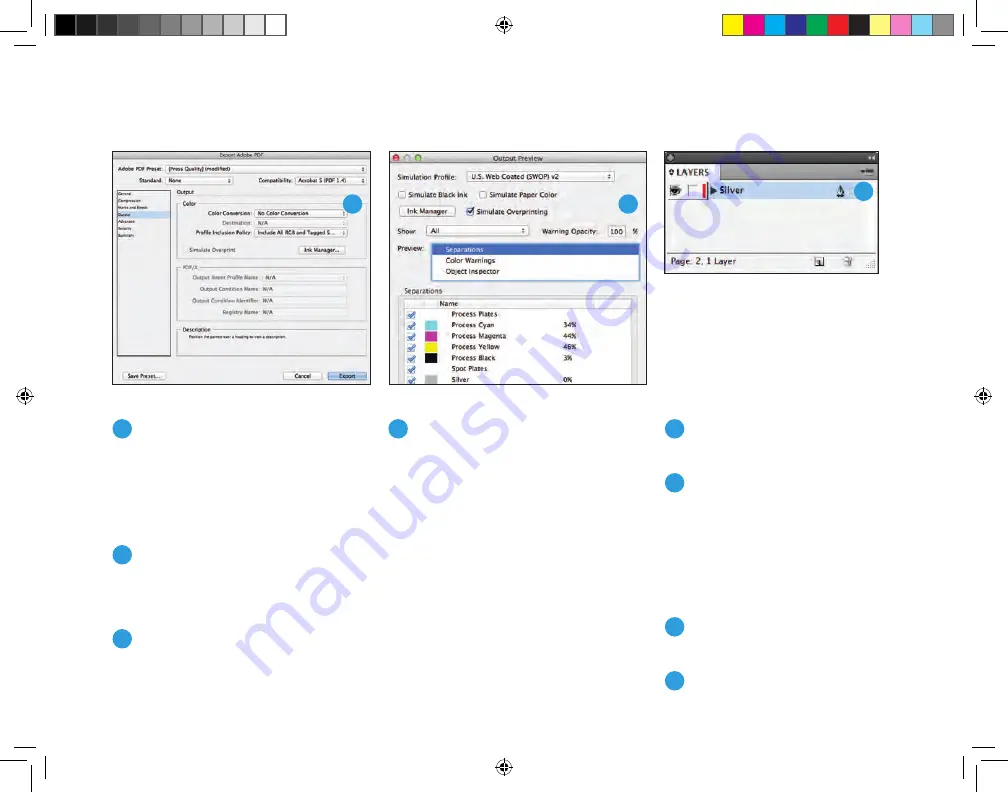
Select Output: Color > No Color
Conversion. Profile Inclusion Policy >
Include All RGB and Tagged source
CMYK Profiles. Click on Ink Manager
and make sure the box for All Spots
to Process is unchecked.
6
Click on Save Preset and name it. We
suggest Xerox
®
Digital Press Metallic.
Checking your PDF
1
Open your PDF in Adobe
®
Acrobat
®
Professional.
2
Select Advanced > Print Production
> Output Preview. Check the
selection for Simulate Overprinting.
If your file is set up correctly, all
areas designated in metallic should
be visible and on a separate layer.
If you mouse over metallic areas,
the percentage should change.
Designing for
Multi-Pass application
If you want to create the effect of
dimension with Multi-Pass Metallic
Dry Ink application, you’ll create an
additional PDF that isolates the
desired metallic objects.
1
Duplicate the final InDesign
®
file
and save as filename_multipass.
2
In the duplicated file, remove all
elements except for the objects
to be printed using the Multi-Pass
feature. You should have only
Silver
or
Gold
elements remaining, and
they should be in the same position
as the original file.
3
Create a high-res PDF of the
Multi-Pass file.
4
Provide both the original high-res
PDF and the Multi-Pass PDF
for printing.
5
2
2
19
Xerox_MetallicDryInksDesignGuide_4c_030915_SPG_FINAL.indd 19
3/9/15 11:55 AM


