Alignment and Adjustments
Service Manual 6-7
6.3 Clearing Paper Jams
The leading causes of paper jams are:
■
The tray is loaded improperly or overfilled.
■
The tray has been pulled out during a print job.
■
The front cover has been opened during a print job.
■
Paper that does not meet specifications has been used.
■
Paper that is outside of the supported size range has been used.
If a paper jam occurs, the On Line/Error LED on the control panel lights red. Find and remove any jammed paper in
the printer. If there is no paper visible, look inside the printer.
Caution
Do not use tweezers or other sharp metal tools when removing a paper jam. You can damage the toner cartridge,
fuser rollers, or potentially damage wiring leading to the potential for electric shock.
Note
If the paper tears while removing a jam, ensure that ALL fragments of paper are removed from
within the printer, otherwise jamming will still occur.
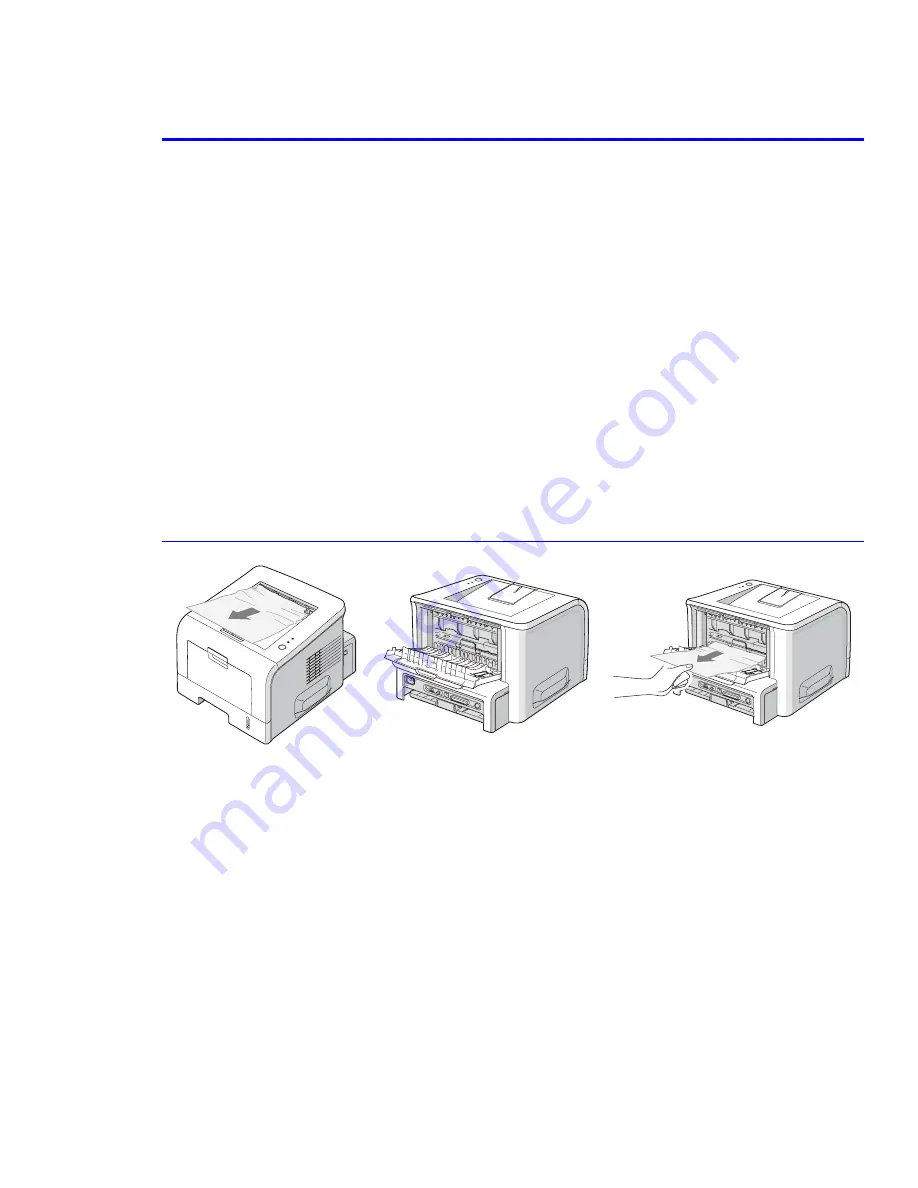
6.3.1 Jam2: Paper in the Exit Area
Warning
Paper jammed in this area is very close to the fuser and burns can occur.
1.
If the paper jams as it exits to the output tray and a long portion of the paper is visible, pull the paper straight out.
When pulling the jammed paper, if there is any resistance and the paper does not move immediately, stop pulling
and continue with the next step.
2.
Open the rear output tray.
3.
Loosen the paper if it is caught in the feed rollers, then pull the paper gently out.
Warning
Be careful when you open the rear cover as the inside of the printer is still hot.
4.
Close the rear output tray. Open and close the front cover. Printing can now resume.
Содержание 3150 - Phaser B/W Laser Printer
Страница 1: ...laser printer Phaser 3150 Service Manual ...
Страница 2: ......
Страница 14: ...Precautions 1 6 ...
Страница 22: ...Specifications 3 4 ...
Страница 38: ...Summary of Product 4 16 ...
Страница 76: ...Alignment and Adjustments 6 12 ...
Страница 94: ...Troubleshooting 7 18 ...
Страница 112: ...Parts List 8 18 ...
Страница 114: ...Block Diagram 9 2 ...
Страница 116: ...Connection Diagram 10 2 ...


