background image


Installation and Users Guide: XenData SX-10 Archive Appliance 


Page 11


Chapter 3. Installation 


3.1   Rack Mounting 


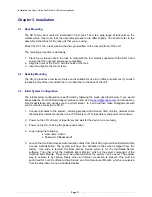
The SX-10 may be mounted in a standard 19 inch rack. There is a wide range of rack units on the 
market which may mean that the assembly procedure will differ slightly. You should refer to the 
assembly instructions for the rack unit that you are using. 
 
Mount the SX-10 in a rack location that has good airflow to the rear and front of the unit.  
 
The mounting procedure is as follows. 
 
1.  Place four retained nuts in the rack to mate with the four screws supplied with the SX-10 and 

ensure that the nuts and screws are compatible. 

2.  Align the holes of the SX-10 with the holes of the rack. 
3.  Insert and tighten the four screws. 


3.2 Desktop 

Mounting 


The SX-10 produces a low level of noise and is suitable for use in an office environment. If you wish 
to desktop mount the unit, attach the four rubber feet to the base of the unit.  


3.3   Initial System Configuration 


The initial system configuration is performed by following the steps described below. If you would 
like assistance from XenData Support, please contact us at 

[email protected]

 and schedule a 

time for assistance. We will ask you to perform steps 1 to 4 and will then make arrangements with 
you for remote access to the SX-10. 
 
1.  Connect all cables to the system, including keyboard and mouse, VGA monitor, network cable 

that provides Internet connection, the LTO drive(s) or LTO tape library and power connections. 


2.  Power on the LTO drive(s) or tape library and wait for the device to come ready. 


3.  Power on the SX-10 using the power push button. 


4.  Logon using the following: 

  User name: Admin 

 Password: XDpassword1 


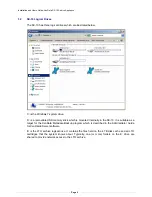
5.  Launch the XenData License Administration utility from 

Start>All programs>XenData>XenData 

License Administration

. The system will have two activation codes when shipped from the 

factory. One code is termed ‘XenData Archive Series’ which is for the XenData6 Server 
software. The other is for the ‘XenData Event Monitor’ which is the server component of the 
XenData Alert Module. These must be activated before the system can be used. The easiest 
way to activate is by clicking ‘Apply’ when an Internet connection is present. This must be 
performed for both ‘XenData Archive Series’ and ‘XenData Event Monitor’ which are selected 
from the drop-down menu as illustrated below: 
 

Содержание SX-10V2 LTO

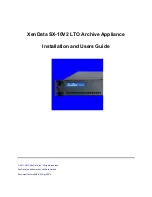
Страница 1: ...XenData SX 10V2 LTO Archive Appliance Installation and Users Guide 2011 2014 XenData Inc All rights reserved XenData is a trademark of XenData Limited Document last modified 23 April 2014...

Страница 2: ...fication 1 4 SX 10 Models 2 Control Panel and Connections 2 1 Front Panel 2 2 Rear Connections 3 Installation 3 1 Rack Mounting 3 2 Desktop Mounting 3 3 Initial System Configuration 3 4 Setting Polici...

Страница 3: ...retiring a fully functional appliance you are encouraged to transfer the functional unit to a new user thereby extending the useful life of the tape library The manufacture of all products requires t...

Страница 4: ...pean RoHS Directive 2002 95EC as long as used as provided in the Server Exception located in Section 7 of the Directive Annex Use of the products outside the scope of the Server Exception will not be...

Страница 5: ...the USB ports on the SX 10 and files may be transferred locally between the USB device and LTO This means that the archive can be used simultaneously by multiple standard applications including those...

Страница 6: ...which is mounted internally in the SX 10 It is suitable as a target for the XenData Metadata Backup program which is described in the Administrator Guide for XenData6 Server software E is the LTO arc...

Страница 7: ...11 lbs 5 KG 1 GB 109 Bytes 1 TB 1012 Bytes 1 4 SX 10 Models The SX 10V2 is available in 16 standard models The SX 10 20x models have two 6 Gb s SAS ports for direct connection to the LTO library Model...

Страница 8: ...p to 25 LTO slots SX 10 215 FC One tape library with one LTO drive and up to 50 LTO slots SX 10 216 FC One tape library with two LTO drives and up to 50 LTO slots SX 10 217 FC One tape library with on...

Страница 9: ...reboot should not be performed using this button rather the system should be rebooted using the restart option from the Windows 7 Start menu Power Indicator LED This indicates that power is being supp...

Страница 10: ...B Connections Two USB 2 0 connections are provided VGA Connection This connects to a VGA computer monitor 1GigE Ports Two network ports are provided that support 1000BASE T 100 BASE TX and 10BASE T ne...

Страница 11: ...ke assistance from XenData Support please contact us at support xendata com and schedule a time for assistance We will ask you to perform steps 1 to 4 and will then make arrangements with you for remo...

Страница 12: ...sed Detailed step by step instructions for each of the supported LTO devices are available on the XenData web site at www xendata com support SX 10 Click on Installation Information for Specific Tape...

Страница 13: ...low 1 Ensure that all LTO drive write and read operations have completed 2 Power off the SX 10 using Shut down from the Start menu For a system with a tape library please follow the procedure describe...

Отзывы: