27
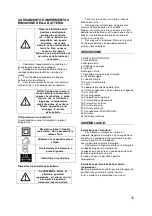
Pictograms on charger
The following pictograms have been applied to the
charger:
"Class II - The machine is double
insulated; Earthing wire is
therefore not necessary
Only use the battery charger
indoors.
Fail-safe isolating transformer.
Cut-out switch.
Removal / insertion of battery
WARNING: Before making any
adjustments ensure the tool is
switched off or remove the
battery pack.
Hold the tool with one hand and the battery
pack (10) with the other.
To install: push and slide battery pack into
battery port, make sure the release latch on the
rear side of the battery snaps into place and battery
is secure before beginning operation.
To remove: Press the battery release latch and
pull the battery pack out at the same time.
DESCRIPTION
1. Battery pack (Not included)
2. Electric wire
3. Right grip
4. The tube of handle
5. Strap
6. Left handle
7. Cross connector for handle
8. Locking screw
9. Aluminum tube
10. Motor housing
11. Blade
12. Blade protective cover
13. Hex key& hexagon socket wrench
14. Thread cassette
15. Cord of grass trimmer
16. Upper blade retainer
17. Positioning button
18. Safety button
19. Start button
20. Locking button
21. Charger (Not included)
22. Button
23. Indicator light
ASSEMBLY
Bike handle installation
Place handle between handle clamp and
handle holder. Adjust the handle to an angle that
provides a comfortable working position and then
tighten four screws so that the handle assembly
cannot move.
Place grip cover the handle and grip hold.
Adjust the handle to an angle that provides a
comfortable working position and then tighten one
screw and one nut so that the grip assembly cannot
move.
Installation protection guard
Fit the correct trimmer guard for use with the
motor
,
then tighten three screws so that the
guard assembly cannot move.
Installing the harness
Adjust the harness hanger in a comfortable
position
Buckle the harness at the hanger
Caution: Always use the harness when using the
débrous¬sailleuse.
Fasten the harness once you have started the
engine and the engine is idling. Stop the engine
before removing the harness.
To deal with any eventuality, the use of a harness:
train yourself to know how to get out of the machine
quickly. During this exercise, do not throw the
machine on the ground, to avoid the risk of
damaging it.
Detachment
In an emergency, pull the red tab, then remove the
machine by pulling it towards you. Be especially
careful to maintain control of the machine at this
stage. Do not allow the machine to be deflected
towards you or to anyone near the workplace.
WARNING :
Losing control of the machine may cause
serious bodily injury or DEATH.
Содержание XPDCB40LIBL-2B
Страница 2: ...2...
Страница 3: ...3...
Страница 4: ...4 ACCESSOIRES FOURNIS BIJGELEVERDE TOEBEHOREN SUPPLIED ACCESSORIES ACCESSORI FORNITI x1 x1 x1 x1...
Страница 40: ...40...


