background image

04

www.we-online.com

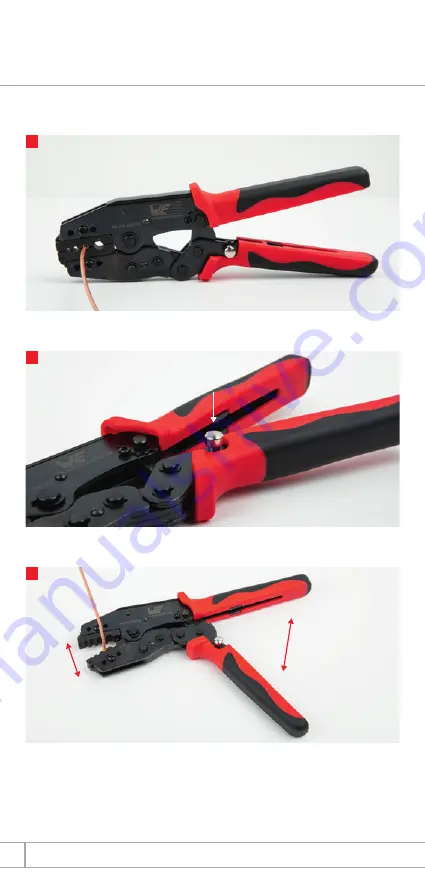
For quick release the lock:

 The lock will open automatically at the end of the crimping process. If 

the crimping process is interrupted, the handles of the tool must be pressed together a little and the 
lock pushed with an appropriate tool (e.g. scew driver).

A

C

Built in quick release (lock)

Press the silver button at lower handle, in order to release the crimp head.

Release completed.

For the moments that is necessary to release to crimp head.

B

open

*click*

press

Содержание 600 600

Страница 1: ...Read these instructions completely before using this tool Crimp Tool PN 600 600 Crimp Head PN 600 600 601 01 Crimp Head Die Size 1 128 151 213 Crimp Tool Basic Information ...

Страница 2: ...tices It must be properly maintained undamaged and in good working order Unauthorized modification is pro hibited and voids the manufacturer s warranty Always wear safety glasses with side shields and other appropriate personal protective equipment MISUSE MAY CAUSE PERSONAL INJURY KEEP OUT OF REACH OF CHILDREN NEVER INSERT FINGERS BETWEEN THE JAWS OF THE TOOL 1 Crimp Steps Make sure ferrule is wel...

Страница 3: ...ease a set of dies two setscrews for the dies and positioning locator The crimping force can be adjusted refer to Adjustment of the Jaw Spread The ratchet has six steps It automatically opens after the sixth step has been passed principle of compulsory completion To prevent dama ge to the crimping die or connector the built in quick release lock enables the tool to be ope ned prematurely in the ev...

Страница 4: ...ss is interrupted the handles of the tool must be pressed together a little and the lock pushed with an appropriate tool e g scew driver A C Built in quick release lock Press the silver button at lower handle in order to release the crimp head Release completed For the moments that is necessary to release to crimp head B open click press ...

Страница 5: ...05 www we online com Insert crimp head manually Match middle screw hole Place And screw 1 2 3 4 Crimp Head Assembly Unscrew Remove screw Slowly remove crimp head manually 1 2 3 Crimp Head Replacement ...

Страница 6: ...e it is in a clean and proper operating state Always remove crimping residue Protect the joints from soiling and apply light machine oil to them re gularly Check the bolts regularly to ensure that the lock washers and headless screw securing the adjustment dial are intact and tight All other maintenance should be performed by the manu facturer www we online com V1 0 2021 DIENECK ARPRINZEN 99990000...

Отзывы: