background image

[  Home  |   User's Guide Archive  |   NetReach Products  |   DataReach Products  |   PollCat Products  |   Contact WTI  ]

WTI Part No. 13027

Rev. B 

CMS-16

Console Management Switch

User's Guide


5 Sterling, Irvine, California  92618-2517   USA

U.S. & Canada:  (800) 854-7226

Phone:  (949) 586-9950

Fax:  (949) 583-9514

www.wti.com

Содержание CMS-16

Страница 1: ...oducts DataReach Products PollCat Products Contact WTI WTI Part No 13027 Rev B CMS 16 Console Management Switch User s Guide 5 Sterling Irvine California 92618 2517 USA U S Canada 800 854 7226 Phone 949 586 9950 Fax 949 583 9514 www wti com ...

Страница 2: ...ht gemessen nachschub Gebrauch nur drei draht schnur welche ist verschaffen mit das einheit Connect unità solo a un proper misurata fornirle Adoperano solo tre wire spago quale è fornii con gli unità Battery Replacement This device may include a lithium battery powered circuit If the battery is incorrectly replaced or mistreated there is a danger of explosion and a risk of personal injury Do not a...

Страница 3: ...ntilation Slots in the instrument cover are provided to allow ventilation for heat dissipation To ensure safe reliable operation these openings must not be covered or blocked Disconnect Power If any of the following events are noted immediately disconnect the unit from the outlet and contact qualified service personnel If the power cord becomes frayed or damaged If liquid has been spilled into the...

Страница 4: ... The Supervisor Password 5 3 2 The Port Passwords 5 4 Defining the Site ID and Supervisor Password 5 5 Port Configuration 5 5 1 Configuration Conventions 5 5 2 Port Modes 5 5 3 RS232 Port Configuration Menus 5 5 4 Network Port Configuration Menu 5 5 5 Implementing IP Security 5 6 Copying Parameters to All Ports 5 7 Save User Selected Parameters 6 The Status Screens 6 1 The Port Status Screen S 6 2...

Страница 5: ...ce Guide 10 1 Command Conventions 10 2 Command Response 10 3 Command Summary 10 4 Command Set Appendices A RS232 Port Interface B Specifications C Customer Service List of Figures 2 1 Instrument Front Panel 2 2 Instrument Back Panel 3 1 The Supervisor Level Help Screen 3 2 The Port Status Screen Defaults Shown 4 1 Terminal Block Assembly DC Units Only 4 2 CMS Application Example Not to Scale 5 1 P...

Страница 6: ...n Configuration of the CMS is simple A menuing system is used to select parameters and enable options The CMS can easily adapt to the requirements of almost any data communications application Limited Command Access The CMS is ideal for situations that require limited access to important commands Two security levels allow each port to function as a Supervisor Port or User Port depending on the pas...

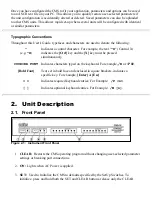
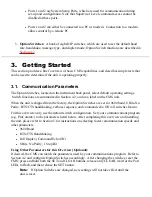
Страница 7: ...text X Control X indicates the Ctrl key and the X key must be pressed simultaneously COURIER FONT Indicates characters typed on the keyboard For example E or P 02 Bold Font Text set in bold face and enclosed in square brackets indicates a specific key For example Enter or Esc Indicates required keyboard entries For Example P n Indicates optional keyboard entries For Example W n 2 Unit Description ...

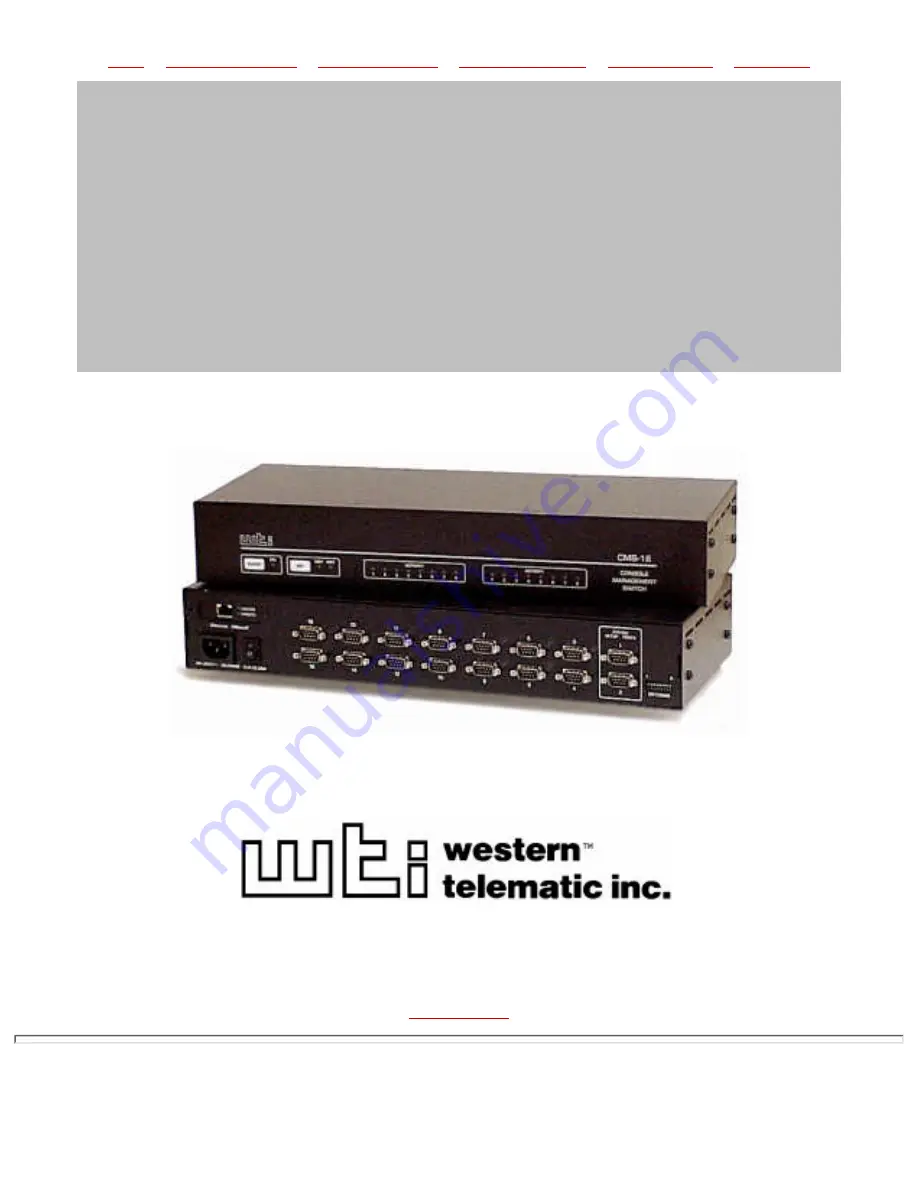
Страница 8: ...port The CMS 16 includes sixteen Activity LEDs and the CMS 8 includes eight Activity LEDs 6 2 2 Back Panel Figure 2 2 Instrument Back Panel Network Port An RJ45 Ethernet port for connection to your TCP IP network To communicate via network you must first specify the IP Address Subnet Mask and Gateway Address as described in Section 5 5 4 1 Power Cable Receptacle 2 Power Switch 3 RS232 PORTS For co...

Страница 9: ... the CMS unit When the unit is shipped from the factory the Option Switches are set for 9600 baud 8 Bits No Parity RTS CTS handshaking verbose response and command echo ON all switches Down For this overview only use the default switch configuration Set your communications program e g ProComm to the parameters listed below After completing this overview and installing the unit please refer to Sect...

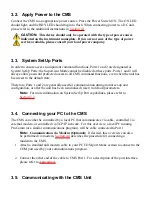
Страница 10: ...Therefore Ports 1 and 2 are generally used for communication during initial set up and configuration or after the unit has been reinitialized reset to default parameters Note For more information on System SetUp Port capabilities please refer to Section 5 2 3 4 Connecting your PC to the CMS The CMS can either be controlled by a local PC that communicates via cable controlled via external modem or ...

Страница 11: ...sfully accessed the Command Mode If the CMS prompt is not displayed this may indicate a communication problem Check the following Cable Connection Check the connection between the CMS and the PC Make certain the cable connectors are firmly seated Communication Parameters Make certain the CMS and ProComm are using the same baud rate b 3 Help Screen Type H Enter to display the Supervisor Level Help ...

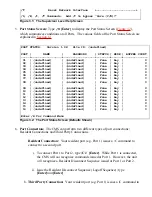
Страница 12: ... undefined undefined Free Any 0 11 undefined undefined Free Any 0 12 undefined undefined Free Any 0 13 undefined undefined Free Any 0 14 undefined undefined Free Any 0 15 undefined undefined Free Any 0 16 undefined undefined Free Any 0 Enter H for Command Menu Figure 3 2 The Port Status Screen Defaults Shown 5 Port Connection The CMS can perform two different types of port connections Resident Con...

Страница 13: ...ree iv Site I D Message If desired the Site I D Message can be used to indicate the name or location of the unit Note that the Site I D cannot include double quotes Type F and press Enter When the System Parameters menu appears type 1 and press Enter A prompt will appear Key in the desired text up to 32 characters and press Enter To display the Site I D type J Enter b Note that the Site I D will b...

Страница 14: ...nect two DC power sources where the second source functions as a backup When connecting the CMS to your DC power source first remove the clear protective cover from the DC terminal block attach the wires from the 48V DC power source to the screw terminals connect your ground line to the labeled ground screw and then replace the protective cover Figure 4 1 Terminal Block Assembly DC Units Only 4 2 ...

Страница 15: ... Baud Rate Sw1 Sw2 Sw3 Option Switches one through three select the default baud rate for all CMS RS232 Ports The default baud rate must match the rate your control device will use when communicating with the CMS If the control device will communicate via modem select a default baud rate that is compatible with the modem SW Default Baud Rate 1 2 3 Down Down Down 9600 Up Down Down 300 Down Up Down ...

Страница 16: ...ric Factory Setting 4 2 4 Default Command Echo Sw7 Switch Seven enables or disables the Command Echo When enabled characters sent to the CMS will be echoed back to the control device Switch 7 Default Command Echo Down Enable Up Disable Factory Setting 4 3 Initialize Unit to Default Settings If Option Switch settings are changed new parameters will not take effect until the CMS is initialized Cauti...

Страница 17: ...us Screen shows data stored in the buffer for the desired port type E xx Enter to clear the buffer where xx is the desired port number Note that cleared data cannot be recovered b 3 Use an appropriate DB9 cable to connect the RS232 serial port on the device to a DB9 port on the CMS External Modems and other DCE Devices Use a standard serial modem cable PCs and other DTE Devices Use a standard null...

Страница 18: ...ts that are allowed by their Port password Port 1 System SetUp Port This port has been left open in order to permit on site service personnel to access the Command Mode without disrupting other ports Since Port 1 is a System SetUp Port the service tech is allowed password protected access to Supervisor Level commands and is able to connect to any port change configuration or display unit status Po...

Страница 19: ...dems and ports connected to devices such as file servers or archives This would allow remote users to dial in and access a specific file server or archive after entering a valid Port Password at log in 5 Configuration 5 1 Access to the CMS Command Mode When the CMS Command Mode is active commands can be invoked to select parameters and connect or disconnect ports Note Command Mode cannot be access...

Страница 20: ...192 1 1 1 Enter i Note that if the Telnet connection to the CMS is refused this probably means that the network port is busy or that the IP Security feature has denied the connection ii If the Supervisor Password has been defined the password prompt will be displayed Key in your Supervisor or Port password and press Enter The CMS will display the Port Status Screen and then the CMS prompt will app...

Страница 21: ...o all ports and port access and configuration functions will not be password protected If you wish to restrict user ports from changing CMS configuration parameters or connecting to restricted ports the Supervisor Password must be defined When the Supervisor Password is defined the CMS will display a password prompt when you attempt to access the command mode Any RS232 port that has not been assig...

Страница 22: ...and a User Port depending on which password is entered at the login prompt However if you wish to prevent a port from being able to access the Supervisor Mode at all even with the Supervisor Password the Supervisor Mode can be disabled at the RS232 Ports and the Network Port using the Port Configuration menus as described in Section 5 5 Note however that the Supervisor Mode cannot be disabled at P...

Страница 23: ...wn your Supervisor Password If the password is lost or forgotten you will not be able to access Supervisor Level commands unless you initialize the unit and clear all parameters as described in Section 4 3 5 5 Port Configuration 5 5 1 Configuration Conventions When responding to prompts invoking commands and selecting items from the port configuration menus note the following To select an item fro...

Страница 24: ...de Passive Mode Ports can be connected by accessing Command Mode from a free Any to Any or Modem Mode port and invoking the C command see Section 7 1 1 The Passive Mode is not available to Ports 1 or 2 or the Network Port Buffer Mode Allows collection and storage of data received from connected devices Collected data can be retrieved by accessing Command Mode from a free Any to Any or Modem Mode P...

Страница 25: ... available in the Supervisor Mode b 2 PORT PARAMETERS 02 1 Port Name undefined 2 Password undefined 3 Baud Rate 9600 4 Bits Parity 8 None 5 Stop Bits 1 6 Handshake Mode CTS RTS 7 Port Mode Any to Any 74 DTR Output Pulse 8 Supervisor Mode Permit 9 Logoff Character 10 Sequence Disconnect Three Characters 11 Timeout Disconnect Off 12 Response Type Verbose 13 Command Echo On 14 Accept Break Yes Enter ...

Страница 26: ...Any Passive or Buffer Mode is selected the unit will display the DTR Output prompt as shown in Figure 5 1 The DTR Output prompt is not displayed when Modem Mode is selected 74 DTR Output Determines how the DTR line will react when this port disconnects The DTR line can be held low held high or pulsed for 0 5 seconds and then held high In the default state the DTR line will pulse for 0 5 seconds an...

Страница 27: ...enabled Permit and the valid Supervisor Password is entered the port will be allowed to invoke Supervisor Level commands If this item is disabled Deny the port may not enter Supervisor Mode even when the Supervisor Password is entered Default Permit 9 Logoff Character Defines the Logoff Character for this port The Logoff Character determines the command sequence that must be issued at this port in...

Страница 28: ...t is set for Any to Any Mode Passive Mode or Buffer Mode the default setting for this item is OFF When the port is set for Modem Mode the default setting for this item is 15 minutes 12 Response Type Selects the type of messages that this port will send in response to commands The user can select Verbose English Text Terse Numeric Abbreviation or Quiet Mode No Response Default Verbose 13 Command Ec...

Страница 29: ...ress for the CMS unit Type 1 press Enter and follow the instructions in the submenu Default undefined 1 Subnet Mask Defines the Subnet Mask for the CMS unit Type 2 press Enter and follow the instructions in the submenu Default undefined 2 Gateway Address Defines the Gateway Address for the CMS unit Type 3 press Enter and follow the instructions in the submenu Default undefined 3 IP Security Sets u...

Страница 30: ...onnection The One Character Disconnect is intended for situations where the destination port should not receive the disconnect command When the Three Character format is selected the disconnect sequence will pass through to the destination port prior to breaking the connection When Three Character format is selected the Resident Disconnect uses the format Enter LLL Enter where L is the selected Lo...

Страница 31: ...he default state the CMS will allow all IP addresses to Telnet to the unit Access the Network Parameters menu as described in Section 5 5 4 Note that the Network Parameters menu is only available in Supervisor Mode 1 When the Network Parameters menu appears type 4 and press Enter to access the IP Security menu Figure 5 4 IP SECURITY 1 Security Mask 1 undefined 2 Mask 1 Action Permit 3 Security Mas...

Страница 32: ...sk 1 Action Deny Security Mask 2 192 255 255 255 Mask 2 Action Permit Since 255 is a wild card Mask 1 blocks all IP addresses Mask 2 then grants access to all addresses that begin with 192 Example 3 Allow access only by addresses that begin with 192 deny access to 192 1 1 5 Security Mask 1 255 255 255 255 Mask 1 Action Deny Security Mask 2 192 255 255 255 Mask 2 Action Permit Security Mask 3 192 1...

Страница 33: ...m to all ports Note The CP command will not copy parameters to the Network Port The CP command is only available in Supervisor Mode The Copy Port Parameters Menu will not display the Port Password This field will read either undefined or defined depending upon whether or not the Port Password has been specified To select common parameters for all CMS RS 232 ports proceed as follows Access the CMS ...

Страница 34: ...al parameters if you wish to clear the CP menu and start again type dash and press Enter the menu will be reset 4 Copy Parameters When you have finished selecting parameters press Esc to copy the selected parameters to all CMS RS 232 Ports and exit from the Copy Port Parameters menu 5 5 7 Save User Selected Parameters Although this step is optional it is strongly recommended to save all user defin...

Страница 35: ...1 02 Site ID undefined PORT NAME PASSWORD STATUS MODE BUFFER COUNT 01 undefined undefined Free Any 0 02 undefined undefined Free Any 0 03 undefined undefined Free Any 0 04 undefined undefined Free Any 0 05 undefined undefined Free Any 0 06 undefined undefined Free Any 0 07 undefined undefined Free Any 0 08 undefined undefined Free Any 0 09 undefined undefined Free Any 0 10 undefined undefined Free...

Страница 36: ...ics Screen will display only the status of those ports that share the same Port Password that was entered at login Ports that are protected by other passwords will not be displayed PORT DIAGNOSTICS Version 1 02 Site ID undefined PORT NAME STATUS BAUD COM HS MODE BUF CTS 01 undefined Free 9600 8N1 RTS Any 0 H 02 undefined Free 9600 8N1 RTS Any 0 L 03 undefined Free 9600 8N1 RTS Any 0 L 04 undefined...

Страница 37: ... Bits selected for each port For example 8N1 indicates Eight data bits No parity and One stop bit HS The handshaking flow control mode for each port Mode The user selected Port Mode This column will read Any Any to Any Modem Passive or Buffer depending on the configuration selected for each port BUF Lists the amount of data in bytes currently stored in the buffer for this port CTS The High Low sta...

Страница 38: ...ort Telnet Connection This item will read Yes when a remote user is connected to the Network Port via telnet Port Connection The connect status of the Network Port When the Network Port is connected to an RS232 port this item will list the number of the RS232 port If the Network port is not connected to another port this item will read Free Buffer Count Lists the amount of data in bytes stored in ...

Страница 39: ...s Screens offer the option to either display or suppress the Port Passwords Normally when the W command is invoked the Password field will read either defined or undefined depending upon whether or not the password for that port has been specified To display the Port Parameters Screen with the Port Password type WP followed by the desired port number and then press Enter Note that the WP command o...

Страница 40: ...ected devices 7 1 1 1 Connecting Ports Two different types of connections can be made between CMS ports Resident Connections and Third Party Connections Resident Connections Your resident port issues a C command to connect to a second port For example Port 4 issues the C command to connect to Port 5 Third Party Connections Supervisor Mode Only Your resident port issues a C command to create a conn...

Страница 41: ... connect Port 3 to the Network Port When the C command specifies the port name it is only necessary to enter enough letters to differentiate the desired port from other ports Type an asterisk to represent the remaining characters in the port name For example to connect your resident port to a port named SALES the connect command can be invoked as C S providing no other port names begin with the le...

Страница 42: ...r Resident Port is Port 1 a Third Party Disconnect would be used to disconnect Port 3 from Port 4 The D command uses the format D xx XX Enter where xx and XX are the numbers of the ports that you wish to disconnect if an N is entered the command will disconnect the Network Port The D Disconnect command can only be invoked by a port with access to Supervisor Level commands b The D command can speci...

Страница 43: ...For example to configure Port 4 type P 4 Enter 2 From the Port Configuration Menu select item 1 to define the Port Name 3 Repeat steps 2 and 3 above to assign identical names to the other ports in the Hunt Group For example a series of ports in a group could all be named SERVER 4 To connect to the next available port in the hunt group invoke the C command using the port name to specify the desired...

Страница 44: ...s display status and etc Passive Mode Ports can be connected by accessing the Command Mode from a free Any to Any Mode or Modem Mode Port and invoking the Third Party Connect or Resident Connect Command as described in Section 7 1 1 2 Passive Mode ports will not buffer data except during baud rate conversion Note A Passive Mode Port is not allowed to access the Command Mode In order to ensure supe...

Страница 45: ...e which reads Connected xx Buffer Empty where xx is the port number If the buffer contains data the CMS will display a prompt that offers four options Next Screen To scroll through data one screen at a time press the Space bar Each time the space bar is pressed the next full screen of data will be sent Scroll All To send all data without pausing press 1 Skip Connect To connect to the buffer port w...

Страница 46: ... will display three additional prompts which allow the user to re define the modem reset string initialization string and hang up string When the Modem Mode is selected for a port with Supervisor Level command access the Supervisor Password should be defined This will discourage unauthorized access to higher command functions When a call is received the unit will prompt the caller to enter a passw...

Страница 47: ... prompt you to configure your terminal emulation program to receive an ASCII download Set your terminal emulation program to receive an ASCII format download and the specify a name for a file that will receive the saved parameters e g CMS PAR 2 When the terminal emulation program is ready to receive the file return to the CMS Save Parameter File menu and press Enter to proceed with the download CM...

Страница 48: ... CMS unit Updates can be uploaded via Setup Ports One and Two or via the Network Port Note All other ports will be disabled during the firmware upgrade procedure Obtain the update file Firmware modifications can either be mailed to the customer on a 3 5 diskette or downloaded from WTI via modem Place the diskette in your diskette drive and or copy the file to your hard drive 1 Access the CMS comma...

Страница 49: ...e new firmware from data flash to program flash memory calculate and store the new checksum and reboot Do not attempt to reconnect to the CMS until the RDY indicator blinks to indicate the process is complete Abort To abort the procedure type 2 and press Enter b 5 Incomplete Upload If the upload is interrupted times out or if the file is corrupted during transfer the CMS will display a screen whic...

Страница 50: ...r Key All commands are invoked by pressing Enter Command Mode CMS Ports will only recognize commands when the Command Mode has been activated The Command Mode can be accessed from a free Any to Any or Modem Mode Port To access the Command Mode proceed as described in Section 5 1 Connected Ports When two ports are connected most CMS commands will not be recognized by either of the connected ports T...

Страница 51: ...ted B Enter Password C Invalid Password D RAM Test Failed at E Inactivity Timeout Disconnected F Data in Buffer from Previous Connection Re Enter Logoff Sequence to Purge Buffer G Asleep These verbose Response Messages include additional information not provided by terse Response Messages 10 3 Command Summary Function Command Syntax Command Availability Supervisor User Enter Command Mode Enter X X...

Страница 52: ...Save Parameters U Enter X Upgrade Firmware UF Enter X 1 Supervisor Mode displays parameters for all ports User Mode only displays parameters for the ports allowed by the Port Password 2 To display Port Passwords include the P Option Supervisor Only 3 A port with User command capability can only view its own parameters A User Port cannot view parameters for other ports 4 A User Port cannot perform ...

Страница 53: ...Screen will be displayed followed by the CMS command prompt Enter Enter Resident Disconnect Sequence The Resident Disconnect Sequence is issued to disconnect your resident port from another port For example if you are communicating via Port 3 and Port 3 is connected to Port 4 the Resident Disconnect Sequence would be used to disconnect Port 3 from Port 4 Although the default Resident Disconnect Se...

Страница 54: ...d to connect to all other ports Availability Supervisor User Format C x x Enter Where x is the number or name of the port s to be connected Response Verbose Connected xx when a Resident Connection is initiated the CMS will also display the currently selected Resident Disconnect Sequence for your port Terse 1 CP Copy RS232 Port Parameters Allows quick set up when all CMS RS232 ports will be configu...

Страница 55: ...mmands D Y 2 Enter or D Y 3 Enter E Erase Buffer Erases data from the buffer for a specified port or several ports Note that erased data cannot be recovered Availability Supervisor Only Format E Y x x Enter Where x Is the number or name of the port buffer s to be cleared To erase buffers for all ports enter an asterisk Y Optional Suppresses the SURE Y N prompt Response Verbose Are You Sure y n if ...

Страница 56: ...Displays Help Screen Note that the User Level Help Screen does not include Supervisor Level Commands I Default and Test Tests internal memory and initializes the unit with the default parameters specified by the Option Switches Caution When I is invoked the CMS will revert to the parameters specified by the Option Switches Command selected parameters will be lost Availability Supervisor Only Forma...

Страница 57: ... or name of the port to be configured If the port number or name is not specified the CMS will display the configuration menu for your resident port Response The Port Parameters Menu is displayed S Display Port Status Displays the Port Status Screen which lists current conditions and parameters for all ports Normally the Port Status Screen will not display Port Passwords the Password column will r...

Страница 58: ...etwork Port For more information on the Network Status Screen please refer to Section 6 3 Availability Supervisor Only Format SN Enter Response Displays Network Status Screen T Reset Network Port Resets the NIC card and breaks the network connection to the unit Note that when this command is invoked the network connection will be reset without warning and must then be re established in order to co...

Страница 59: ...option can be used to display the password for the target port For more information please refer to Section 6 4 Availability Supervisor User Format W P x Enter Where P When the P option is included e g WP 5 the Port Parameters screen will list the password for each port if defined Supervisor Mode Only x Is the port number or name To display parameters for the Network Port enter an N If the x argum...

Страница 60: ...input at the other end If neither port is set for Modem Mode DTR output is held high active b 1 When not connected If the port is set for Modem Mode upon disconnect DTR output is pulsed for 0 5 seconds and then held high If the port is not set for Modem Mode DTR output is controlled by the DTR Output option Parameters Menu Option 74 Upon disconnect Option 74 allows DTR output to be held low held h...

Страница 61: ...hrough 16 Temperature 0 C to 45 C operating Power AC Version IEC 32 Inlet 115 230 VAC 50 60 Hz 5 watts DC Version Terminal Strip 6 32 48 VDC 0 2 Amp Max Size 2 8 x 17 x 6 8 H x W x D Weight 8 lbs shipping weight Humidity 10 to 90 RH Non Condensing Venting Side vents are used to dissipate heat generated within the unit When mounting the unit in an equipment rack make certain to allow adequate clear...

Страница 62: ... of Western Telematic Inc Such information and descriptions may not be copied disseminated or distributed without the express written consent of Western Telematic Inc Copyright Western Telematic Inc 2000 Printed in the United States of America February 2000 Part Number 13027 Revision B Trademarks Used in this Manual ProComm and ProComm Plus are registered trademarks of Datastorm Technologies Inc H...

Отзывы: