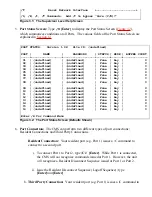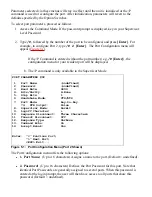
create a connection between two other ports.
To connect Port 2 to Port 3, type /C 2 3 [Enter].
i.
While Ports 2 and 3 are connected, Port 1 will still recognize CMS
commands. Type
/S
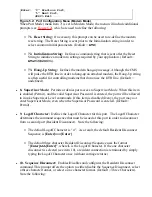
[Enter] to display the Port Status Screen. The
"STATUS" column should now list Ports 2 and 3 as connected, and Port 1 as
"Free".
ii.
Issue a Third Party Disconnect command to disconnect Ports 2 and 3; type
/D 2
[Enter]. The unit will display the "Are you Sure (y/n)?" prompt. Type
y
and press [Enter] to disconnect.
iii.
Type
/S
[Enter] to display the Port Status Screen. The "STATUS" column
should now list Ports 2 and 3 as "Free".
iv.
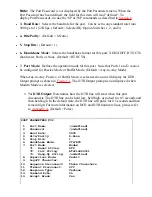
Site I.D. Message: If desired, the Site I.D. Message can be used to indicate the name or
location of the unit. Note that the Site I.D. cannot include double quotes (
"
).
Type
/F
and press [Enter]. When the System Parameters menu appears, type
1
and
press [Enter]. A prompt will appear. Key in the desired text (up to 32 characters)
and press [Enter].
.
To display the Site I.D., type
/J
[Enter].
b.
Note that the Site I.D. will be cleared when the
unit is initialized.
c.
7.
This completes the introductory overview of the CMS. Please proceed to
Section 4
and
Section 5
for complete installation and configuration procedures.
4. Hardware Installation
4.1. Connecting Power to the CMS Unit
The CMS is available in both AC and DC powered versions. When connecting AC or DC power
to the CMS, proceed as follows:


