1A
2A
3A
4A
Rev 8.0/1-20
MRTALP8-DC3: #35059
11
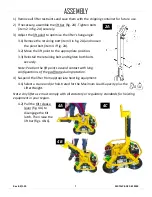
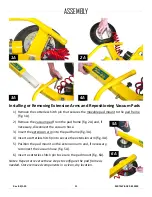
Installing or Removing Extension Arms and Repositioning Vacuum Pads
1) Remove the cotterless hitch pin that secures the movable pad mount to the pad frame
(fig. 1A).
2)
6A
5A
Remove the vacuum pad from the pad frame (fig. 2A) and, if
necessary, disconnect the vacuum hose.
3) Insert the extension arm into the pad frame (fig. 3A).
4) Insert a cotterless hitch pin to secure the extension arm (fig. 4A).
5) Position the pad mount on the extension arm and, if necessary,
reconnect the vacuum hose (fig. 5A).
6) Insert a cotterless hitch pin to secure the pad mount (fig. 6A).
Notes: Repeat or reverse these steps to configure the pad frame as
needed. Store removed components in a clean, dry location.
ASSEMBLY
Содержание MRTALP810CDC3O
Страница 2: ...MRTALP8 DC3 35059 Rev 8 0 1 20 2 ...
Страница 6: ...MRTALP8 DC3 35059 Rev 8 0 1 20 4 Note A standard MRTALP811LDC3 is shown SPECIFICATIONS ...
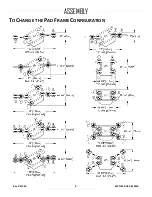
Страница 11: ...Rev 8 0 1 20 MRTALP8 DC3 35059 9 TO CHANGE THE PAD FRAME CONFIGURATION ASSEMBLY ...
Страница 47: ...Rev 8 0 1 20 MRTALP8 DC3 35059 45 ...
Страница 48: ...MRTALP8 DC3 35059 Rev 8 0 1 20 46 ...
Страница 49: ......
Страница 50: ......


