background image

 15 


Battery care: 

Some care is needed to ensure that the battery performs at its best and lasts as long as possible. All 
batteries age over time, and the way that they age is that the range you can achieve will gradually de-
crease. Follow the instructions below to ensure your battery performs as well as possibly for as long as 
possible. Charge the battery once or twice per week as needed. 

Do NOT charge the battery in extremely cold conditions. The battery can be easily removed from the bike 
and charged whilst off the bike if it’s more convenient. Allow the battery to warm up to room tempera-
ture before charging. 

If the battery is not in regular use i.e. over the winter, you should charge the battery for around 10 
minutes ever three to four weeks. When the bike is to be put back into service, fully charge the battery as 
normal. Try and keep the battery around two thirds full when not being used. 


General battery care: 

Do not attempt to open the outer casing of the battery. 

Do not attempt to repair the battery. 

Do not immerse the battery in water. 

Keep the battery away from children. 

Do not drop, pierce or otherwise damage the battery. 

Ensure the battery is not exposed to temperatures above 55 degrees Celsius or extreme humidity. 

Do not use the bike in an environment where temperatures are below -5 or greater than 55 degrees Cel-
sius. 

Lithium batteries do not perform at their best during the winter months, and so the range may vary from 
one season to another. 

Charging the battery: 

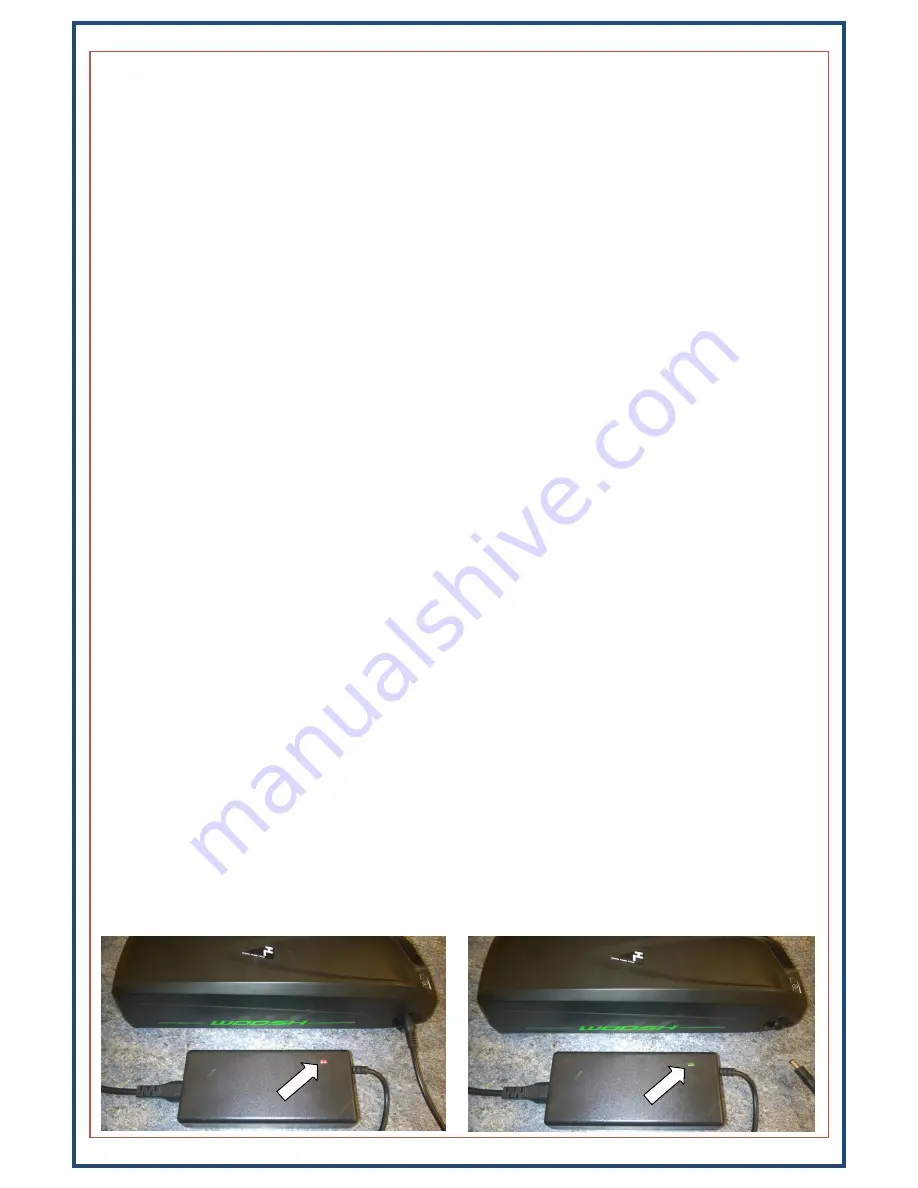
Plug the charger into the socket on the right-side of the battery, then plug the other end into the mains 
socket and switch it on. While the battery is charging, the LED on the charger will glow RED, when charg-
ing is complete, the LED will go GREEN. If the charger is on but not attached to the battery, the LED will 
also be GREEN. If you experience a sudden drop in capacity, run the battery down quite low, then fully 
charge it. Once full, leave the charger switched on and connected to the battery for a further two hours. 
This will help to balance the cells internally and restore normal operation. 

Содержание Hub Kit

Страница 1: ...Important For your own safety you must read this man ual before attempting to fit any part of the motor kit to your bike You must also ensure that you fit the kit in strict accordance with the instru...

Страница 2: ...sor we would normally have determined which type is suitable for your bike before you finalised your order If we didn t please contact us before attempting to fit your kit Warranty Terms If your kit i...

Страница 3: ...st disc and sensor speed sensor and magnet a thumb throttle brake levers and KingMeter J LCD Ensure that you have all of these items a photo of the items is show below so you can easily identify each...

Страница 4: ...efit the bottom bracket With the bottom bracket re installed slide the PAS disc over the spindle so that it is as close as possible to the sensor without actually touching it You need to ensure that t...

Страница 5: ...cannot slide the sensor down far enough if this is the case you can either swap the bottom bracket for a different model we can advise you on a suitable unit or contact us to see if a right side PAS i...

Страница 6: ...6 Left side pedelec sensor cont Slide the larger rubber washer over the spindle and then re fit the crank...

Страница 7: ...of your smallest chain ring in the case of double or triple rings The sensor itself is then attached to the base of the seat tube Pedelec disc With the sensor in place as per the photo above it now ne...

Страница 8: ...o use the supplied washers if you bolt the cradle to the frame without using the washers the plastic will deform and eventually break Once the cradle has been secured to the frame fit the battery in p...

Страница 9: ...all the way down the cable so that it protects the cable from the somewhat sharp edges where the cable ex its the motor The red arrow on the diagram above shows the typical route for the motor cable w...

Страница 10: ...rake lever etc then slide the thumb throttle on and then secure it and the other components in position Depending on the configuration of the bike it may be more practical to mount the throttle and di...

Страница 11: ...below Ensure that the arrows line up on both sides before pushing the connectors firmly together be careful with them and don t force them or you may bend damage the pins Also be sure to mate the cab...

Страница 12: ...frame with cable ties it may be necessary to fit a spacer between the sensor and the frame to bring the sensor closer to the magnet otherwise it may not detect the magnet as it passes Position the ma...

Страница 13: ...pedelec sensor and the modular cable The modular cable runs up to the handlebars and connects to the display unit the thumb throttle and the brake levers All of the connectors have ar rows on them tha...

Страница 14: ...eed To switch between these modes press and hold the Up and Mode buttons for approx 1 second to cycle through the modes Walking Mode Start Aid The bike also supports a walking mode which is basically...

Страница 15: ...pen the outer casing of the battery Do not attempt to repair the battery Do not immerse the battery in water Keep the battery away from children Do not drop pierce or otherwise damage the battery Ensu...

Страница 16: ...tical the button on this one is a multi function button The button is used to turn the battery on and off as well as to indicate the status of the battery With the battery off pressing the button will...

Страница 17: ...illustrating the problem and we ll normally get back to you within an hour or two on weekdays Support staff are not available at the weekends though if you send an email it will normally be read and r...

Отзывы: