14
the machine, you should return the temperature regulating knob to 0 position first, then turn
on the fan, at this time, the temperature on the indicator begins to fall and the sealing belt
should still be in state of running. About several minutes’ later, when the temperature drops
below 80
℃
, only can you turn off the fan and main power supply.
VII Circuit Diagram
Diagram 15
K1. switch/on-of
f K2. switch/st
art
K3. switch/fan K4. switch/heat seal
K5. switch/printer
W1. sealing s
peed r
egulator W2.
temper
ature of ink roller
W3. coding position
R1,R2 heat
ing pipe for s
ealing
R3,R4. heating pipe of ink roller
MD. speed-adjusting motor DF
. F
an AP1-speed-adjusting PCB AP2.
temperature-adjusting PC boar
d of ink roller AP3.main control PC board AP4. sealing
temperature controller YC1.el
ectromagnetic clutch YC2. el
etromagnetic stopper SQ1.
thermocouple SQ2. groove sensor SQ3. photoelec
tric
sensor TCL.
control
transformer
Содержание FRM-1120L
Страница 7: ...6 Diagram 4 FR 1370LD Continuous band sealer with two sets of heating blocks Diagram 5 ...
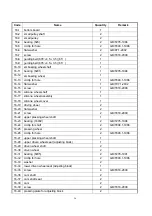
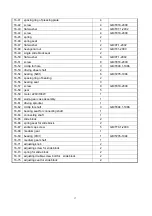
Страница 16: ...15 VIII Breakdown Drawing of Machine Body FRM 1120L Diagram16 ...
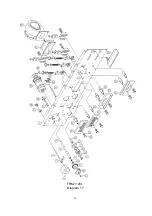
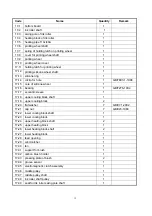
Страница 19: ...18 FRM 1120L Diagram 17 ...
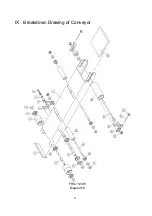
Страница 21: ...20 IX Breakdown Drawing of Conveyor FRS 1120W Diagram18 ...
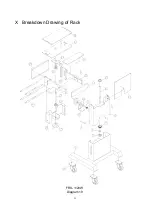
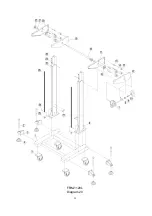
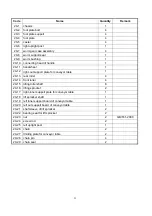
Страница 23: ...22 X Breakdown Drawing of Rack FRS 1120W Diagram 19 ...
Страница 25: ...24 FRM 1120L Diagram 20 ...


