


Page 5
TimelapseCam User Guide
Page 16
TimelapseCam User Guide
Quick Start Guide
Use the steps below as a guide to quickly set up your camera so it will function using the
factory default settings.
STEP 1
Open camera cover. Press the Battery Chamber Release button. Install 6 C-cell alkaline
batteries. Recommended for use: Duracell
®
or Energizer
®
batteries. Reinsert the Battery
Chamber into the camera until you hear an audible click.
Rechargeable batteries are not recommended.
Do not use lithium batteries.
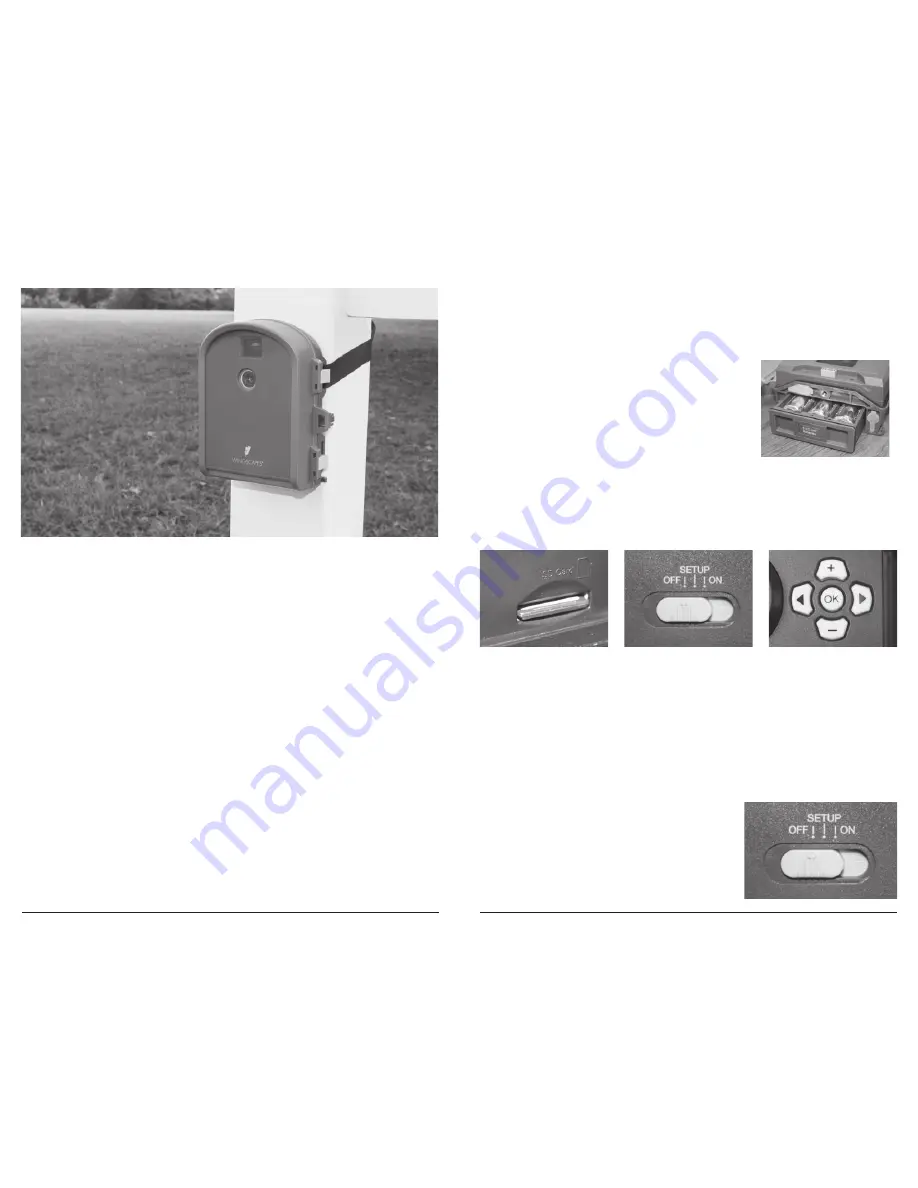
STEP 2
Insert SD Memory Card (label side up) until you hear an audible click. Camera will not
operate without SD Card. Slide the power switch to SETUP. Set the time and date by
pressing the RIGHT button until DATE & TIME appear on screen. Press OK to begin
entering the Time and Date, using +/- buttons to adjust the values and LEFT/RIGHT to
move between fields.
STEP 3
Mount Camera in desired location using a mounting strap or other accessories offered by
Wingscapes (visit
www.wingscapes.com
for more information on mounting accessories).
See page 16 for helpful mounting tips.
STEP 4
Slide the power switch to the ON position. The
camera will operate using default settings for the
respective mode selected. You may also customize the
settings if desired in SETUP. Press the Right (>) button
to begin taking photos or videos.
The key to taking great photos and videos
is proper mounting and placement of
the TimelapseCam. We designed the
TimelapseCam so that it can be mounted
many different ways. Take a moment to
learn more about mounting your
TimelapseCam properly, and you will
quickly see improvement in your images.
Basic Principles
1. Stability -
Mount the TimelapseCam
securely so that it does not move. It should
never be hung from above or mounted
to an object that moves in the wind. If the
TimelapseCam is moving, it will cause the
motion sensor to trigger incorrectly.
2. Focus -
Note that the TimelapseCam lens
can be focused manually. This is a snap. Use
the included measuring tape to measure the
distance between the TimelapseCam and its
target. Set the lens accordingly.
3. Lighting -
As with all cameras, it is best to
avoid aiming the TimelapseCam at the source
of light (for instance, the sun). Ideally during
daytime, position the TimelapseCam so it is
facing its target, e.g. a bird feeder, but facing
away from the sun.
On the Ground
Set up is simple, even on the ground. Just
position your TimelapseCam directly on the
ground. If you’re concerned about it falling
over, use the included Stretch Cords to
secure the TimelapseCam to the base of a
tree, a post, or other solid feature (a brick
works great).
Mounting your TimelapseCam


