Page 18
16940-2-0806
OPTIONAL MANTEL INSTALLATION INSTRUCTIONS
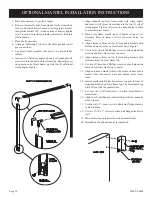
1. Place base adjacent to gas inlet supply.
2. Remove thermostat bulb from plastic bracket located on
exterior, bottom of heater. Loosen screw for plastic bracket,
turn plastic bracket 180° (to the outside of heater), tighten
screw for plastic bracket and replace thermostat bulb into
plastic bracket.
3. Place heater onto base.
4. Attach gas inlet supply to heater. Check for gas leaks on all
gas connections.
5. Lay brass frame assembly face down on a non-abrasive
surface.
6. Insert one (1) flat crimp angle and one (1) crimp angle with
set screws into channel on brass frame top. Repeat process
on opposite end of brass frame top with two (2) additional
crimp angles. Figure 1.
7. Align channels on brass frame sides with crimp angles
and insert two (2) brass frame sides into the two (2) sets of
crimp angles. Tighten set screws in crimp angles in order
to assemble brass frame.
8. Place brass frame around front of heater. Align six (6)
clearance holes on frame with six (6) screw holes on
heater.
9. Align clearance holes on two (2) mounting brackets with
bottom clearance holes on brass frame sides. Figure 2.
10. Use four (4) truss-head Phillips screws to attach mounting
brackets and brass frame sides to heater.
11. Align clearance holes on two (2) mounting brackets with
clearance holes on brass frame top.
12. Use two (2) truss-head Phillips screws to attach mounting
brackets and brass frame top to heater.
13. Align notches on mantel sides with notches on base. Insert
mantel sides into mantel base and behind brass frame
sides.
14. Insert breastboard behind brass frame top and in front of
mounting brackets on brass frame top. The breastboard top
will be flush with the mantel sides.
15. Use four (4) 1-1/4"wood screws to attach breastboard to
mantel sides.
16. Align two (2) nail flange brackets with pilot holes in mantel
sides. Figure 3.
17. Use four (4) 1/2" wood screws to attach nail flange brackets
to mantel sides.
18. Use two (2) 10 x 1" screws to attach nail flange brackets to
wall.
19. Place mantel top onto breastboard and mantel sides.
20. Installation of optional mantel is completed.
Содержание AVFBH-30
Страница 15: ...Page 15 16940 2 0806 PARTS VIEW ...
Страница 19: ...Page 19 16940 2 0806 SERVICE NOTES ...

