background image

U S E   O F   T H E   A P P L I A N C E

U S E   O F   T H E   A P P L I A N C E

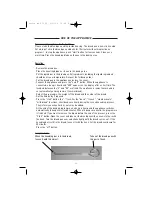
Before using the appliance for the first time : 

Please clean the bread pan and the inside housing. The bread pan is non-stick coated.  
Put a drop of oil in the bread pan and bake for 10 minutes with nothing inside on 
program 1, to stop the appliance, push “start” button for few seconds. Clean once
more time. Place the kneading blade on the axe in the baking area.

Operation :

- Remove the bread pan.
- Place the kneating blade on its axe in the baking area.
- Put the ingredient in the bread pan. All ingredients, including the liquid ingredients,

should be at room temperature. Respect the following order.

- Put the bread pan in the appliance and close the cover.
- Connect the appliance and press the “on/off” button. When the appliance is 

connected, a beep is heard and “3:00” appears on the display after a short time. The
two dots between the “3” and “00” are fixed. The appliance is ready to work and is
set automaticaly on programme 1 (normal bread).

- Select the programme, the weight of the bread and the colour of the bread.
- Set the time delay if required.
- Press the “start” button, the “:” flash. For the “basic”, “french”, “whole wheate”,

“milk bread” functions, short beeps are heard during the second kneading process.
They inform you when fruits or nuts may be added.

- At the end of the baking programme, one beep is heard and the appliance switches 

automatically to keep warm for 60 minutes. When 10 beeps are heard, the programme
is finished. If you want to remove the bread before the end of the process, press the
“Start” button. Open the cover and take out the brand pan with an oven-cloth or with
the hook. Turn the bread pan over and shake lightly until the bread comes out. If the
kneading bar is still in the bread, loosen it with the hook. Let the bread cool down for
30 minutes.

- Press the “off” button.

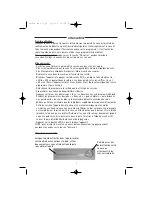
Using the hook :

22

When the kneading bar is in the bread,
loosen it with this object.

Take out the brand pan with
this part of hook.

  notice MP 572_06  2/11/06  16:48  Page 22

Содержание La Tessara 1.1

Страница 1: ...Machine pain Machine pain Bread maker Bread maker MP 572 La Tessara 1 1 MODE D EMPLOI MODE D EMPLOI USER MANUAL USER MANUAL notice MP 572_06 2 11 06 16 48 Page 1...

Страница 2: ...urs de plus en plus nombreux Bient t le ph nom ne prit une ampleur inou e et le nombre de b n ficiaires quintupla en moins d un si cle A la fin de l Empire romain ce droit au pain gratuit devint un dr...

Страница 3: ...aces chaudes Ne jamais d placer ou d brancher l appareil en tirant sur le cordon d alimentation D brancher l appareil avant de le nettoyer ou d effectuer le remplacement d un l ment V rifier r guli re...

Страница 4: ...nt l appareil ne doit pas tre mis en contact avec des mat riaux inflammables par exemple des rideaux tissus etc Ne pas utiliser sur une surface craignant la chaleur ni proximit d une plaque de cuisson...

Страница 5: ...Bouton M A 6 Cuve pain 7 Pale de p trissage 8 Crochet 9 Verre doseur 10 Cuill re doseuse Tableau de bord 11 Ecran de contr le 12 S lection des programmes 13 S lection de la cuisson 14 S lection du poi...

Страница 6: ...des sur la touche d marrage un bip se fait entendre et les deux points entre les heures et les minutes sont fixes Programmation horaire et 16 pour diff rer le d marrage de la machine S lectionner le p...

Страница 7: ...et cuire du pain brioch 6 Ultra rapide I p trir lever et cuire 750 g de pain dans un laps de temps tr s court 7 Ultra rapide II p trir lever et cuire 1 1 kg de pain dans un laps de temps tr s court 8...

Страница 8: ...t le type de cuisson Programmer une heure de d part diff r si d sir Appuyer sur la touche d marrage les clignotent Le cycle programm d bute Pendant les programmes basique fran ais pain complet pain br...

Страница 9: ...vous conseillons de laisser votre pain reposer temp rature ambiante pendant 30 minutes avant de le d guster Attention ne jamais ouvrir l appareil lorsque le pain est en cours de lev e ou de cuisson q...

Страница 10: ...Cuisson Maintien au chaud Normal 1 Fran ais 2 Pain Complet 3 Rapide 4 Pain Brioch 5 Ultra rapide I 6 750 g 9 20 14 25 45 60 60 1 1 kg 10 20 15 25 45 65 60 750 g 16 40 19 30 50 65 60 1 1 kg 18 40 22 30...

Страница 11: ...n Maintien au chaud Ultra rapide II 7 P te 8 Confiture 9 G teau 10 Cake 11 Cuisson 12 1 1 kg 12 20 43 60 750 g 20 30 40 15 45 20 repos 750 g 15 40 5 25 40 50 60 1 1 kg 15 40 5 25 40 55 60 750 g 8 5 6...

Страница 12: ...r en sucre du pain Votre p te contient trop de levure r duisez un peu la levure au pain suivant Votre p te ne contient pas assez de sel augmentez la quantit de sel au pain suivant quantit minimum de s...

Страница 13: ...de prot ines qui forment le gluten Le programme rapide a t s lectionn ce cycle produit des pains plus compacts car le temps de lev e est plus court Le sucre et la levure sont entr s en contact avant...

Страница 14: ...faitement form mais cela n affecte pas le go t savoureux du pain go tez le La machine est plac e dans un courant d air ou bien elle a t secou e pendant que la p te levait Le pain est plus gros que la...

Страница 15: ...ide r duisez la quantit de liquides Il y a eu une panne de courant pendant la cuisson Les quantit s taient trop importantes et la machine n a pas pu les faire cuire Le pain a t coup en tranches quand...

Страница 16: ...ppuyez sur le bouton marche La cuve n est pas correctement plac e Le minuteur est s lectionn d part diff r de votre machine La machine n est pas mise en marche Le p trin n est pas install dans la cuve...

Страница 17: ...the connection cord does not touch any hot surface If the plug get hot please call a qualified electrician From time to time check the cord for damages Never use the appliance if cord or appliance sho...

Страница 18: ...appliance is not covered or touching flammable material including curtains draperies walls etc Do not use on surfaces where heat may cause a problem or near a hot gas or electric burner Unplug from t...

Страница 19: ...ent 5 On off knob 6 Bread pan tank blade 7 Kneading blade 8 Hook 9 Measuring jug 10 Measuring spoon Control panel 11 Display 12 Functions setting 13 Cooking setting 14 Weight setting 15 Start Stop the...

Страница 20: ...confirms that the program has been switched off the two dots are fixed Timer and 16 to delay the time your breadmaker will start press button to go to the hour you desire one pressure 10 min if neces...

Страница 21: ...rising without baking 9 Jam mixing and baking fruit with suggar 10 Cake 1 kneading rising and baking cake 11 Cake 2 kneading rising and baking cake 12 Bake only baking without keading nor rising OPERA...

Страница 22: ...e appliance is ready to work and is set automaticaly on programme 1 normal bread Select the programme the weight of the bread and the colour of the bread Set the time delay if required Press the start...

Страница 23: ...elt flour In order to have a slightly bread we advice you to use spelt flour We advice you to wait 30 minutes before eating the bread Caution Never open the appliance when using If the blade is still...

Страница 24: ...e r utilisation des appareils usag s Veuillez vous adresser votre municipalit pour conna tre la d chetterie comp tente Instructions on environment protection Do not dispose of this product in the usua...

Отзывы: