background image

11

WHIRLPOOL CORPORATION LAUNDRY WARRANTY

LIMITED WARRANTY

For one year from the date of purchase, when this major appliance is operated and maintained according to instructions attached to or 
furnished with the product, Whirlpool Corporation or Whirlpool Canada LP (hereafter “Whirlpool”) will pay for Factory Specified Parts 
and repair labor to correct defects in materials or workmanship that existed when this major appliance was purchased. Service must be 
provided by a Whirlpool designated service company. YOUR SOLE AND EXCLUSIVE REMEDY UNDER THIS LIMITED WARRANTY 
SHALL BE PRODUCT REPAIR AS PROVIDED HEREIN. This limited warranty is valid only in the United States or Canada and applies 
only when the major appliance is used in the country in which it was purchased. Proof of original purchase date is required to obtain 
service under this limited warranty.

ITEMS EXCLUDED FROM WARRANTY

This limited warranty does not cover:

1.

Replacement parts or repair labor if this major appliance is used for other than normal, single-family household use or when it is 
used in a manner that is inconsistent to published user or operator instructions and/or installation instructions.

2.

Service calls to correct the installation of your major appliance, to instruct you on how to use your major appliance, to replace or 
repair house fuses, or to correct house wiring or plumbing. 

3.

Service calls to repair or replace appliance light bulbs, air filters or water filters. Consumable parts are excluded from warranty 
coverage. 

4.

Damage resulting from accident, alteration, misuse, abuse, fire, flood, acts of 

G

od, improper installation, installation not in 

accordance with electrical or plumbing codes, or use of products not approved by Whirlpool. 

5.

Cosmetic damage, including scratches, dents, chips or other damage to the finish of your major appliance, unless such damage 
results from defects in materials or workmanship and is reported to Whirlpool within 30 days from the date of purchase. 

6.

Pick up and delivery. This major appliance is intended to be repaired in your home. 

7.

Repairs to parts or systems resulting from unauthorized modifications made to the appliance. 

8.

Expenses for travel and transportation for product service if your major appliance is located in a remote area where service by an 
authorized Whirlpool servicer is not available. 

9.

The removal and reinstallation of your major appliance if it is installed in an inaccessible location or is not installed in accordance 
with Whirlpool’s published installation instructions. 

10.

Replacement parts or repair labor on major appliances with original model/serial numbers that have been removed, altered, or 
cannot be easily determined.

DISCLAIMER OF IMPLIED WARRANTIES

IMPLIED WARRANTIES, INCLUDIN

G

 ANY IMPLIED WARRANTY OF MERCHANTABILITY OR IMPLIED WARRANTY OF FITNESS FOR 

A PARTICULAR PURPOSE, ARE LIMITED TO ONE YEAR OR THE SHORTEST PERIOD ALLOWED BY LAW. Some states and provinces 
do not allow limitations on the duration of implied warranties of merchantability or fitness, so this limitation may not apply to you. This 
warranty gives you specific legal rights, and you also may have other rights that vary from state to state or province to province.

LIMITATION OF REMEDIES; EXCLUSION OF INCIDENTAL AND CONSEQUENTIAL DAMAGES

YOUR SOLE AND EXCLUSIVE REMEDY UNDER THIS LIMITED WARRANTY SHALL BE PRODUCT REPAIR AS PROVIDED HEREIN. 
WHIRLPOOL SHALL NOT BE LIABLE FOR INCIDENTAL OR CONSEQUENTIAL DAMA

G

ES. Some states and provinces do not allow 

the exclusion or limitation of incidental or consequential damages, so these limitations and exclusions may not apply to you. This 
warranty gives you specific legal rights, and you also may have other rights that vary from state to state or province to province.


If outside the 50 United States and Canada, contact your authorized Whirlpool dealer to determine if another warranty applies.

If you think you need repair service, first see the “Troubleshooting” section of the Use & Care 

G

uide. If you are unable to resolve the 

problem after checking “Troubleshooting,” additional help can be found by checking the “Assistance or Service” section or by calling 
Whirlpool. In the U.S.A., call 

1­800­253-1301

. In Canada, call 

1­800­807­6777

.

7/08

Keep this book and your sales slip together for future 
reference. You must provide proof of purchase or installation 
date for in-warranty service.

Write down the following information about your major appliance 
to better help you obtain assistance or service if you ever need it. 
You will need to know your complete model number and serial 
number. You can find this information on the model and serial 
number label located on the product.

Dealer name____________________________________________________

Address ________________________________________________________

Phone number __________________________________________________

Model number __________________________________________________

Serial number __________________________________________________

Purchase date __________________________________________________


Содержание WGD9250WL - Duet Lunar - Gas Dryer

Страница 1: ... SÉCURITÉ DE LA SÉCHEUSE 12 GUIDE DE DÉMARRAGE RAPIDE UTILISATION DE LA SÉCHEUSE 14 Programmes 16 Caractéristiques supplémentaires 17 Control Lock Unlock verrouillage déverrouillage des commandes 17 Modification des programmes et réglages 17 ENTRETIEN DE LA SÉCHEUSE 18 DÉPANNAGE 20 GARANTIE 22 ASSISTANCE OU SERVICE COUVERTURE ARRIÈRE ELECTRONIC DRYER Use CareGuide For questions about features oper...

Страница 2: ...2 DRYER SAFETY ...

Страница 3: ...ing Immediately call your gas supplier from a neighbor s phone Follow the gas supplier s instructions If you cannot reach your gas supplier call the fire department Installation and service must be performed by a qualified installer service agency or the gas supplier Clear the room building or area of all occupants 3 IMPORTANT The gas installation must conform with local codes or in the absence of...

Страница 4: ...m dryer Do not dry anything that has ever had anything flammable on it even after washing Failure to follow these instructions can result in death explosion or fire WARNING Fire Hazard No washer can completely remove oil Do not dry anything that has ever had any type of oil on it including cooking oils Items containing foam rubber or plastic must be dried on a clothesline or by using an Air Cycle ...

Страница 5: ...ng an Automatic Cycle You may select or deselect the WRINKLE SHIELD and or SIGNAL feature at any time during the cycle if desired USING TIMED CYCLES Use Timed Cycles to set a drying time and temperature See the Cycles information on the following pages for more information 1 Clean lint screen 2 Place laundry in the dryer Shut the door 3 Press POWER 4 Select the desired TIMED cycle 5 Press More Tim...

Страница 6: ...When a Timed Cycle is selected the Estimated Time Remaining display shows the actual time remaining in your cycle Press the TEMP button to change the drying temperature from the default setting Press the MORE TIME or LESS TIME button to increase or decrease the drying time Tap MORE TIME or LESS TIME and the time will change by 1 minute intervals Press and holdMORE TIME or LESS TIME and the time wi...

Страница 7: ... button for 3 seconds The control is locked when a single beep is heard and the Control Lock status light is on To enable the Control Lock feature when dryer is OFF When the dryer is off it is not necessary to press the POWER button before activating the Control Lock feature To unlock Press and hold the SIGNAL button for 3 seconds to turn this feature off NOTE When the dryer is running and Control...

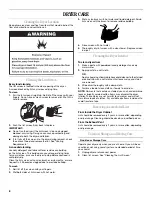
Страница 8: ...er 3 Wet a nylon brush with hot water and liquid detergent Scrub lint screen with the brush to remove residue buildup 4 Rinse screen with hot water 5 Thoroughly dry lint screen with a clean towel Replace screen in dryer CleaningtheDryerInterior To clean dryer drum 1 Make a paste with powdered laundry detergent and very warm water 2 Apply paste to a soft cloth OR Apply a liquid nonflammable househo...

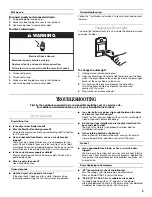
Страница 9: ...e may be 2 household fuses or circuit breakers for the dryer Check that both fuses are intact and tight or that both circuit breakers have not tripped Replace the fuse or reset the circuit breaker If the problem continues call an electrician Is the correct power supply available Electric dryers require 240 volt power supply Check with a qualified electrician Was a regular fuse used Use a time dela...

Страница 10: ...r air movement Stains on load or drum Was dryer fabric softener properly used Add dryer fabric softener sheets at the beginning of the cycle Fabric softener sheets added to a partially dried load can stain your garments Drum stains are caused by dyes in clothing usually blue jeans These will not transfer to other clothing Loads are wrinkled Was the load removed from dryer at the end of the cycle R...

Страница 11: ...ccessible location or is not installed in accordance with Whirlpool s published installation instructions 10 Replacement parts or repair labor on major appliances with original model serial numbers that have been removed altered or cannot be easily determined DISCLAIMER OF IMPLIED WARRANTIES IMPLIED WARRANTIES INCLUDING ANY IMPLIED WARRANTY OF MERCHANTABILITY OR IMPLIED WARRANTY OF FITNESS FOR A P...

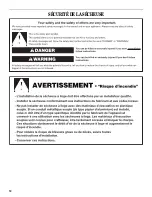
Страница 12: ...12 SÉCURITÉ DE LA SÉCHEUSE ...

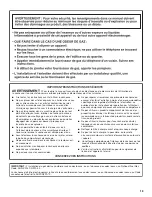
Страница 13: ... en faire l entretien à moins d une recommandation spécifique dans le guide d utlilisation et d entretien ou publiée dans les instructions de réparation par l utilisateur que vous comprenez et pouvez exécuter avec compétence CONSERVEZ CES INSTRUCTIONS Ne pas installer ni entreposer la sécheuse où elle sera exposée aux intempéries Ne pas jouer avec les commandes Ne pas utiliser un produit assouplis...

Страница 14: ...y compris les huiles de cuisson Les articles contenant mousse caoutchouc ou plastique doivent être séchés sur une corde à linge ou par le programme de séchage à l air Le non respect de ces instructions peut causer un décès ou un incendie AVERTISSEMENT Pour un résumé sur l utilisation de la sécheuse après installation voir le GUIDE DE DÉMARRAGE RAPIDE à la page suivante Avertissements de la proposi...

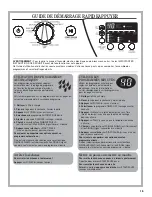
Страница 15: ...la sécheuse en marche Fermer la porte et appuyer sans relâcher sur START PAUSE mise en marche pause GUIDE DE DÉMARRAGE RAPIDEAPPUYER AVERTISSEMENT Pour réduire le risque d incendie de choc électrique ou de blessures à autrui lire les IMPORTANTES INSTRUCTIONS DE SÉCURITÉ avant de faire fonctionner cet appareil Ce Guide d utilisation et d entretien couvre plusieurs modèles Votre sécheuse peut ne pas...

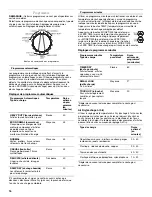
Страница 16: ...s minutés Utiliser un programme minuté pour sélectionner une durée et une température de séchage spécifiques Lorsqu un programme minuté est sélectionné l afficheur de la durée résiduelle estimée indique la durée résiduelle réelle pour le programme en cours Appuyer sur le bouton TEMP température pour modifier la température de séchage préréglée par défaut Appuyer sur le bouton MORE TIME plus de tem...

Страница 17: ... de la sécheuse Pour activer la caractéristique Control Lock verrouillage des commandes alors que la sécheuse est en marche Appuyer sur le bouton SIGNAL signal sonore pendant 3 secondes Les commandes sont verrouillées lorsqu un bip unique retentit et que le témoin de verrouillage des commandes est allumé Pour activer la caractéristique Control Lock verrouillage des commandes alors que la sécheuse ...

Страница 18: ...ter les temps de séchage ou entraîner un arrêt de la sécheuse avant que la charge ne soit complètement sèche Nettoyer le filtre à charpie avec une brosse en nylon tous les 6 mois ou plus fréquemment s il devient obstrué par suite d une accumulation de résidus Lavage 1 Enlever la charpie du filtre en la roulant avec les doigts 2 Mouiller les deux côtés du filtre à charpie avec de l eau chaude 3 Mou...

Страница 19: ...Pour les sécheuses avec câblage direct AVERTISSEMENT Risque de choc électrique Déconnecter la source de courant électrique avant l entretien Replacer pièces et panneaux avant de faire la remise en marche Le non respect de ces instructions peut causer un décès ou un choc électrique 1 Déconnecter la source de courant électrique 2 Déconnecter le câblage 3 Veiller à ce que les pieds de nivellement soi...

Страница 20: ...ommençant par un F et alternant entre F and E apparaît sur l affichage cela signifie que le module de commande de la sécheuse a détecté un problème nécessitant une réparation Faire un appel de service Résultatsdelasécheuse Le séchage des vêtements n est pas satisfaisant les durées de séchage sont trop longues la charge est trop chaude Le filtre à charpie est il obstrué de charpie Le filtre à charp...

Страница 21: ...mesautomatiques IMPORTANT Vos réglages de degré de séchage peuvent être modifiés pour s adapter à différentes installations à l environnement de l installation ou selon vos préférences personnelles Cette modification est sauvegardée et affectera tous vos programmes automatiques pas seulement le programme la charge actuel le Si les charges des programmes de séchage automatiques sont systématiquemen...

Страница 22: ...s installé conformément aux instructions d installation fournies par Whirlpool 10 Les pièces de rechange ou la main d oeuvre pour les gros appareils ménagers dont les numéros de série et de modèle originaux ont été enlevés modifiés ou qui ne peuvent pas être facilement identifiés CLAUSE D EXONÉRATION DE RESPONSABILITÉ AU TITRE DES GARANTIES IMPLICITES LES GARANTIES IMPLICITES Y COMPRIS LES GARANTI...

Страница 23: ...23 Notes ...

Страница 24: ... Canada Use and maintenance procedures N Accessory and repair parts sales N Referrals to local dealers repair parts distributors N and service companies Whirlpool designated service technicians are trained to fulfill the product warranty and provide after warranty service anywhere in the United States and Canada ASSISTANCE OU SERVICE Avant de faire un appel pour assistance ou service veuillez véri...

Отзывы: