background image

GB

T

HIS


FUNCTION


IS


USED


 for quick reheating of food with a 

high water content such as clear soups, coff ee or tea.

q


P

RESS


THE

 J

ET

 S

TART


B

UTTON

T

HIS


FUNCTION


AUTOMATICAL

-

LY


STARTS


 with maximum mi-

crowave power level and the cooking time set to 30 
seconds. 

Each additional press

 increases the time with 

30 seconds. You may also alter the time by turning the 
adjust knob to increase or decrease the time after the 
function has started.

GT

 385

T

HE


CLOCK


IS


SET


and in operation.

D

URIN

G


YOUR


SETTIN

G

if you press the Stop button it will 

exit the


 setting and enter standby mode with only colon 

shown.

N

OTE

If current clock setting is not completed till clock 

set mode time out (1 minute), it will enter Standby mode 
with only colon shown.

q


T

URN


THE


ADJUST


KNO

B


 to set the hour when the left-

hand digit (hours) blinking.

w


P

RESS

 S

TART


B

UTTON


to set the hours.

e


T

URN


THE


ADJUST


KNO

B


 to set the minute when the 

two right hand digit (minutes) blinking. 

r


P

RESS

 S

TART


B

UTTON


 to set the minutes.

U

SE


THIS


FUNCTION


TO


 cook lasagne, fi sh gratins and veg-

etable gratins.

D

O


NOT


USE


PLASTIC


 utensils when grilling. They will 

melt. Items of wood or paper are not suitable either.

E

NSURE


THAT


THE


UTENSILS


 used are microwave safe and 

heat resistant when you use this function. Place the 
utensil on the glass turntable.

D

URIN

G


COOKIN

G


TIME

, It is possible  to adjust the cook time 

by turning the adjust knob.

q


P

RESS


THE


G

RATIN


B

UTTON

w


T

URN


THE

 A

DJUST


KNO

B


 to set the cooking time.

e


P

RESS


THE

 S

TART


B

UTTON

I

T


IS


NOT


POSSI

B

LE


TO


CHAN

G

E


OR


SWITCH


the Power level or 

Grill on/off , when using the Gratin function. 

U

SE THIS

FUNCTION

TO

co

co

k

ok

ok

l

las

las

agn

agn

e

e,

fi

fis

fis

h

h g

h g

rat

rat

i

ins

an

d

d v

eg-

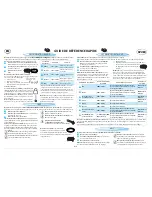
GRATIN

S

UPPLY

 V

OLTA

G

E

230 V/50 H

Z

R

ATED

 P

OWER

 I

NPUT

1900 W

F

USE

10 A (UK 13 A)

MW 

OUTPUT


POWER

700 W

G

RILL

900 W

O

UTER


DIMENSIONS

 (H

X

W

X

D)

299 

X

 521 

X

 391

I

NNER


DIMENSIONS

 (H

X

W

X

D)

200 

X

 326 

X

 320

HIS


F

UNC

TIO

N


I

IS U

S


U

SED

SED


f

fo

 fo

r q

r q

i

uic

uic

k

k

k r

k r

h

h

ehe

ehe

ti

ati

ati

ng

ng 

f

of

of 

f

foo

foo

d

d w

d w

ith

ith a 

JET START

CLOCK

MICROWAVES ONLY

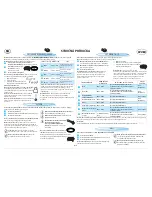
P

OWER

S

UGGESTED


USE

:

JET 
(700 W)

R

EHEATIN

G


OF


B

EVERA

G

ES

 water, clear soups, 

coff ee, tea or other food with a high water 
content. If the food contains egg or cream 
choose a lower power.

500 W

M

ORE


CAREFUL


COOKIN

G


 e.g. high protein 

sauces, cheese and egg dishes and to fi nish 
cooking casseroles.

350 W

S

IMMERIN

G


STEWS

 melting butter.

160 W

D

EFROSTIN

G

 Softening butter, cheeses.

 90 W

S

OFTENIN

G


 Ice cream.

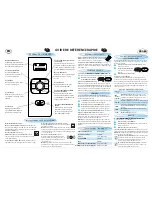
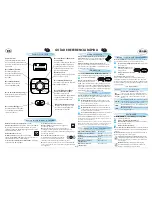
QUICK REFERENCE 

G

UIDE

CONTROL PANEL

PAUSE OR STOP COOKING

T

O


PAUSE


COOKIN

G

:

T

HE


COOKIN

G


CAN


B

E


PAUSED


to check, turn or stir the food 

by opening the door. The setting will be maintained for 
10 minutes.

T

O


CONTINUE


COOKIN

G

:

C

LOSE


THE


DOOR


and press the Jet Start button 

ONCE. The cooking is resumed from where it 
was paused. 

P

RESSIN

G


THE

 S

TART


B

UTTON


 TWICE will increase the time 

by 30 seconds.

I

F


YOU


DON

T


WANT


TO


CONTINUE


COOKIN

G

:

R

EMOVE


THE


FOOD

,  

close the door and press the 

STOP button.

N

OTE

After cooking ends, the fan, turntable 

and cavity lamp is on before pressing STOP button, 
it’s normal.

B

EEP


WILL


SI

G

NAL


once a minute for 10 minutes when 

the cooking is fi nished. Press the STOP 
button or open the door to cancel the 
signal.

N

OTE

:  

The oven will only hold the settings for 60 

seconds if the door is opened and then closed after 
the cooking is fi nished.

COOK & REHEAT WITH MICROWAVES

U

SE


THIS


FUNCTION


 for normal cooking and reheating, 

such as vegetables, fi sh, potatoes and meat.

O

NCE


THE


COOKIN

G


PROCESS


HAS


B

EEN


STARTED


The time can easily be increased in 30-second steps by 
pressing the Start button. 

Each press 

increases the time 

with 30 seconds. You may also alter the time by turning 
the adjust knob to increase or decrease the time. 

q


P

RESS


THE

 P

OWER


B

UTTON


 repeatedly to set the power.

w


T

URN


THE


ADJUST


KNO

B


 to set 

the cooking time.

e


P

RESS


THE

 J

ET

 S

TART


B

UTTON

CHILD LOCK

T

HIS


AUTOMATIC


SAFETY


FUNCTION


IS


ACTIVATED

 1 

MINUTES


AFTER


 the oven has returned to “stand 

bymode“.  In this mode the door will be 
locked.

T

HE


DOOR


MUST


B

E


OPENED


AND


CLOSED


 e.g. putting food into 

it, before the safety lock is released. Else the display will 
show 

DOOR

.

W

HEN


THE


APPLIANCE


IS


FIRST


PLU

GG

ED


IN


 or after a power 

failure, it will enter clock setting mode automatically.

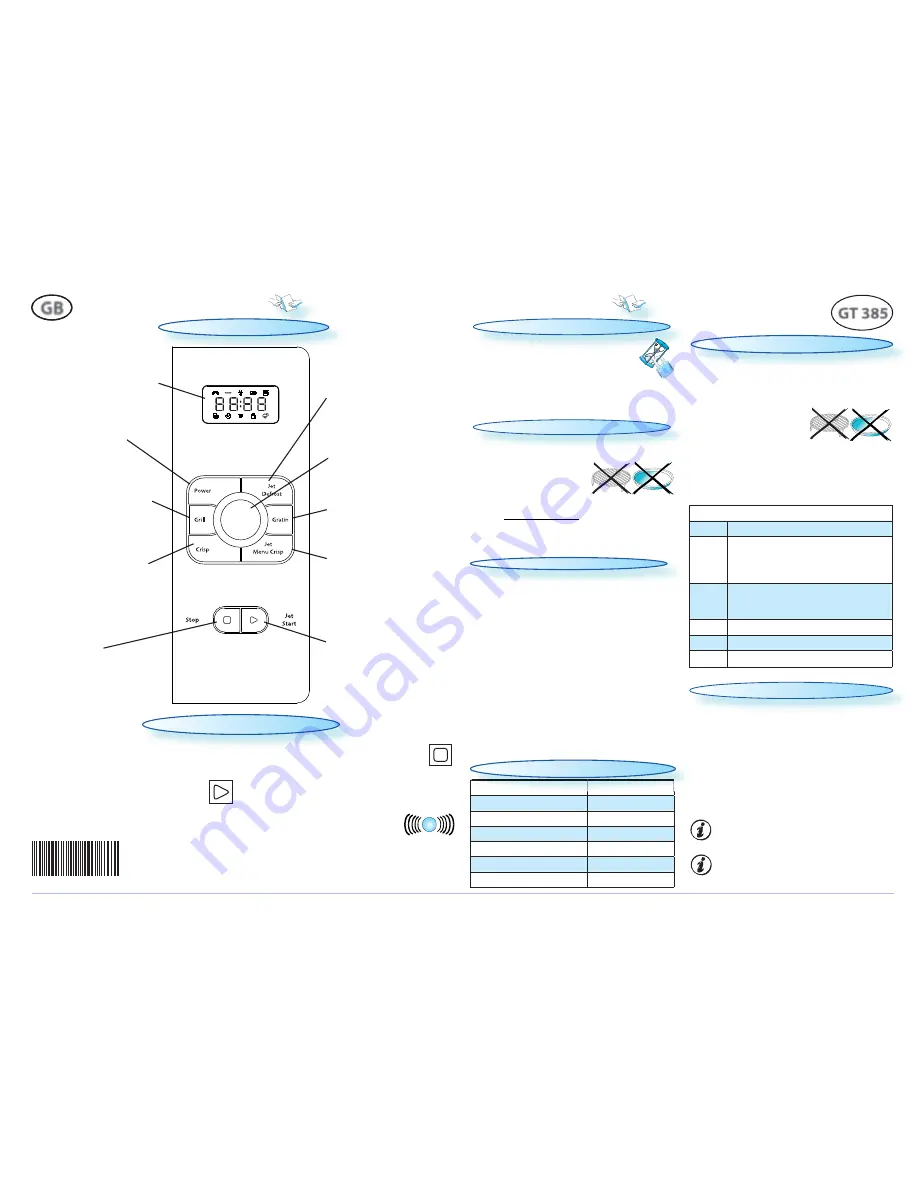
P

OWER


B

UTTON


Use to set the desired 
microwave power level.

S

TOP


B

UTTON


Press to stop or reset any of 
the oven functions. 

J

ET

 D

EFROST


B

UTTON


Use to select Jet Defrost func-
tion and select type of food to 
be defrosted.

A

DJUST


KNO

B


Use to set the cooking time or 
weight.

G

RATIN


B

UTTON


Use to select Gratin function.

G

RILL


B

UTTON


Use to select Grill function.

J

ET

 S

TART


B

UTTON


Use to start the cooking 
process or invoke the Jet 
Start function.

D

I

G

ITAL


DISPLAY


The display includes a 24-hour 
clock and indicator symbols.

C

RISP


B

UTTON


Use to select Crisp function.

J

ET

 M

ENU

 C

RISP


B

UTTON


Use to select Jet Menu Crisp 
function and select food 
class.

  W 1 0 5 5 7 1 1 0

S

UPPLY

 V

O

LTA

G

E

230

230

230

V/

V/

 V/

50

50 

H

H

Z

TECHNICAL SPECIFICATION

1/7

Содержание GT 385

Страница 1: ...ter 160 W DEFROSTING Softening butter cheeses 90 W SOFTENING Ice cream QUICK REFERENCE GUIDE CONTROL PANEL PAUSE OR STOP COOKING TO PAUSE COOKING THE COOKING CAN BE PAUSED to check turn or stir the food by opening the door The setting will be maintained for 10 minutes TO CONTINUE COOKING CLOSE THE DOOR and press the Jet Start button ONCE The cooking is resumed from where it was paused PRESSING THE...

Страница 2: ...ass turntable USE OVEN MITTENS or the special Crisp handle sup plied when removing the hot Crisp plate BE CAREFUL NOT TO TOUCH the ceiling beneath the Grill element DO NOT PLACE THE HOT CRISP PLATE on any surface susceptible to heat THE OVEN AND THE CRISP PLATE become very hot when using this function q PRESS THE CRISP BUTTON w TURN THE ADJUST KNOB to set the cooking time e PRESS THE START BUTTON ...

Страница 3: ...ENCE RAPIDE PANNEAU DE COMMANDE INTERRUPTION OU ARRÊT DE LA CUISSON POUR INTERROMPRE LA CUISSON VOUS POUVEZ SUSPENDRE LA CUISSON pour vérifier re tourner ou mélanger les aliments en ouvrant sim plement la porte Les réglages seront conservés pendant 10 minutes POUR POURSUIVRE LA CUISSON FERMEZ LA PORTE et appuyez UNE FOIS sur la touche Jet Start La cuisson reprend là où elle a été interrompue SI VO...

Страница 4: ...SEZ DES GANTS DE CUISINE ou la poignée Crisp spéciale fournie pour sortir l assiette Crisp chaude FAITES TRÈS ATTENTION À NE JAMAIS TOUCHER la voûte du four sous le gril NE POSEZ JAMAIS L ASSIETTE CRISP CHAUDE sur une surface sensible à la chaleur q APPUYEZ SUR LA TOUCHE CRISP w TOURNEZ LE BOUTON DE RÉGLAGE pour sélectionner le temps de cuisson e APPUYEZ SUR LA TOUCHE JET START IL N EST PAS POSSIB...

Страница 5: ...ambién para ablandar mantequilla y queso GUÍA DE REFERENCIA RÁPIDA PANEL DE CONTROL PAUSA O INTERRUPCIÓN DE LA COCCIÓN PARA EFECTUAR UNA PAUSA DURANTE LA COCCIÓN SI DESEA COMPROBAR dar la vuelta o remover el alimen to puede efectuar una pausa durante la cocción abriendo la puerta El ajuste programado se conser vará durante 10 minutos PARA REANUDAR LA COCCIÓN CIERRE LA PUERTA y pulse el botón Jet S...

Страница 6: ...LICE GUANTES PARA HORNO o el mango especial suministra do para retirar la bandeja de fritura al horno si ésta está caliente EXTREME LA PRECAUCIÓN para evitar el contacto con la superficie situada bajo la parrilla NO COLOQUE LA BANDEJA DE FRITURA AL HORNO CALIENTE sobre superficies vulnerables al calor q PULSE EL BOTÓN CRISP FRITURA AL HORNO w GIRE EL MANDO DE AJUSTE para establecer el tiem po de c...

Страница 7: ...elten van boter 160 W ONTDOOIEN Zacht laten worden van boter kaas 90 W IJS ZACHT laten worden SNELLE REFERENTIEGIDS BEDIENINGSPANEEL DE BEREIDING ONDERBREKEN OF STOPPEN DE BEREIDING ONDERBREKEN DE BEREIDING KAN WORDEN ONDERBROKEN om het voedsel te controleren om te draaien of om te roeren door de deur te openen De instelling blijft 10 minuten lang ge handhaafd VERDERGAAN MET DE BEREIDING SLUIT DE ...

Страница 8: ... en spek worstjes hamburgers enz VERZEKER u ervan dat de crispplaat goed in het midden van het glazen draaiplateau is geplaatst GEBRUIK OVENHANDSCHOENEN of de meegeleverde speciale cri sphandgreep om de hete crispp laat uit de oven te nemen LET EROP DAT U DE PLAAT onder het grillelement niet aanraakt PLAATS DE HETE CRISPPLAAT NIET op een oppervlak dat gevoelig is voor warmte DE OVEN EN DE CRISPPLA...

Страница 9: ...ntola il piatto rotante e la lampadina della cavità restano accesi fino a che non si preme il tasto STOP AL COMPLETAMENTO DEL PROCESSO DI COTTURA il segnale acu stico del forno suona ogni minuto per 10 minuti Premere il tasto STOP o aprire la porta per far cessare il segnale NOTA Se si apre e chiude la porta al termine del pro cesso di cottura le impostazioni rimangono memo rizzate per 60 secondi ...

Страница 10: ...hamburger ecc ASSICURARSI CHE IL PIATTO Crisp sia posizionato cor rettamente al centro del piatto rotante in vetro INDOSSARE GUANTI DA FORNO o servirsi dell apposita maniglia Crispin dotazione per togliere il piatto Crisp caldo NON TOCCARE LA PARTE superiore del forno dove è alloggiata la griglia NON APPOGGIARE IL PIATTO CRISP ancora caldo su su perfici che potrebbero rovinarsi IL FORNO E IL PIATT...

Страница 11: ...hl hl chl chly o y oh h hre hrev p v p t otr otr í aví avín s n s vy vy k soký ým JET START HODINY STRUČNÁ PRÍRUČKA OVLÁDACÍ PANEL PRERUŠENIE ALEBO UKONČENIE VARENIA PRERUŠENIE VARENIA AK CHCETE JEDLO SKONTROLOVAŤ obrátiť alebo premiešať proces prerušíte otvorením dvierok Nastavené hodnoty sa udržia 10 minút POKRAČOVANIE VARENIA ZATVORTE DVIERKA a RAZ stlačte tlačidlo Jet Start Varenie pokračuje ď...

Страница 12: ... SKONTROLUJTE že tanier Crisp Plate je správne umiestnený v strede skleneného otočného taniera NA VYBERANIE TANIERA NA PEČENIE CRISP PLATE POUŽÍVAJTE RUKAVICE alebo špeciálnu rúčku Crisp dodávanú sa tanierom na pečenie Crisp Plate DÁVAJTE POZOR A NEDOTÝKAJTE SA povrchu pod grilovacím prvkom HORÚCI TANIER CRISP PLATE NEUKLADAJTE na žiadny povrch náchylný na účinky tepla RÚRA A TANIER NA PEČENIE CRI...

Страница 13: ...TE DVÍŘKA a JEDNOU stiskněte tlačítko Jet Start Proces tepelné úpravy se obnoví od okamžiku kdy byl přerušen STISKNUTÍM TLAČÍTKA STARTDVAKRÁT se doba prodlou ží o 30 vteřin JESTLIŽE UŽ NECHCETE POKRAČOVAT VYJMĚTE JÍDLO Z TROUBY zavřete dvířka a stiskně te tlačítko STOP POZNÁMKA Po skončení vaření osvětlení trouby stále svítí dokud nestisknete tlačítko STOP To je normální ZVUKOVÝ SIGNÁL bude po uko...

Страница 14: ... smažení slaniny a vajec párků hamburgerů atd OVĚŘTE SI zda je talíř Crisp správně umístěný uprostřed skleněného otočného talíře PŘI VYJÍMÁNÍ HORKÉHO TALÍŘE CRISP VŽDY POUŽÍVEJTE KUCHYŇSKÉ CHŇAPKY nebo přiložený speciální držák Crisp BUĎTE OPATRNÍ A NEDOTÝKEJTE SE stěny pod topným tělesem grilu HORKÝ TALÍŘ CRISP NEPOKLÁDEJTE na plochu která nesnáší vysoké teploty TROUBA A TALÍŘ CRISP se při použit...

Отзывы: