page 4 – 13
L-8 / Jan 2015
W H E A T N E T - I P 8 8 c b l C O N S O L E B L A D E 3
BLADE 3 Front Panel Configuration
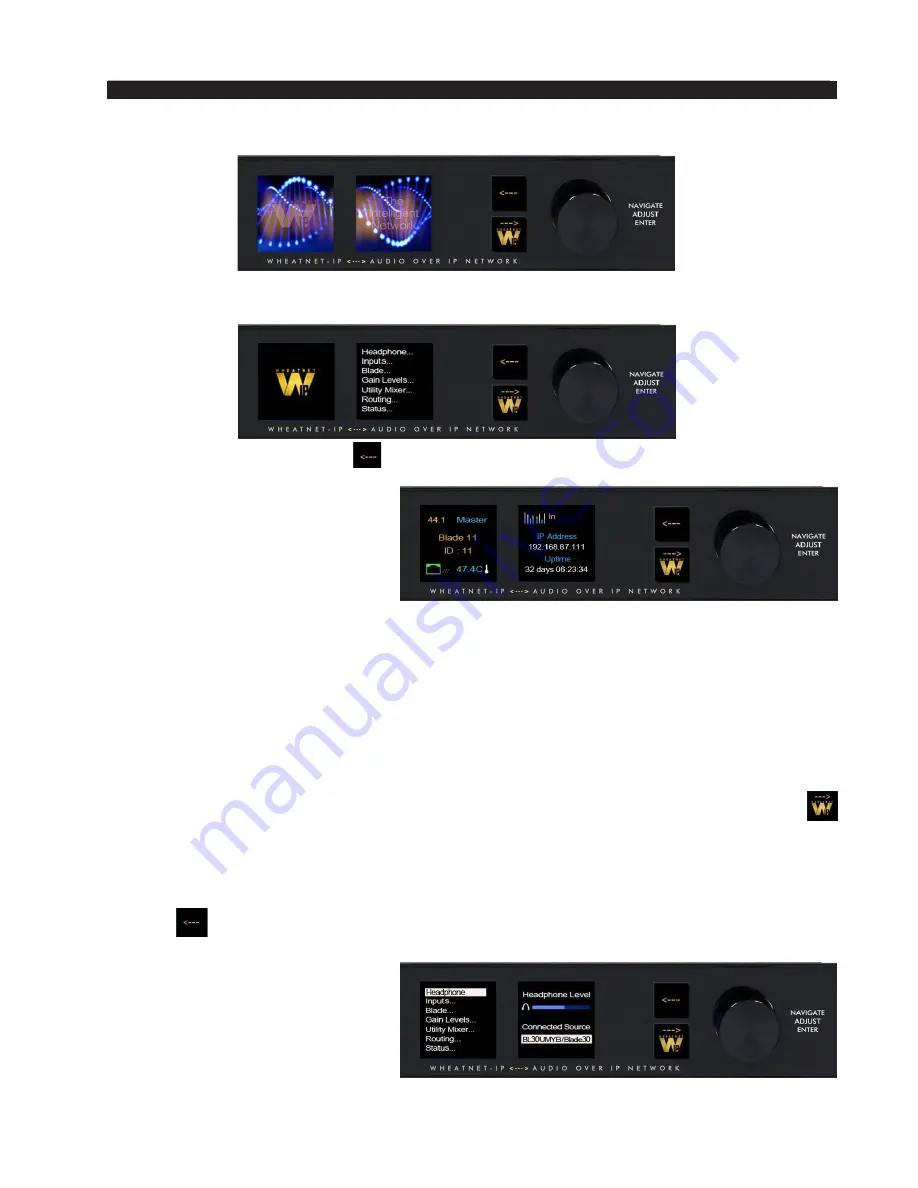
Activating any of the front panel controls will replace the screen saver display with the
main menu screen.
Press the left arrow button
twice to open up the BLADE 3 information screens:
On the left window of the Info
screens you will find your digital
system clock rate, that can be either
44.1K, 48K, External Reference, or
AES 67. The “Master” on the top row
will be displayed if this BLADE 3 as-
sumes the role as system master over
the rest of the BLADE 3s in your network, or a square wave icon shows if this BLADE 3 is
acting as the clock master. The BLADE 3’s Name, ID number, and inside temperature also
display in this window. The RJ-45 connector icon will show green and have moving dots
next to it if the BLADE 3 is connected to the network. If it is not connected the RJ-45 icon
will show red and there will be no dots.
The right window of the Info screens displays whether the BLADE 3’s signal meters are
displaying input or output, and also shows the BLADE 3 IP Address and Uptime.
Pressing the left arrow button again will take you back to the screen saver display.
Clockwise rotation of the knob navigates up and down a menu when there is a list,
or scrolls thru options in a submenu once one has been selected. Pressing the right arrow
button navigates through sub-menu options. Pushing the knob “takes” an option.
To edit any parameter or name, press the right arrow button to highlight the parameter.
Turn the knob to find the desired value or character, then press the right arrow button to take
it. If the parameter has more than one field you can press the knob to cycle through the fields.
The
button backs out of a submenu to the main menu.
For example, when you select
Headphone...
by pressing the right
arrow button the main menu list will
be displayed in the left window and
Headphone Level
and
Connected
Status
show in the right window.
To adjust the volume level, turn
the knob to highlight
Headphone


