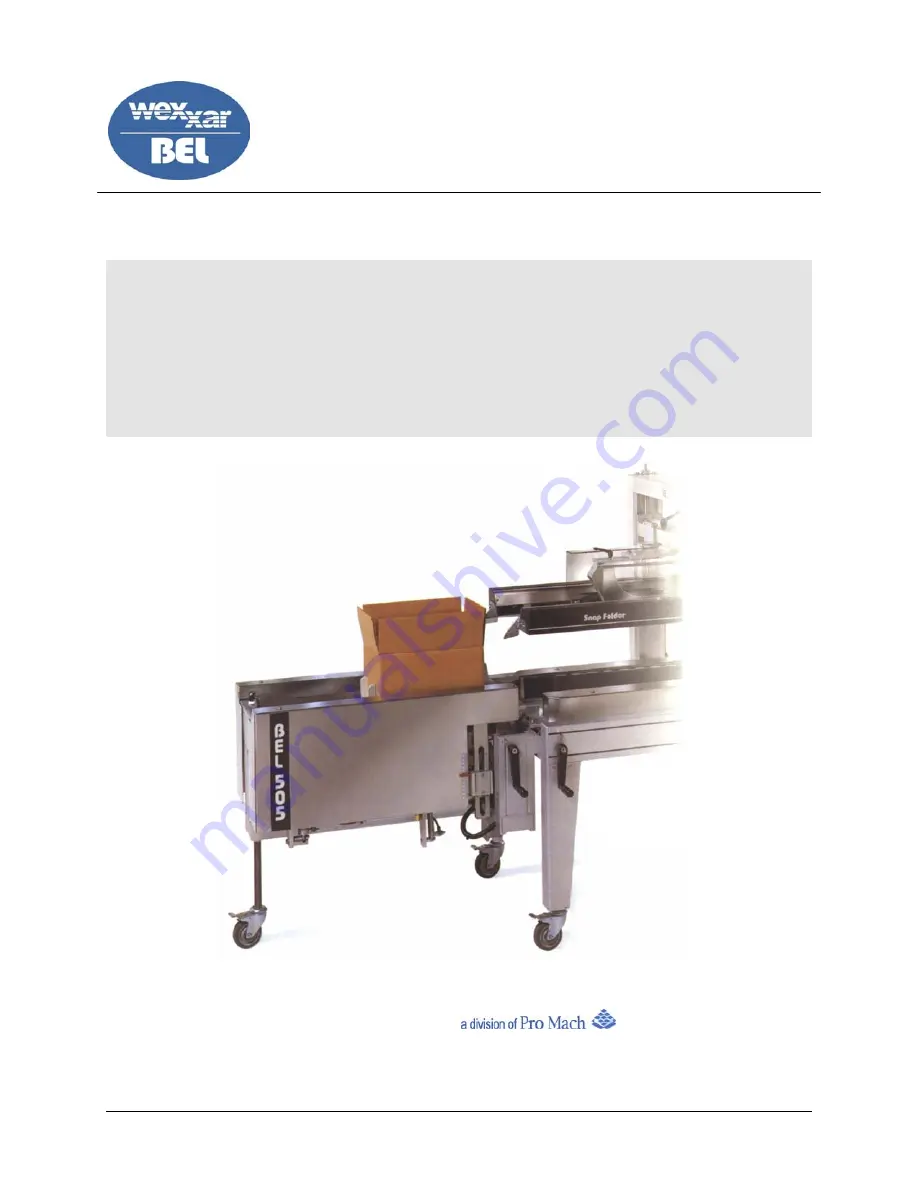
background image


O

PERATION 

& S

ERVICE 

M

ANUAL


65-11-7


BEL 505 / BEL 505S 

S

EMI

-A

UTOMATIC 

C

ASE 

F

ORMER 


AND 

P

ACKING 

S

TATION


Wexxar Packaging Inc


E-mail: [email protected] 

Phone (604) 270-0811 • Fax (604) 270-7897 

65-11-07  2/5/2007 

Содержание BEL 505

Страница 1: ...OPERATION SERVICE MANUAL 65 11 7 BEL505 BEL505S SEMI AUTOMATIC CASE FORMER AND PACKING STATION Wexxar Packaging Inc E mail sales wexxar com Phone 604 270 0811 Fax 604 270 7897 65 11 07 2 5 2007 ...

Страница 2: ...king stations in close proximity with conventional back flap kickers and three flap folders Be sure that the main on off valve at the air connection is shut off and that the red emergency stop button is pushed down before connecting an air supply to the machine the machine is disconnected from the air source before undertaking any maintenance or service procedures This is to avoid inadvertent mach...

Страница 3: ...d Height UHMW Pads 21 5 546mm min 28 5 724mm max Castors 25 635mm min 32 813mm max Power Requirements standard Compressed Air 80 90 PSI 0 1 CF Cycle BEL 505 S SEMI AUTOMATIC CASE FORMER AND PACKING STATION Standard Case Size Range Length Width Height Minimum 8 203mm 5 127mm 3 5 89mm Maximum 16 406mm 15 381mm Unlimited Machine Size 27 5 700mm 25 635mm 22 560 Case Infeed Outfeed Height UHMW Pads 21 ...

Страница 4: ...LLATION PROCEDURES 6 INSTALLING THE BEL 505 505 S 6 LEVELLING THE MACHINE 6 AIR CONNECTION 7 OPERATION ADJUSTMENT PROCEDURES 8 MACHINE SET UP ADJUSTMENTS 8 CASE WIDTH 8 CASE LENGTH 9 MAJOR FLAP FOLDER ROLLER PLATES 10 MACHINE OPERATION 11 STARTING THE MACHINE 11 ERECTING A CASE 11 MACHINE OPERATING CYCLE 12 TROUBLESHOOTING GUIDE 14 65 11 7 2 5 2007 ...

Страница 5: ... of corrugated cartons used and effectiveness of the case folding process A separate Technical Reference manual or manual section provides details on parts kits parts identification and machine construction for those who will service and repair the machine PLEASE NOTE Best performance with BEL machines will occur when adjusted operated and maintained in accordance with the instructions in this man...

Страница 6: ...a horizontal position Attempting to tilt the 505 or 505 S toward the operator will cause excessive wear in the case width adjustment mechanism and may case it to bind or damage the width adjustment screw A width adjustment equalizer option 70 380 is on BEL 505 s that are used with side tilt mounted systems Another possibility for a side tilt system is the BEL Model 507 Tilt Packing Station It is d...

Страница 7: ...n is pushed down off before connecting an air supply to the machine The air may come from either a separate source or by tapping off the supply of an adjoining case sealer The supply must be clean factory air and must be lubricated by the unit on the machine Air pressure should be set to 80 psi for most applications with a minimum setting of 65 psi and maximum of 100 psi 65 11 7 2 5 2007 ...

Страница 8: ...s Switch off or disconnect the air supply to the machine before making any changes or adjustments MACHINE SET UPADJUSTMENTS Setting up the BEL 505 505 S to fold a particular box size is accomplished with two main adjustments for case width and length There is a third adjustment to reposition the major flap folder plates that after initial setup will need to be changed only where there is a large d...

Страница 9: ...se of the front minor flap folding tower 2 Reinsert the case into the machine and position it back from the minor flap folder at the exit end of the machine Push the tower forwards until it just contacts the back of the case Remove the case and tighten the tower clamp Body switch roller Case hold down roller Minor flap folding tower 65 11 7 2 5 2007 ...

Страница 10: ...valve flap opener bracket as the machine is adjusted for minimum width If forced either of these conditions can damage machine components There are two major folder plates on each side of the machine one small and one large that are adjusted independently 1 Loosen the four socket head cap screws on each side that hold the folder rollers in place Slide the front large folder to the desired position...

Страница 11: ...e air connection is shut off and that the red emergency stop button is pushed down before connecting an air supply to the machine STARTING THE MACHINE Prior to starting hand swing all moving parts to check adjustment and for any mechanical interference Turn on main supply valve keeping hands clear of moving parts ERECTING ACASE 1 Open a case so that it is fairly square 2 Place the open bottom into...

Страница 12: ...ctuators of the two floor switch valves and the side of the case depresses the wheeled body switch valve All three switches must be actuated for the machine cycle to start 2 The two small levers of the major side flap openers momentarily open the bottom major flaps wider to clear the minor end flaps Body switch Floor switches Bottom major flap opener 65 11 7 2 5 2007 ...

Страница 13: ...der Front Minor Flap Folder Rear Minor Flap Folder Machine out feed end Rear Minor Flap Folder 4 The major flap folders then fold up both side flaps of the bottom and stay in position to support the box for packing 5 Pushing the box out of the machine breaks contact with the body switch inside the packing station The machine then resets ready for the next case Major folder RH h 65 11 7 2 5 2007 ...

Страница 14: ...of minor flaps to be folded over Check that the air pressure is adequate and that the air pressure does not drop during the cycle Check that the flow controls on the small major flap opening cylinders are set so that they will momentarily open the major flaps wider and allow the minor flaps to clear the inside of the major flaps before releasing Problem Back or front case collapses inward during m...

Страница 15: ...on Service Manual 65 02 7 BEL150 151 Semi AutomaticUniformCaseTapeSealers BEL150X 151X ExtendedRangeSemi AutomaticUniformCaseTapeSealers Wexxar Packaging Inc Phone 604 270 0811 Fax 604 270 7897 E mail sales wexxar com ...

Страница 16: ...r drive and it connects to an electrical outlet by a conventional cord and plug 5 1 0 DEKKA Standard Specifications Length Width Height Case Size Range Minimum 8 203mm 5 5 140mm 4 102mm Maximum no limit 17 38 440mm 21 533mm Machine Dimensions 40 101mm 33 838mm 53 25 1353mm In Outfeed Height Frame 22 558mm With adjustable leg extensions foot pad Minimum Maximum 23 5 597mm 32 813mm Speed Up to 30 ca...

Страница 17: ...nnects to an electrical outlet by a conventional cord and plug 151 DEKKA Standard Specifications Length Width Height Case Size Range Minimum 8 203mm 5 5 140mm 4 102mm Maximum 17 38 440mm Machine Dimensions 40 1016mm 33 838mm 37 937mm In Outfeed Height Frame 22 558mm With adjustable leg extensions foot pad Minimum Maximum 23 5 597mm 32 813mm Speed Up to 30 cases min Shipping Weight Approx 400 lbs 1...

Страница 18: ...hase for the conveyor drive and the machine connects to an electrical outlet by a conventional cord and plug 1 0 5 X DEKKA Standard Specifications Length Width Height Case Size Range Minimum 8 203mm 6 5 165mm 5 127mm Maximum no limit 24 75 629mm 30 762mm Machine Dimensions 40 101mm 41 1041mm 54 25 1378mm In Outfeed Height Frame 18 457mm With adjustable leg extensions foot pad Minimum Maximum 20 38...

Страница 19: ...ive and the machine connects to an electrical outlet by a conventional cord and plug 151X DEKKA STANDARD SPECIFICATIONS Length Width Height Case Size Range Minimum 8 203mm 6 5 165mm 5 0 Maximum Unlimited 24 75 629mm Unlimited Machine Dimensions 40 101mm 41 1041mm 37 940mm In Outfeed Height Frame 18 457mm With adjustable leg extensions foot pad Minimum Maximum 20 38 518mm 25 75 654mm Speed Up to 30...

Страница 20: ... FEEDING CASES 10 PREVENTATIVE MAINTENANCE GUIDE BEL 150 151 150X 151X 11 SERVICE AND MAINTENANCE PROCEDURES 12 UNI DRIVE Side Belt Drive System 12 Chain Drive Tension 13 Side Belt Replacement 13 Belt Tensioning and Tracking Adjustment 13 ARCH CROSS MEMBER VERTICAL SLIDE ADJUSTMENT 14 TROUBLE SHOOTING GUIDE 17 Section 1 Corrugated Case Quality Specifications 17 Section 2 Case Drive Belt System 18 ...

Страница 21: ...s on the sides of the heads that fit into corresponding slots in the tape head mounting brackets Lower the tape head into the bracket aligning the pins with the slots The upper tape head when pushed firmly toward the rear of the machine in its mounting slots is held in position by spring retainers Please consult the tape head manual for instructions on the mounting of tape rolls and the proper thr...

Страница 22: ...TCH MAGNETIC MOTOR STARTER AND THERMAL OVERLOAD PROTECTION CASE HEIGHT VERTICAL ADJUSTMENT TOP TAPE HEAD AND MOUNTING BRACKET OPTIONAL TOP CASE SIDE SHOULDER COMPRESSION ROLLERS UNI DRIVE SIDE DRIVE BELT CONVEYOR WITH ENDLESS ROUGH TOP BELTS SINGLE HP CONVEYOR DRIVE MOTOR CASE CONVEYOR WIDTH ADJUSTMENT BOTTOM TAPE HEAD OPTIONAL INFEED TABLE OPTIONAL CASTERS FOOT PADS STANDARD ...

Страница 23: ...dth by a crank both of which can be positioned on either side of the machine for operator convenience Height Adjustment Turn the hand wheel located at the top of the machine frame arch raising the tape head until it clears the top of box to be sealed Position the box under the tape head and wind the tape head down until the folded top flaps fit snugly under the upper tape holder front compression ...

Страница 24: ... of the frame arch for easy access from either side of the machine To start the machine press the green start button on the switch Use the red button to stop the machine FEEDING CASES First fold down the top flaps of the case must by hand Holding the top flaps closed the operator directs the case between the infeed guides until it contacts the side drive belts which grip it and transport it throug...

Страница 25: ...for evidence of oil leakage noise or vibration and keep unit free of dirt excess accumulation of dirt or grease will affect the proper cooing of the units 3 M O N T H L Y 480 Hrs Lubricate width and height adjustment lead screws with a Synthetic Teflon Grease Loctite Super Lube Remove drive belts Drive and Idle Pulleys should be inspected for bearing wear and pulley damage Remove any dirt build up...

Страница 26: ...nance Procedures UNI DRIVE Side Belt Drive System SIDE BELT CONVEYOR WITH COVERS REMOVED POINT A SERPENTINE CHAIN DRIVE DRIVE CHAIN IDLER SPROCKET LOOSEN MOUNTING BOLT POINT D UNDERNEATH DRIVE HOUSING NEXT TO GEAR SPEED REDUCER AND PULL TO TENSION BELT TENSIONING AND TRACKING ADJUSTMENT NUTS POINT B BELT TENSION ALIGNMENT LOCKING BOLT POINT C ...

Страница 27: ...the screws and attaching them to the machine frame cross member IMPORTANT Replace the safety covers before operating the machine The optional BEL 150 Spare Parts Maintenance Kit contains all of the parts necessary for maintaining the Uni Drive system See the Technical Reference manual 66 02 for details and contact the factory or your local Belcor Distributor for price and availability Side Belt Re...

Страница 28: ...ly with vertical slide bar bearings that ride inside the arch columns allowing the cross member to move smoothly up and down for case height adjustment The bearings are made of a special hardwearing plastic material but may need periodic adjustment to compensate for wear or for loosening due to shipping or operating vibration If worn or loose the bearings allow excessive movement of the upper tape...

Страница 29: ...B E L 1 5 0 1 5 1 1 5 0 X 1 5 1 X S e m i A u t o m a t i c U n i f o r m C a s e T a p e S e a l e r s 15 65 02 7 02 06 07 Fig 3 Vertical Slider Bearing Assembly Fig 4 Slider Bearing Adjustment ...

Страница 30: ... so the slider bar bearings are free to be adjusted 4 Place a screwdriver through an adjusting hole and use it to lever a slider bar bearing tighter against the column channel flange While holding the pressure with the screwdriver tighten the two securing bolts through each bearing Repeat this procedure for the other three bearings and try to equalize the amount of adjustment between all four 5 Te...

Страница 31: ...red by various factors in the corrugated box manufacturing process Points to watch for a that the flutes have not been crushed overall causing the box to have a soft and limp feeling This causes poor case rigidity during machining and also does not give your product the protection it deserves b selective bands of crushing usually parallel to the box flutes that can cause failure lines down the box...

Страница 32: ...he case of round can or bottle products check that belts are set to grip lightly but firmly on case sides Excessive side pressure can cause round objects to roll over center and push the case out of square Problem Depressed or Crushed Band on Lower Case If the cases exit the machine with a band of crushed corrugation at the level of the conveyor belts it is likely that the case is gripped too tigh...

Страница 33: ...t center point of conveyor Idler and drive pulley rotation Check that pulleys rotate freely and that bearings are not excessively worn or seized Rotation direction of belt Look on the back of the belt for the type of join Stepped lap splice belts must move in the direction of the arrow marked on the inside of the belt Newer style finger spliced belts can move in either direction Problem Machine Ja...

Страница 34: ...good initial bond and permanent sealing performance Tape adhesive Check presence and quality of tape adhesive Problem Tape is not cut uniformly The tape is not cut properly every time in the worst situations several boxes may be taped together Check the following conditions Tape head position If the top tape head is set too high the cut off knife will not be fully activated resulting in poor cut o...

Страница 35: ...ons Look for obstructions that could be pushing the tape off center Problem Tape Falls Forward on Bottom Head The beginning end of the tape must stand vertically in front of the tape head front roller in order to contact the leading end of the next case A bow made across the tape by the tape head guides help to stiffen it and a static electric charge on the tape head rollers attract the tape and h...

Страница 36: ... 003 Adjustable stainless steel leg extenders with zinc plated casters 70 004 Alternate voltages available on request Machine spare parts kits BEL 150 151 70 010 BEL 150X 151X 70 189 as above DEKKA tape head spare parts kits Dekka 22 70 056 Dekka 23 70 057 Spare tape heads Shoulder compression rollers for bulged cases 70 007 All parts available individually TECHNICAL REFERENCE INFORMATION See Publ...

Отзывы: