background image

8

Lighting the side burner

For models with a range-style side burner

The side burner has a separate ignition system from the
main cooking box.

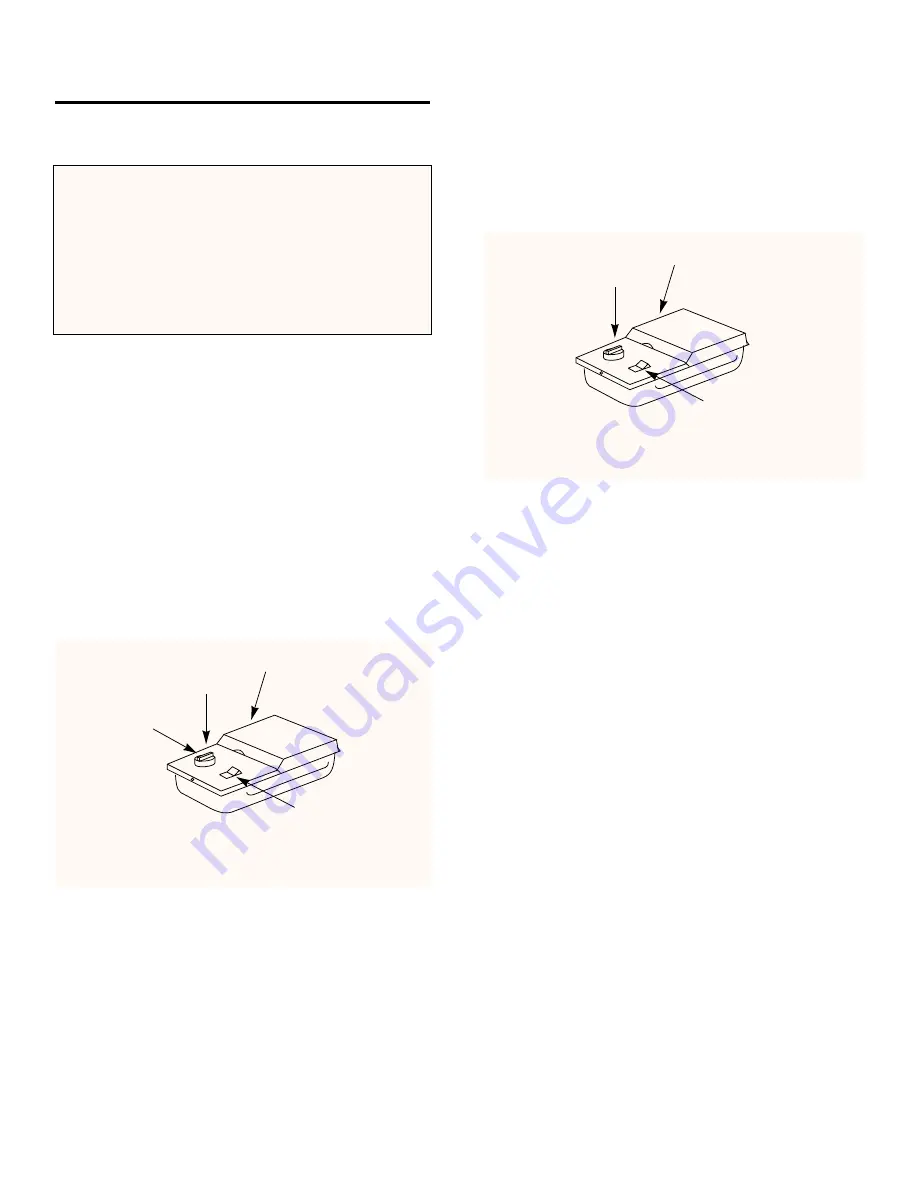
Lighting only the side burner. Figure 3.

1)

Open the side burner lid.

2)

Check that the fuel scale reads more than “E”.

3)

Check that the side burner valve is OFF (push 
down and turn clockwise), and all main burner 
control valves are OFF (push down and turn 
clockwise).

4)

Turn the LP tank valve on (turn counterclockwise).

5)

Push down and turn the side burner control valve 
to HI.

6)

Push the side burner igniter button several times so 
it clicks each time.

CAUTION: Side burner flame may be difficult to see
on a bright sunny day.

WARNING: If the side burner does not light:

a)

Turn OFF the side burner control valve.

b)

Wait 5 minutes to let the gas clear before you 
try again or try to light with a match.

6

3

5

1

Figure 3

DANGER

Failure to open lid while igniting the

side burner, or not waiting 5 minutes to
allow gas to clear if the side burner does
not light, may result in an explosive
flame-up which can cause serious bodily
injury or death.

Lighting the side burner if the main burners are lit.
Figure 4.

1)

Open the side burner lid.

2)

Push down and turn the side burner control to HI.

3)

Press the side burner igniter button several 
times so it clicks each time.  

CAUTION: Side burner flame may be difficult to see
on a bright sunny day.

WARNING: If the side burner does not light:

a)

Turn OFF the side burner control valve.

b) Wait 5 minutes to let the gas clear before you try

again or try to light with a match.

3

2

1

Figure 4

Содержание 3400 Series

Страница 1: ...r gas supplier or your fire department WARNING Follow all leak check procedures carefully in this manual prior to barbecue operation Do this even though the barbecue is assembled FOR YOUR SAFETY 1 Do not store or use gasoline or other flammable vapors and liquids in the vicinity of this or any other appliance 2 An LP tank not connected for use shall not be stored in the vicinity of this or any oth...

Страница 2: ...lace hands or fingers on the front edge of the cooking box Should a grease fire occur turn off all burners and leave lid closed until fire is out Do not enlarge valve orifices or burner ports when cleaning the valves or burners The Weber Gas Barbecue should be thoroughly cleaned on a regular basis LP gas is not natural gas The conversion or attempted use of natural gas in an LP unit or LP gas in a...

Страница 3: ...is owner s manual Deterioration or damage due to severe weather conditions such as hail hurricanes earthquakes or tornadoes discoloration due to exposure to chemicals either directly or in the atmosphere is not covered by this Limited Warranty There are no other express warrants except as set forth herein and any applicable implied warranties of merchantability and fitness are limited in duration ...

Страница 4: ... improved LP tank connection that has additional safety features They are 1 The connection of the barbecue to the LP tank can be made without the use of tools 2 The new connection will not permit the flow of gas until a positive gas connection is made 3 If an accidental fire occurs at the LP tank connection the flow of gas is stopped by a temperature activated shutoff 4 If the LP supply hose becom...

Страница 5: ...cessarily comply with the Canadian Installation codes particularly with piping above and below ground In Canada the installation of this appliance must comply with local codes and or Standard CAN CGA B149 2 Installation Code for Propane Burning Appliances and Equipment Storage The gas must be turned OFF at the LP tank when the Weber Gas Barbecue is not in use When the Weber Gas Barbecue is stored ...

Страница 6: ...lve and burner control knobs and start over 4 Turn the tank on by turning the tank valve counterclockwise 5 Push Front burner control knob down and turn to START HI WARNING Do not lean over open barbecue Keep your face and body at least one foot away from the matchlight hole when lighting the barbecue 6 Push the Crossover Ignition Button several times so it clicks each time 7 Check that the burner...

Страница 7: ...e lid Figure 2 2 Check that fuel scale reads more than E Note E empty F full 3 Make sure all burner control knobs are turned OFF Push each burner control knob down and turn clockwise WARNING The burner control knobs must be in the OFF position before turning on the LP tank valve If they are not in the OFF position when you turn on the LP tank valve the excess flow control will activate limiting th...

Страница 8: ...side burner does not light a Turn OFF the side burner control valve b Wait 5 minutes to let the gas clear before you try again or try to light with a match 6 3 5 1 Figure 3 DANGER Failure to open lid while igniting the side burner or not waiting 5 minutes to allow gas to clear if the side burner does not light may result in an explosive flame up which can cause serious bodily injury or death Light...

Страница 9: ...The load limit for the swing table is 30 pounds Swing table end bracket Slide bar assembly Support rod Support rod holder Locked position Unlocked position Figure 5 Figure 6 Slide Swing table end bracket Using the swing table To use table Unhook support rod from the support rod holder at the rear of the barbecue and insert the support rod into the frame at the front barbecue Figure 6 WARNING If sw...

Страница 10: ... be stored outdoors in a well ventilated area out of reach of children Disconnected LP tanks must have threaded valve plugs tightly installed and must not be stored in a building garage or any other enclosed area When the LP tank is not disconnected from the Weber Gas Barbecue the appliance and LP tank must be kept outdoors in a well ventilated space Storage and or Nonuse continued The Weber Gas B...

Страница 11: ...is closed Close by turning clockwise Scale setting wing nut Tank lock wing nut Tank valve a b Figure 7 F E Figure 8 You will need LP tank a soap and water solution and a rag or brush to apply it Note Since some leak test solutions including soap and water may be slightly corrosive all connections should be rinsed with water after checking for leaks a Lift and hook the tank onto the fuel scale b Lo...

Страница 12: ...use the barbecue g When leak checking is complete turn gas supply OFF at the source and rinse connections with water LP Tank The LP tank manufacturer is responsible for the materials workmanship and performance of the tank If the tank has a defect malfunctions or you have a question regarding the tank call the tank manufacturer s customer service center The phone number is on the warning decal whi...

Страница 13: ...ped or handled roughly Never store or transport the LP tank where temperatures can reach 125 F too hot to hold by hand for example do not leave the LP tank in a car on a hot day Note A refill will last about 20 hours of cooking time at normal use The fuel scale will indicate the propane supply so you can refill before running out You do not have to run out before you refill Treat empty LP tanks wi...

Страница 14: ... heavily coated with burned on grease Is the bottom tray dirty and not allowing grease to flow into catch pan Are burners clean The lid is porcelain on steel not paint It cannot peel What you are seeing is baked on grease that has turned to carbon and is flaking off THIS IS NOT A DEFECT Check adjustment of fuel scale Cure Clean Weber Spider Stopper Guards See Section Annual Maintenance See Section...

Страница 15: ...urner WARNING Before attempting any troubleshooting steps all gas controls and supply valves should be in the OFF position Side Burner Maintenance WARNING All gas controls and supply valves should be in the OFF position Check igniter Remove side burner cover To remove side burner cover remove control knob and screws that hold cover to bottom Figure 11 Make sure wire is connected between igniter an...

Страница 16: ...ou will need a soap and water solution and a rag or brush to apply it Make sure main burners are in the OFF position Make sure side burner is OFF Remove valve control knob and screws Remove enamel top Refer to the Step by Step Instruction booklet for removal and installation of control panel To perform leak checks Turn on gas supply WARNING Do not ignite burners while leak checking Check for leaks...

Страница 17: ...anual Check all gas fittings for leaks WARNING You should check for gas leaks every time you disconnect and reconnect a gas fitting You will need a soap and water solution and a rag or brush to apply it Make sure main burners are in the OFF position Refer to Step by Step Instruction booklet for removal and installation of control panel To perform leak checks Turn on gas supply WARNING Do not ignit...

Страница 18: ...symptoms may result in a fire which can cause serious bodily injury or death and cause damage to property Main Burner Flame Pattern The Weber Gas Barbecue burners have been factory set for the correct air and gas mixture The correct flame pattern is shown in Figure 18 If the flames do not appear to be uniform the length of the burner tube follow the burner cleaning procedures Main Burner Cleaning ...

Страница 19: ...er CAUTION After reinstalling the gas lines they should be leak checked with a soap and water solution before using the barbecue See Step Check for gas leaks Crossover tube Figure 24 Venturi fin Check fit around burner Figure 25 Check fit around valve d Unlatch the Spider Stopper Guards and remove Figure 21 e Remove the manifold bracket and unscrew the two wing nuts that hold the manifold to the c...

Страница 20: ...the white and black ignition wires are attached properly Figure 26 Check that the Crossover Ignition button pushes the igniter button down and returns to the up position Check to see if the igniter is loose in the frame Tighten if necessary see Step Install igniter for correct procedure If the Crossover Ignition System still fails to light see Section Manual Lighting and contact Weber Stephen Cust...

Отзывы: