background image

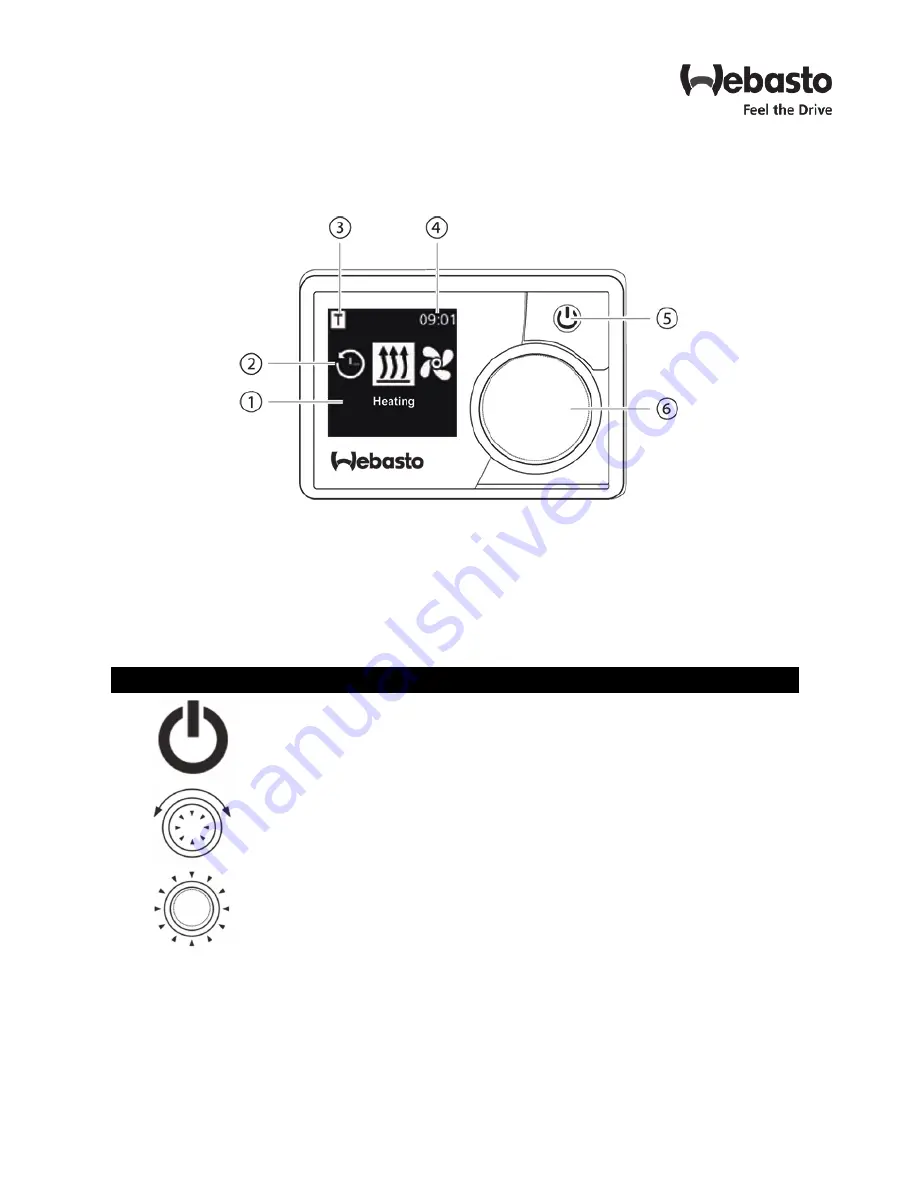
MultiControl Element and Menu Structure

NOTE: For more detailed information on the operation of the MultiControl control panel, refer to the operation guide
located at www.techwebasto.com

* - Optional

1

Menu name

2

Menu symbol

3

Activated time settings, altitude correction*

4

Time

5

Quick-start button with status display

6

Control knob

Button

Control and Function

Quick-start button with status display

Turn the control knob (turn/push button) to select a function.

Press the control knob (turn/push button) for confirmation of the selected function.

Содержание Coolant

Страница 1: ...Coolant Heater General Operation Manual ...

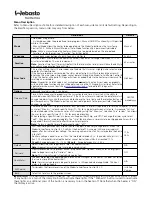
Страница 2: ...er suffers continuous fault cut outs with error messages on select models it must be shut down by removing the fuse and must not be used until it has been inspected by Webasto trained personnel 8 Wherever flammable vapors or dust may form the heater must be switched off as a result of the risk of explosion 9 The heat transfer unit on coolant heaters is exposed to very high thermal stress and must ...

Страница 3: ...y Knob a Screw Cap Selection Button The micro USB service port is not used for heater diagnostic purposes on SmarTemp Control fc 2 0 Switching ON When the switch is used the operation indicator toggle lights up Shortly thereafter the heater begins operation and delivers heated coolant to the engine or heat exchanger Switching OFF When heating is no longer required switch the toggle switch OFF The ...

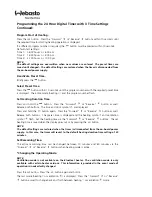
Страница 4: ...ser to properly set the current date and time User also has the ability to switch between AM PM and 24 hour format If the 24 hour format is selected the date format will change to dd mm yyyy Use the rotary knob to choose the time date and the selection button to confirm each entry The Webasto button can be used to go back to the previous field if additional changes are needed AM PM mm dd yyyy Time...

Страница 5: ...nd the symbol for heating are displayed Switching Off Manually by pressing the Manual Operation button Automatically via the programmed end time The display field goes out when the heating time expires Setting the Time This function is not available when heating mode is active Press and hold the button Press the Forward or Reverse button as well The time of the day is displayed and the clock symbo...

Страница 6: ...both buttons The time and clock symbol are displayed Press and hold the button again Press the Forward or Reverse button as well Release both buttons The preset time is displayed and the heating symbol and ventilation symbol flash Set the heating time via the Forward or Reverse buttons The set heating time is saved when the display goes out or by pressing the button NOTE The default settings are r...

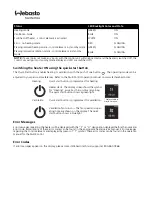
Страница 7: ...w techwebasto com Optional 1 Menu name 2 Menu symbol 3 Activated time settings altitude correction 4 Time 5 Quick start button with status display 6 Control knob Button Control and Function Quick start button with status display Turn the control knob turn push button to select a function Press the control knob turn push button for confirmation of the selected function ...

Страница 8: ... operation manual on www techwebasto com Heating Quick start button is programmed for heating Heater starts The display screen shows the symbol for Heating as well as the run time remaining The quick start button shows a green light Ventilation Quick start button is programmed for ventilation Not available in North America Ventilation fan turns on The fan speed and oper ating time are shown on the...

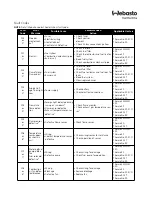
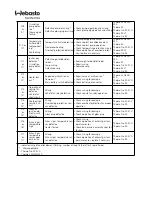
Страница 9: ...lectrical connections Thermo 230 300 350 Thermo 50 Thermo Pro 50 ECO Thermo 90 ST Thermo Pro 90 F04 or 4 Premature flame detec tion Foreign light detected during run up or run down2 Flame sensor defective Exhaust temperature sensor defective1 Check flame monitor Check exhaust gas temperature sen sor1 Thermo 230 300 350 Thermo 50 Thermo Pro 50 ECO Thermo 90 ST Thermo Pro 90 F05 or 5 Flame sensor de...

Страница 10: ... for damage Check battery disconnector Thermo 230 300 350 Thermo Pro 50 ECO Thermo Pro 90 F13 or 13 Operation of vehicle fan defective Vehicle fan short circuit Wiring Vehicle fan relay defective Check wiring for damage Check vehicle fan relay operation Thermo Pro 50 ECO Thermo Pro 90 F14 or 14 Overheat sen sor short cir cuit Wiring Overheating protection sen sor defective Check wiring for damage ...

Страница 11: ...ace those parts which are demonstrated to be defective in material or workmanship While warranty is provided to the original end user it is to be administered and serviced through an authorized Webasto dealer in accordance with the Webasto warranty policy or contractual agreement between Webasto and a second party To locate the nearest Webasto authorized dealer for warranty service visit http www ...

Страница 12: ...Webasto Thermo Comfort N A Inc 15083 North Road Fenton MI 48430 Technical Assistance Hotline USA 800 860 7866 Canada 800 667 8900 www webasto us www techwebasto com Org 10 2017 Rev 07 2019 P N 5012725A ...

Отзывы: