16 of 20
WX-501-0517 • 05.22
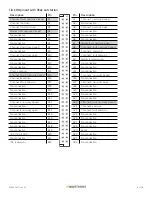
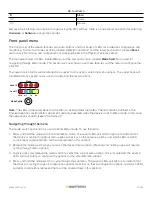
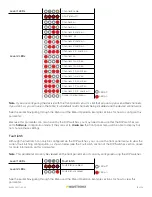
Level 1 LEDs
Channel Enable
Level 2 LEDs
All off (default)
Channel 4 on
Channel 3 on
Channels 3 and 4 on
Channel 2 on
Channels 2 and 4 on
Channels 2 and 3 on
Channels 2, 3, and 4 on
Channel 1 on
Channels 1 and 4 on
Channels 1 and 3 on
Channels 1, 3, and 4 on
Channels 1 and 2 on
Channels 1, 2, and 4 on
Channels 1, 2, and 3 on
Channels 1, 2, 3, and 4 on
LED off
Cancel and exit menu
LED on
Note.
If you are configuring the device with the front panel menu, it’s vital that you set up your enabled channels;
if you don’t, as you can see in the table, it will default to all channels being disabled and the device will not work.
See the earlier Navigating through the Menu and the Menu Operation Example sections for how to configure this
parameter.
Because this parameter can also be set by the DIP switches, you may need to ensure that the DIP switches are
set to
Software
configuration mode; if they are set to
Hardware
, the front panel menu will be able to display but
not change these settings.
Fault latch
Although the fault latch can only be configured via the DIP switches, you can use the front panel menu to view the
current fault latching configuration, as shown below (see the Fault Latch section of the DIP Switches section above
for more information on this parameter).
Note.
This parameter can only be viewed on the front panel menu; it can only configured using the DIP switches.
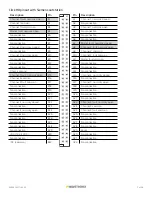
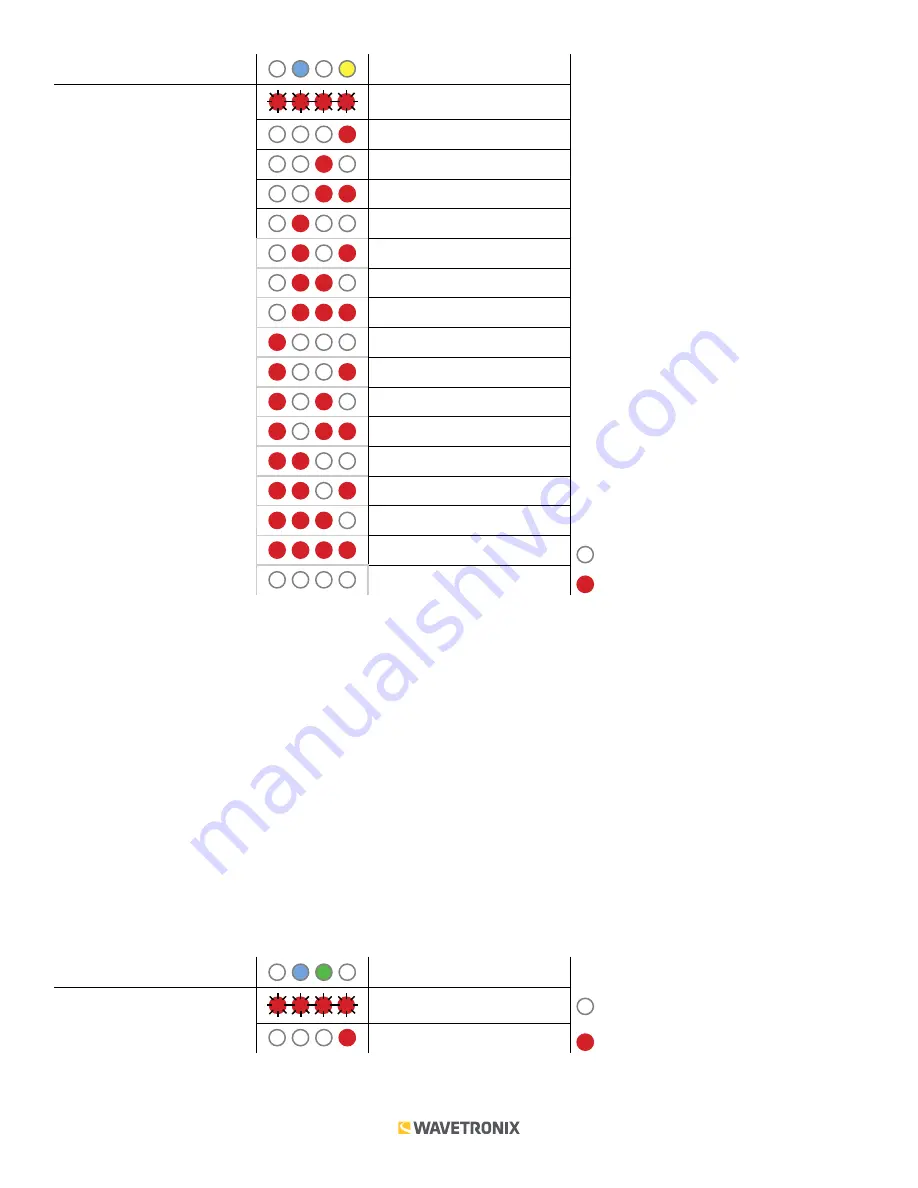
Level 1 LEDs
Fault latch
Level 2 LEDs
Fault latch enabled
LED off
Fault latch disabled
LED on
See the earlier Navigating through the Menu and the Menu Operation Example sections for how to view this
parameter.


