


IS-HF-M100+-29293 Rev 5
5
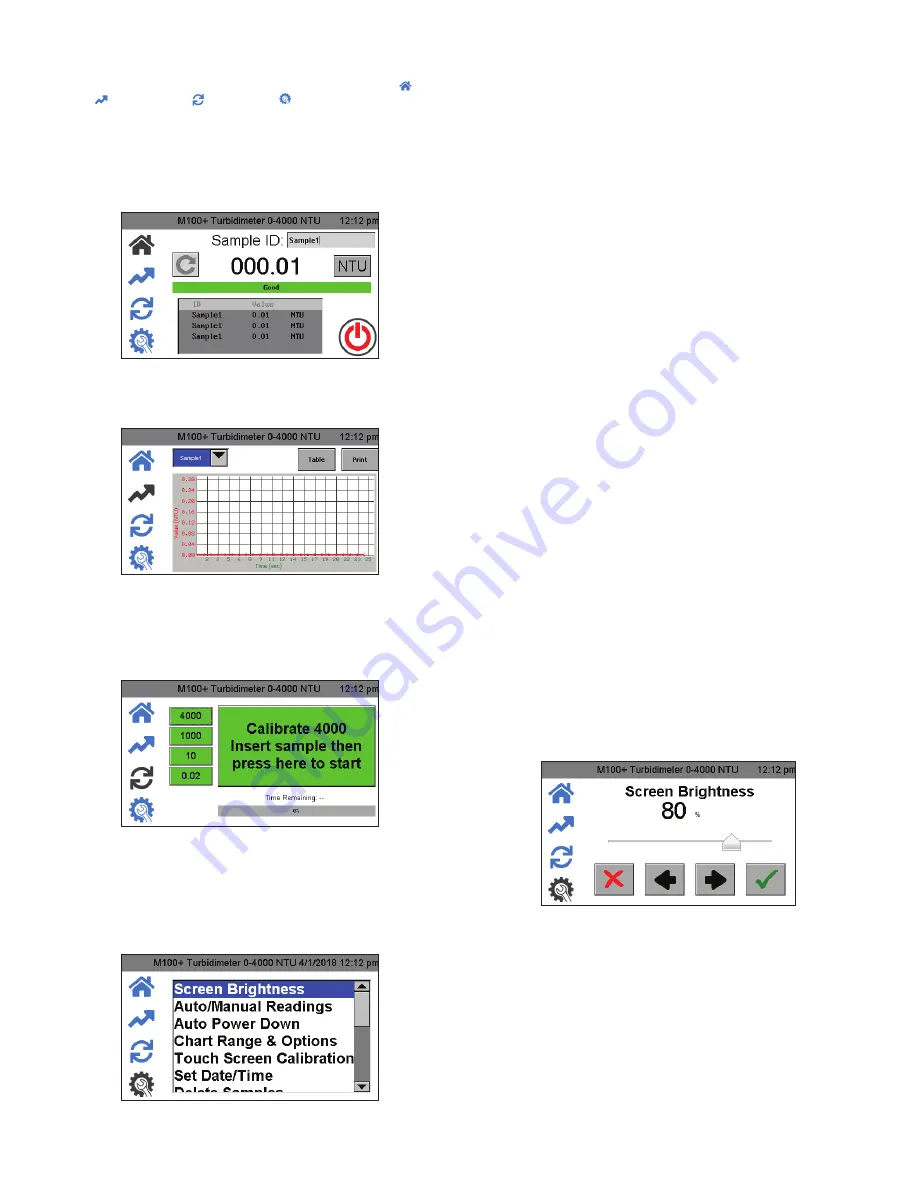
Operating Screens
There are four main operating screens in the form of icons,
Home
( ),
Trend
( ),
Calibration
( ) and
Setup
( ). Touch the appropriate
icon to switch between screens.
Home Screen
The
Home
screen is the normal reading screen. This is the default
mode when power is applied or restored. The other three operation
screens are limited to 15 minutes with no key presses. After 15
minutes, the screen will return to Home.
Trend Screen
The
Trend
Screen is used for displaying trend information. This
information can be downloaded to the USB stick or printed to a serial
printer.
Calibration Screen
The
Calibration
screen is used for calibration. The instrument was
calibrated and tested prior to leaving the factory. Therefore, it is
possible to use the instrument out of the box. Under normal conditions,
re-calibration is required once every three months. Quarterly calibration
ensures performance within accuracy specifications.
Setup Screen
The
Setup
screen is where configuration changes can be made. In the
Setup
screen, you can customize the instrument according to needs
and preferred operation at any time during normal operation. The
Setup
screen has been split into sub-menus to facilitate instrument
configuration. This is also where logged files and calibration logs can
be downloaded and where new software, when available, can be
uploaded.
Configuring the Instrument
The M100+ has been designed to provide the ability to customize
the instrument according to your needs at any time during normal
operation. The
Setup
screen has been split into sub-menus to facilitate
instrument configuration. This section describes how to use each of the
sub-menus to configure the instrument.
Turning on the Instrument
1. Confirm that the M100+ is safely and properly plugged into a
suitable power source.
2. Touch the screen to turn the instrument on.
The instrument will power down automatically unless the Auto Power
Down setting is disabled. If the Auto Power Down setting is disabled,
it allows the instrument to stay on and require a manual shutdown. An
On/Off button will appear on the Home screen. It is not recommended
to leave the instrument on constantly as it may cause drift and
premature degradation of the lamp. The drift can be corrected by more
frequent calibrations.
The following configuration settings can be set on the
Setup
screen.
Use the slider on the right-hand side to access all of these settings.
• Screen Brightness
• Auto/Manual Readings
• Auto Power Down
• Touch Screen Calibration
• Set Time/Date
• Delete Samples
• Data Resolution
• Offset
• Device ID
• Calibration Reminder
• Calibration Download
• Firmware Update
• Reset Defaults
• About Device
At any time, any of the Home, Trend, Calibration and Setup screens
can be selected and implemented. To select any of the Setup options,
press the
Setup
icon and then select the option you wish to change.
Screen Brightness
1. Press the
Setup
icon. Select Screen Brightness.
2. Adjust current screen brightness.
3. Use
&
or the drag cursor.
4. Push
to save and return to Setup Menu.


