


6
Check Module Reassembly
Reverse the assembly procedure and the following special instructions
to reassemble the check module.
1. Inspect the check module O-ring (item 3.1) for damage and
replace if necessary. To ease assembly, apply a thin coating of
FEBCO factory-supplied petroleum jelly (food grade) to the O-ring
(item 3.1) before installing into the valve body.
Excess lubricant can cause foreign debris to collect on internal
components. Accumulated debris could foul the check assembly
and result in a test failure.
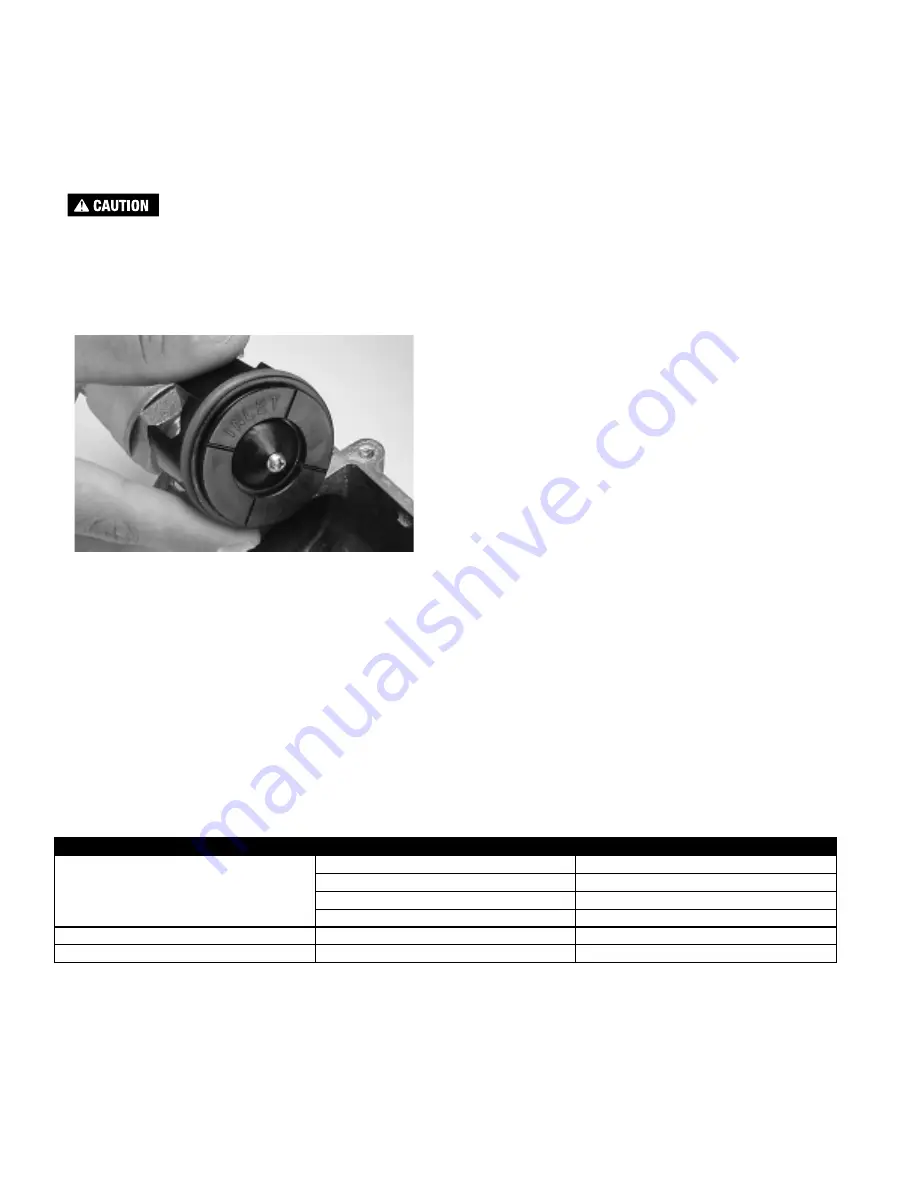
2. Ensure the end of each module inscribed with the word INLET
faces the inlet of the valve.
3. When replacing the spacer (item 8) between the two check
assemblies, be sure that the flanged end of the spacer is touching
the back side of the inlet check assembly so that the cover
fits properly. Next, replace the cover making sure test cock No. 3
is on the upstream side. Do not overtighten the cover bolts.
(Approximately 35 inch-pounds is sufficient.)
4. After reassembling, close test cock No. 2, No. 3, and No. 4.
(Test cock No. 1 should already be closed.) Slowly open the inlet
ball valve. Bleed air from the unit by opening and closing test cock
No. 2, next No. 3, then No. 4.
5. Check for external leaks and repair if necessary. Slowly open the
outlet ball valve.
6. Test the assembly in accordance with locally approved methods.
Testing
All mechanical devices should be inspected on a regular basis to
ensure proper operation. Test the assembly at initial installation, after
servicing or maintenance, and at least annually thereafter. Accept-
able test procedures are published by Foundation for Cross Con-
nection Control and Hydraulic Research at the University of Southern
California (USC), American Water Works Association (AWWA),
American Society of Sanitary Engineering (ASSE Series 5000), and
the Canadian Standards Association (CAN/CSA B64•10). Consult
the regulatory authority in the area for specific information.
Troubleshooting
PROBLEM
CAUSE
SOLUTION
Check value fails to hold 1.0 psid minimum
Debris on sealing surfaces
Inspect and clean
Leaking shutoff valve
Inspect and clean, or repair
Damaged seat or seat disc
Disassemble and replace
Spring stem not moving freely
Inspect for debris or damage
Chatter during flow conditions
Worn or damaged parts
Inspect and replace
Low flows passing through the mainline valve
Mainline check fouled
Inspect and clean, or repair


