9
House creation
.
See house creation section.
Radio pairing.
See radio pairing section.
Delete a device:
Select device type and then the device.
Delete all devices:
All devices installed in the system will be deleted (rooms
will be maintained).
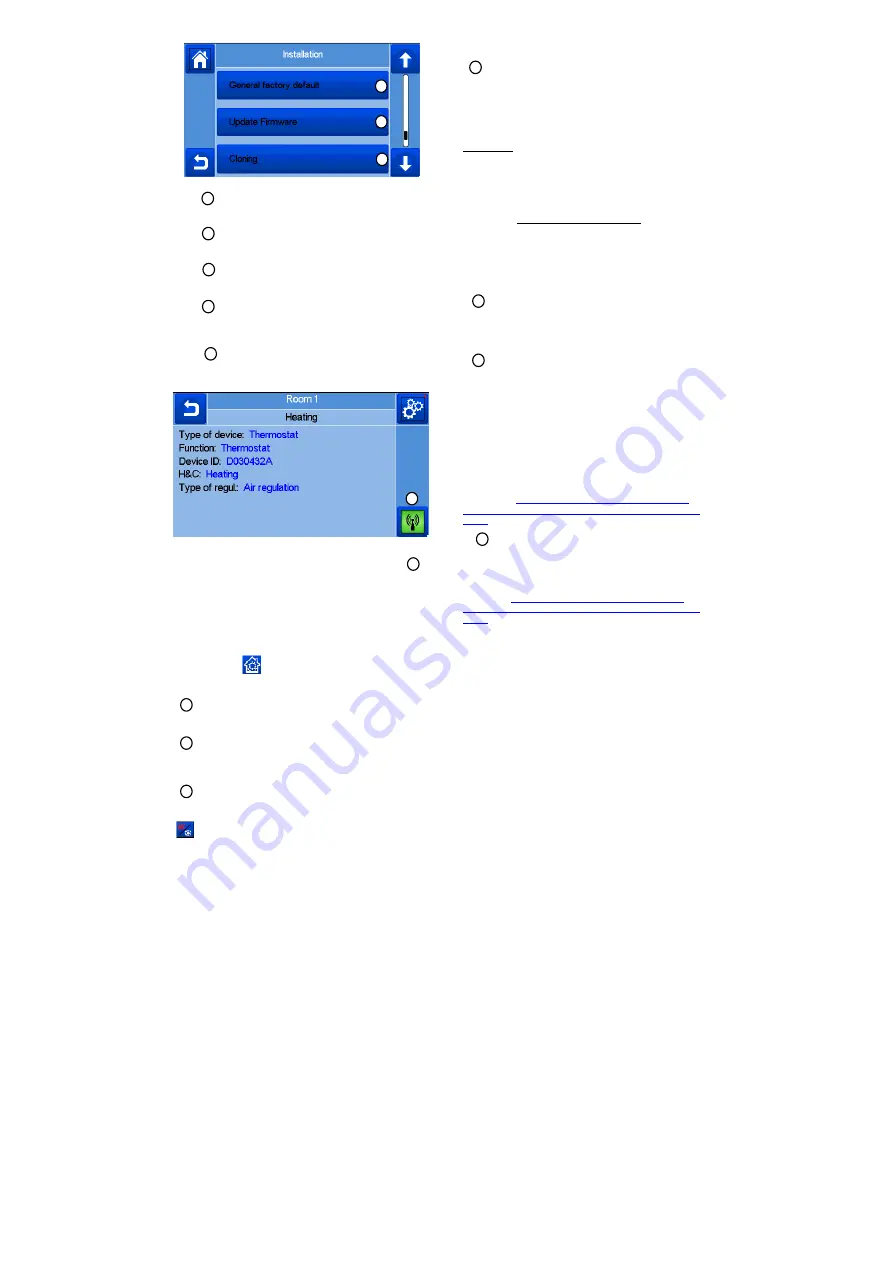
Identify a device
To identify a device of the installation,
go to Menu,then “Identify
a Device”
a- To put the menu in reception mode.
b- To access to the device parameters.
Process:
- Press on ‘a’ to make the Central listening
-
Press on the device receiver and wait a few seconds until
radio communication frame is transmitted.
Note: ID-number is displayed on the screen, please repeat to
be sure to have the same ID.
- Long press on
to change device parameters (name,
power …).
Antifreeze setpoint:
You can set the antifreeze setpoint as reference for the whole
installation.
Heating setting:
You can fix setpoint limitations (min/max) per zone and the
offset assigned to devices working in floor sensor regulation
Heating/cooling settings:
You can set the installation in heating mode, in cooling mode or
in manual mode. If you set the device in manual mode, the
icon appears on the main menu.
WIFI settings:
To set the WIFI configurations (SSID/Protected Access Key
Type/ Password). You can do it manually or scan the active
networks.
Configuration requesting a registration on a web page is not
supported.
WIFI Status:
0/2 : Central unit not connected to the wifi router and server
1/2 : Central unit connected to the Wifi router
2/2: Central unit connected to the wifi router and to the server
(Pairing of the central to an account is required)
n.b.: The connection to Internet is recommended with Certified
WiFi routers (http://www.wi-fi.org/certification).
n.b.: Automatic pairing time to WiFi router with WEP key: 3-4
min, with WPA2 key: 1 min.
n.b.: For the network scan, Repeat at least twice the operation if
your desired WiFi network is not displayed. If your desired WiFi
network is still not displayed, enter the WiFi settings manually
General factory default:
To reset the system with the factory values, but the software
version will remain the same.
Update Firmware:
To update the software, with the SD-card.
The system is
qualified to work with SD-cards less than or equal to 16GB.
Select
to proceed.
Please wait the end of the update procedure (The Wifi icon
should be available for the Wifi central unit) before removing the
microSD from the central unit.
The SW and the procedure to update the central unit is
available on:
http://wattswater.eu/catalog/regulation-and-
control/watts-vision-smart-home/watts-vision-system-smart-
home/
Cloning:
The menu allows to transfert a configuration from central 1 to
central 2. If you change the central, you do not have to
reconfigure your system.
Put update.bin file on SD card (Special software for cloning
available on
http://wattswater.eu/catalog/regulation-and-
control/watts-vision-smart-home/watts-vision-system-smart-
home/
Insert the SD card in central 1 and make an update firmware
Insert the same SD card in central 2 and launch the cloning.
J
K
L
b
A
B
D
E
F
G
H
I
J
K
L
C
a


