


1
-K
v-
01
3
10
6
1
20
20
30
°C
0
10
20
30
40
50
80
70
60
°F
32
50
70
90
110
130
150
170
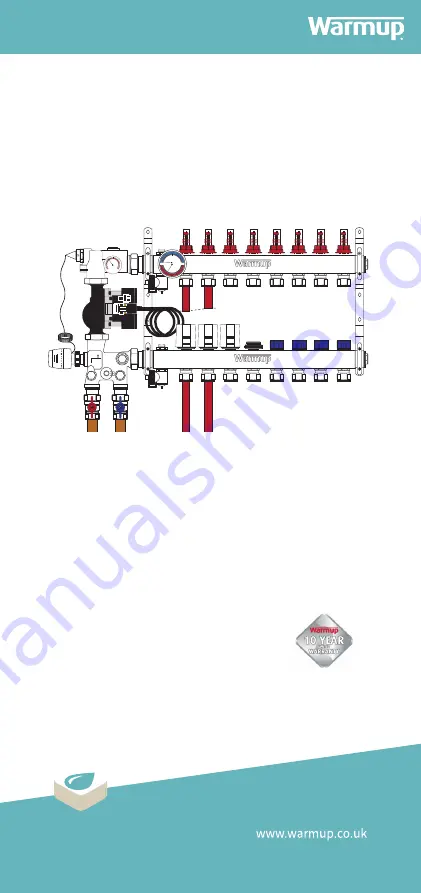
Hydronic
Heating System
IMPORTANT!
Please read this manual before
attempting to install your Warmup
product. Complete and submit your
warranty form
online at
www.warmup.co.uk
0345 345 2288
Technical Helpline
Installation Manual
WHS-M-S3-Series Manifolds
Содержание WHS-M-S3-Series
Страница 15: ...15 ...
Страница 29: ...29 ...
Страница 33: ...33 NOTE Draw a plan showing the layout and location of the heating circuits Layout Plan ...


