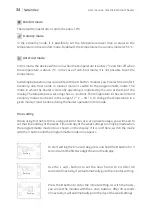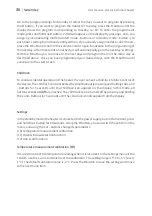
A suitable program can be assigned to each day of the week. Same as 1 (next to the hour
and minutes) for Monday, 2 for Tuesday, 3 for Wednesday, etc., then P1 is the program for
Monday, P2 for Tuesday, P3 for Wednesday, etc. until P7 is the program for Sunday.
Depending on your needs, you can leave the default programs set (as below) or set any
program for each day of the week, in which the appropriate mode (comfort or economy)
will be assigned to each hour. The comfort mode on the display is presented as a rectangle
above the time to which it has been assigned. Economy mode, on the other hand is
presented as lack of this symbol.
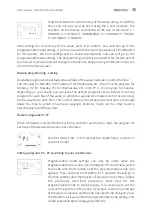
Default programs P1-P7
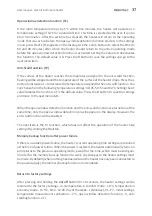
Press the
V
button to enter the day of the week setting. As with the
hours and minutes, you can set it using the
+
and
-
buttons. The
numbers on the display correspond to the day of the week: 1 =
MONDAY, 2 = TUESDAY, 3 = WEDNESDAY, 4 = THURSDAY, 5 = FRIDAY,
6 = SATURDAY, 7 = SUNDAY.
flashing
After setting the current day of the week, press
V
to confirm. You will then go to the
programmable mode settings. If you do not confirm the day of the week with the
V
button
for 30 seconds, the time settings will be saved automatically and you will go to the
programmable mode settings. The programming process is described in the further part of
the manual. If you do not want to program the heater, keep pressing the
V
button until you
return to the home screen.
Weekly programming - setting
Comfort mode 5:00 - 23:59 (except the stated hours, it works in
economy mode)
When the heater is started for the first time, and after each factory reset, the program for
each day of the week is the same and is as follows:
Setting programs P1 - P7 according to your preferences
Programmable mode settings can only be made when the
programmable icon is shown on the display. If it is not there, switch
the mode with the
V
button until the programmable mode icon
appears. Press and hold the
V
button for 5 seconds. You will go to
the time settings described earlier. If you want to set them, follow
the previously described procedure. Note that for the
programmable mode to work properly, it is necessary to set the
current time and day of the week. If you have set the time and day
of the week in advance and they do not need to be changed, press
the
V
button until you enter the programmable mode setting. This
will be evidenced by the displayed symbol P1.
miganie
User manual - electric bathroom heater
35
Содержание VARILLA
Страница 1: ...v 1 02 PL ELEKTRYCZNY GRZEJNIK AZIENKOWY EN ELECTRIC BATHROOM HEATER...
Страница 7: ...2 2 2 2 7 Instrukcja obs ugi elektryczny grzejnik azienkowy Kolejno monta u akcesori w...
Страница 9: ...9 Instrukcja obs ugi elektryczny grzejnik azienkowy 2 2 2 2 Suwak mo na przesuwa w g r i w d...
Страница 10: ...10 Instrukcja obs ugi elektryczny grzejnik azienkowy...
Страница 11: ...11 Instrukcja obs ugi elektryczny grzejnik azienkowy...
Страница 12: ...12 Instrukcja obs ugi elektryczny grzejnik azienkowy...
Страница 21: ......
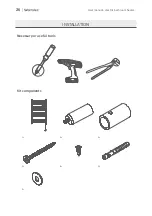
Страница 26: ...Kit components 1 4 4 4 4 4 4 INSTALLATION Necessary or useful tools User manual electric bathroom heater 26...
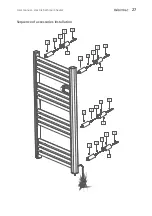
Страница 27: ...2 2 2 2 Sequence of accessories installation User manual electric bathroom heater 27...
Страница 29: ...2 2 2 2 The slider can be moved up and down User manual electric bathroom heater 29...
Страница 30: ...User manual electric bathroom heater 30...
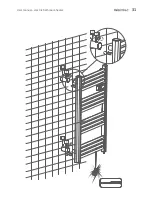
Страница 31: ...User manual electric bathroom heater 31...
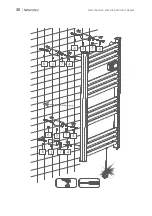
Страница 32: ...User manual electric bathroom heater 32...
Страница 41: ...NOTATKI User manual electric bathroom heater 41...
Страница 42: ...User manual electric bathroom heater 42...
Страница 43: ...User manual electric bathroom heater 43...
Страница 44: ...www warmtec pl www warmtec pl v 1 02...


