manualshive.com logo in svg
background image

5

6

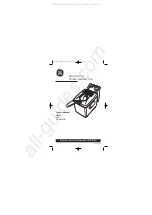
HOW TO USE YOUR WARING PRO

®


PROFESSIONAL DEEP FRYER

 1.  

This appliance is designed for household use only.   


It is not intended for commercial use.

  2.   Before you use the Waring Pro

®

 Professional Deep Fryer for the 

first time, remove all packaging materials and follow cleaning 
instructions in this book.

  3.  Lift off lid covering oil container.
  4.   Remove basket from oil container. Attach handle to basket by 

squeezing posts and assembling as in diagram.

  5.   Pour approximately 3.25 liter (3.4 quart) of good quality  

vegetable, corn, canola, soybean, or peanut oil into reservoir 
until it reaches a level between the MIN and MAX marks inside 
the container. DO NOT OVER- OR UNDER-FILL.

  6.  Put lid on deep fryer. Make sure the switch is on Standby.
  7.   Attach breakaway cord to the back of the appliance, then plug 

into outlet.

  8.  When unit is plugged in, power light will turn on.
  9.   Set the temperature control knob to the desired temperature. 

The oil Ready light will turn green once the oil has reached the 
desired temperature.

 10.   Remove lid and put food into basket. Lower basket into oil and 

replace lid.  
CAUTION: Oil is hot. Please use caution when placing food  
into hot oil.

 11.   To set timer, press until desired frying time appears. Time will 

flash twice and then go solid to start countdown process. 
Timer will count down in minutes. The timer will countdown in 
seconds for the last minute. When the time is reached, the fryer 

will beep several times and show 00 in the display. To cancel, 
press button and reprogram timing. Maximum frying time is  
60 minutes.


 CAUTION: The timer will not turn off when the  
programmed time is completed.

 12.   When recommended frying time has elapsed, raise the basket 

to see if the food has reached the required golden color. If the 
food is done, carefully lift and hang basket on edge of the oil 
reservoir. Allow oil to drain 10 to 20 seconds. Remove basket, 
and place cooked food onto absorbent paper towels.  

NOTE:

 To preserve oil quality, do not add salt or spices to the 

food until after it has been removed from the fryer.

 13.   When cooking is finished, turn temperature control to  

Standby. Unplug the breakaway cord from the wall outlet  
before detaching from the appliance.

CHANGING THE TIMER BATTERY

  1.   Insert flat head screw driver or similar object into opening of 

left side of timer (located on the control panel) and push up to 
release the timer housing.

  2.   Once timer housing has been removed, turn upside down and 

remove battery cover. Replace with a L1154 button cell battery.

  3.  Place timer housing back into control panel. 

CLEANING & MAINTENANCE INSTRUCTIONS

  1.   Always unplug appliance, detach the breakaway cord and let 

the oil cool down to room temperature before cleaning.

  2.  Remove lid.
  3.  Lift out basket. 
  4.   The control panel should never be immersed in water or other 

liquids. Clean the outer surface of the heating element with a 
damp cloth containing mild soap solution or plain water.

  5.   Once oil has cooled, detach the container from the stainless 

steel body and use the spout on the corner to pour oil into a 
suitable container.

  6.   The frying basket should be hand washed before first use and 

should be seasoned with oil before going into the dishwasher 
for the first time. Lid, oil container and frying basket are  
dishwasher safe. Dry parts thoroughly after cleaning. 

Содержание DF175

Страница 1: ...PROFESSIONAL DEEP FRYER DF175 For your safety and continued enjoyment of this product always read the instruction book carefully before using ...

Страница 2: ... contact a Waring Certified Customer Service Center for assistance 17 Be sure handles are properly attached to basket and locked in place See detailed assembly instructions 18 Do not use this appliance for other than intended use 19 Periodically check for looseness of screws or nuts and retighten them CAUTION Overtightening can result in stripping of screws or nuts or cracking of handle or feet 20...

Страница 3: ...ctric shock a polarized plug is featured This plug is intended to fit only into a polar ized outlet If the plug does not fit into the outlet reverse the plug If it still does not fit contact a qualified electrician Do not attempt to modify the plug in any manner SHORT CORD INSTRUCTIONS CAUTION A short power supply cord is provided to reduce the risk of personal injury resulting from becoming entan...

Страница 4: ...AUTION The timer will not turn off when the programmed time is completed 12 When recommended frying time has elapsed raise the basket to see if the food has reached the required golden color If the food is done carefully lift and hang basket on edge of the oil reservoir Allow oil to drain 10 to 20 seconds Remove basket and place cooked food onto absorbent paper towels NOTE To preserve oil quality ...

Страница 5: ... To reset unplug the unit from the wall outlet and allow it to cool down Remove the control panel and heating element from the unit CAUTION Heating element is extremely hot Allow it to cool thoroughly before removing it You will find a reset button on the front of the control panel below the controls Using a toothpick or another long thin object push the reset button and replace the control panel ...

Страница 6: ...oat easily in the oil Too much added to the Waring Pro Professional Deep Fryer will cause the temperature to drop and the pieces will be difficult to turn Turn bread when it rises to the top of the oil taking care not to pierce it Lift cooked breads from the fryer allow them to drain for a moment then place on paper towels to drain Applesauce Spice Doughnuts Makes about 16 doughnuts 2 3 cups unble...

Страница 7: ...or reserve for making chicken stock Split each wing at the joint and cut through so there are 2 pieces from each wing Rinse and dry completely In a large bowl combine the melted butter hot sauce and cider vinegar and stir until completely blended Heat oil until it is 375 F Put half the wings into the Waring Pro Professional Deep Fryer and cook until browned and crispy about 12 to 15 minutes Remove...

Страница 8: ...e crowding will drop the temperature of the oil The calamari will be pale golden and just cooked in about 40 to 60 seconds Do not overcook they will become tough Lift the calamari out using a slotted spoon or metal skimmer and drain in a single layer on prepared cookie sheets Repeat with the remaining calamari When all the calamari have been fried reheat them in the 500 F oven for several minutes ...

Страница 9: ... servings 3 tablespoons kosher salt 3 tablespoons brown sugar 1 cup boiling water 12 ice cubes 4 skinless boneless chicken breast halves 1 cup unbleached all purpose flour teaspoon kosher salt teaspoon freshly ground pepper teaspoon paprika teaspoon granulated garlic powder oil for frying cup buttermilk or regular milk Honey Mustard Sauce cup honey cup Dijon mustard regular or grainy Combine salt ...

Страница 10: ...ken breasts 5 6 min Breaded bone in pork chops 7 8 min Egg rolls 5 min Chimichangas 7 7 min Large shrimp 1 2 min High Heat 375 F Red potato chips 2 3 min Yam potato chips 2 2 min American fries 5 6 min Thin french fries 3 3 min Thick french fries 3 4 min Curly french fries 4 5 min Egg rolls 6 7 min DEEP FRYING GUIDE Prepared Foods Prepared foods listed in this chart are breaded and cooked prior to...

Страница 11: ...s 150 Milford Road East Windsor NJ 08520 www waringpro com Printed in China DF175 IB 11WR119913 IB 10587 Trademarks or service marks of third parties referred to herein are the trademarks or service marks of their respective owners ...

Отзывы: