


CONSTRUCT AND CONNECT [
CONT.]
3
Tighten the locking
bolt clockwise. Then
install the other Z
axis pillar onto the
Base.
Loose the two locking
bolt on No.3 and No.4
Z axis pillar by around
5mm. So there will be
sufficient space for X axis
pillar to slide in.
4
5
Slide the X axis pillar into
the No.3 and No.4 bolts. If
there’s not enough space,
you may need to re-loose
the locking bolt.
To tighten the locking
bolt through the hole on
top of the X axis pillar.
Lock both No.3 and No.4
pillar.
6
7
Insert the plastic cover
onto the two ends of X
axis pillar.
Note:
Please double
check the Z axis and X
axis pillars. If any bolt
not secured. You need
to secure the screws to
ensure the gantry are
steady and tight.
Rotate the cylinder holder
for a bit but not too close.
Tight enough that can not
slide into pillar freely.
This is also same to the
other side with stickers
No.6.
8
9
Mount the X axis rail.
Align the right and left
side holders first. Please
make sure the rail is
located in the middle
of the X axis. You may
need to adjust the
distance to both ends
through the cylinder
holders.
Then tighten the bolts
on both end of No.5 and
No.6.
10
11
Mount the MK12
extruder onto the
X axis holder. Make
sure the locking holes
match to the holder
holes.
A total of 4 bolts need
to be tightened, but the
first bolt should not be
too tight until the other
three bolts are mounted,
then tighen all the bolts
together.
12
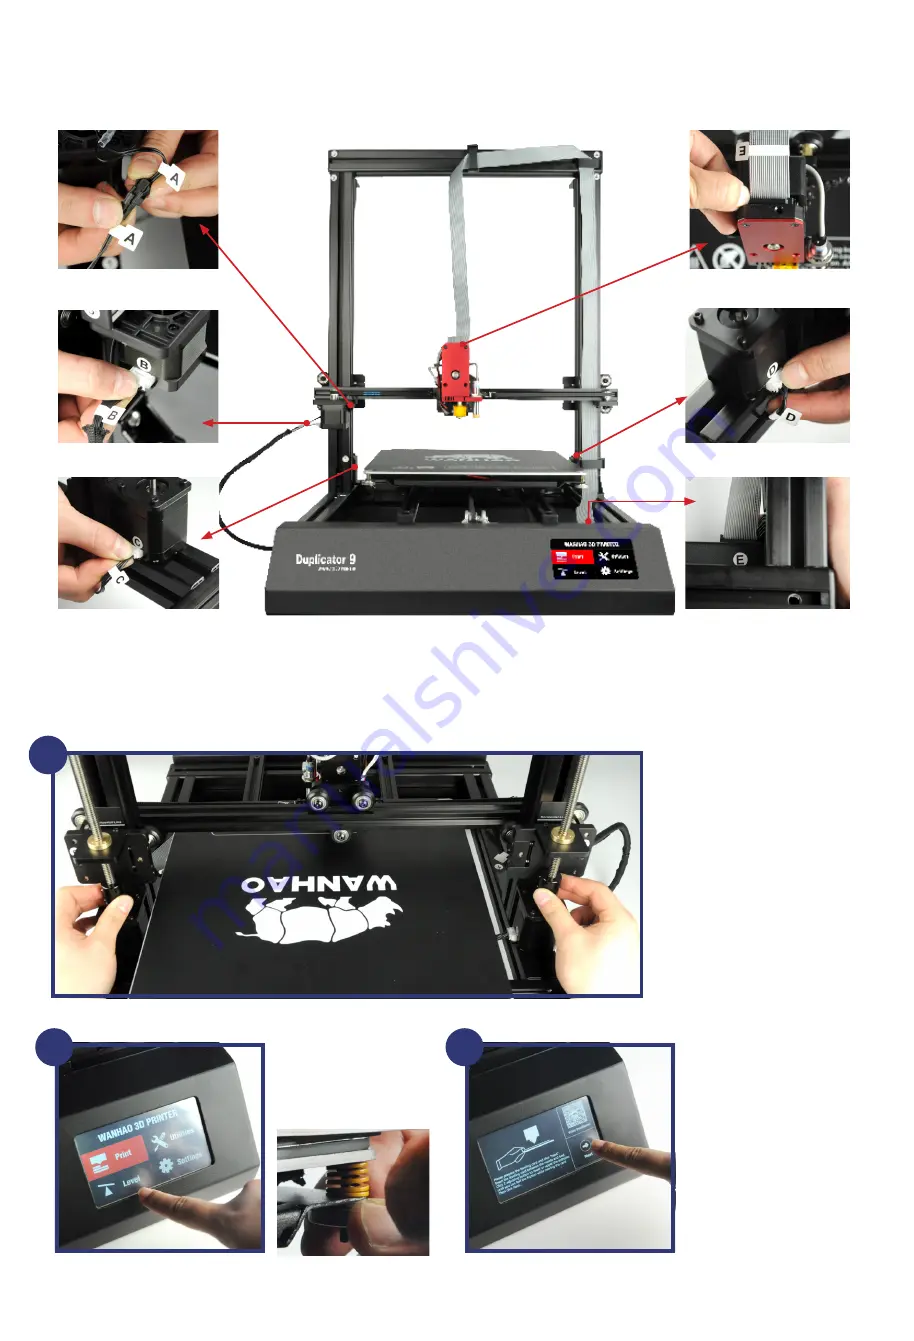
WIRING INSTRUCTION
B
C
LEVELING BEFORE PRINTING
2
1
Turn the couple to lower the
two Z axis in order to level
the two Z axis at same height.
Note: The ruler or height
gauge would provide more
accurate height for both two
Z axis. The two axis need to
be at same height.
3
Turn on the printer.
Release the 4 bed
leveling nuts by 4-5
turns. Then Click LEVEL.
Read the instruction, then
click NEXT.


