RD 12/RD 12A
Drive System
wc_tx000667gb.fm
55
5.6 Checking Oil Flow through the Drive Motors
Background
The drive motors are plumbed in series. Oil flow through one motor is virtually identical to
the flow through the other, unless a problem with one of the motors exists.
Procedure
Follow the procedure below to check oil flow through the motors.
1. Start the engine and allow the hydraulic oil to warm up. Shut off the engine.
2. Using a crane or overhead lift with enough load-bearing capacity to support the
machine, lift the machine off the ground so that the drums are 2–5 cm (1–2 inches) off
the ground.
3. Place a piece of tape on or boldly mark each drum. This will aid in observing the rotation
of the drums.
4. Start the engine and slowly shift the forward/reverse control lever into the FORWARD
position. Observe the drum rotation for any sign of difference in the rotation of the
drums. If one drum is rotating slower than the other, the drum with the slower rotation
may be failing.
5. With the engine running and the drums rotating, slowly apply the parking brake to the
rear drum. Observe the speed of both drums as the brake is applied. Both drums should
slow down at the same rate. Apply the brake until the rear drum stops rotating.
Note:
If
the brake cannot stop the rear drum from rotating, the brake requires repair or replace-
ment
. With the rear drum held from rotating by the brake, the front drum should not be
rotating. If it is, the seals of the rear drive motor are failing. Rebuild or replace the rear
drive motor.
6. Release the brake from the rear drum.
7. Conduct the same test on the front drum. Use a sturdy piece of wood, such as a 2x4, as
an external brake.
Wedge the sturdy piece of wood between the drum and the
machine frame
to stop the
drum rotation.
If the rear drum rotates when the front drum is held from rotating by the external brake,
the seals of the front drive motor are failing. Rebuild or replace the front drive motor.
The oil flow through the drive motors has now been checked.
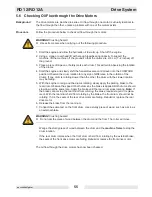
WARNING!
Crushing hazard.
f
Use extreme care when carrying out the following procedure.
WARNING!
Crushing hazard.
f
Do not jam the piece of wood between the drum and the floor. The roller will move.
Содержание RD 12A
Страница 1: ...5000192242 02 0912 5 0 0 0 1 9 2 2 4 2 Repair Manual Roller RD 12 EN...
Страница 15: ...RD 12 RD 12A Safety Information wc_si000302gb fm 15 1 4 Label Locations X FF...
Страница 21: ...RD 12 RD 12A Safety Information wc_si000302gb fm 21 Notes...
Страница 25: ...RD 12 RD 12A Operation wc_tx000865gb fm 25 53 47 54 61 50 62 55 wc_gr004114 56...
Страница 29: ...RD 12 RD 12A Operation wc_tx000865gb fm 29 wc_gr002951 N F R 55 42 44 54 10 15...
Страница 119: ...RD 12 RD 12A Disassembly Assembly wc_tx000671gb fm 119...
Страница 120: ...Schematics RD 12 RD 12A wc_tx001073gb fm 120 10 Schematics 10 1 Hydraulic Schematic...
Страница 122: ...Schematics RD 12 RD 12A wc_tx001073gb fm 122 10 4 Electrical Schematic A RD 12A...
Страница 124: ...Schematics RD 12 RD 12A wc_tx001073gb fm 124 10 6 Electrical Schematic B RD 12A...
Страница 126: ...Schematics RD 12 RD 12A wc_tx001073gb fm 126 10 8 Electrical Schematic RD 12...
Страница 137: ......


