12
Chapter 4
Menu Operation
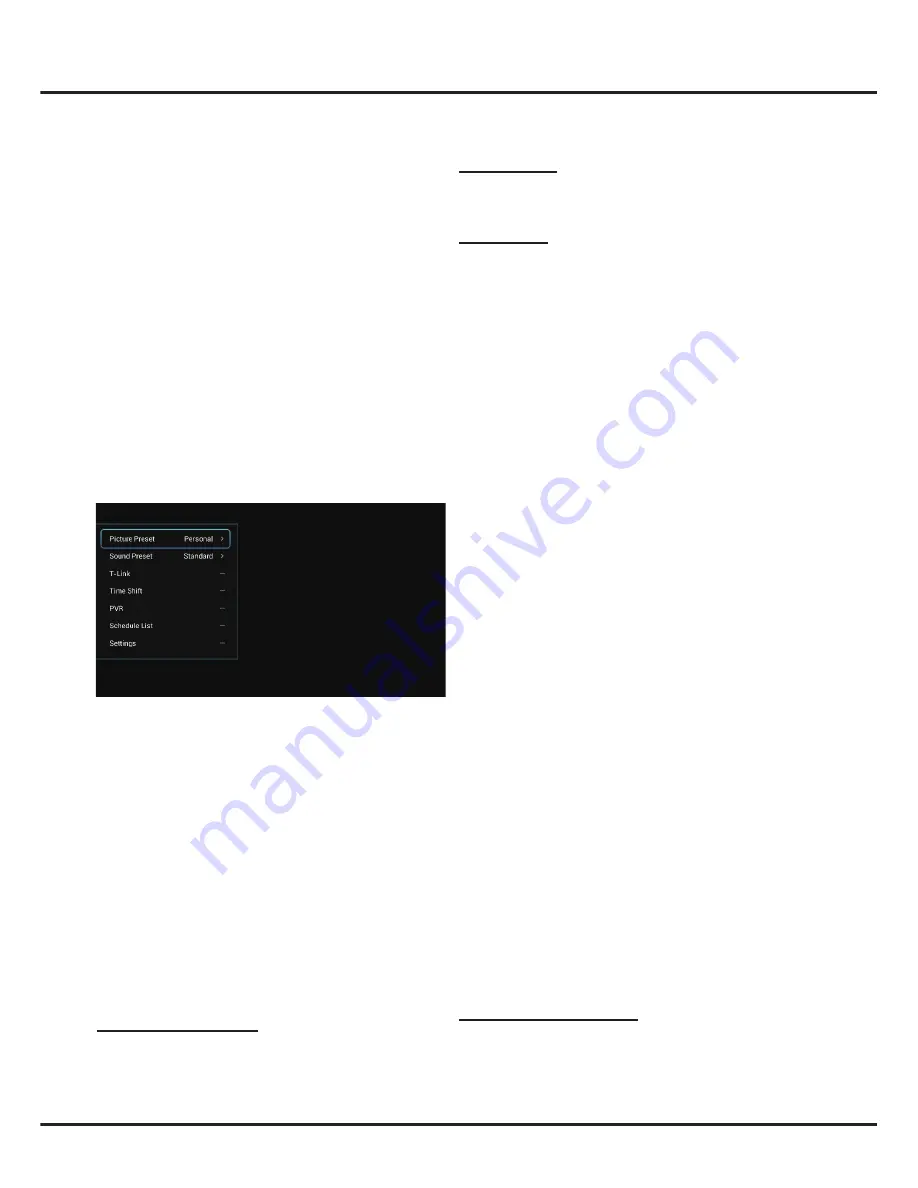
Using Quick Access Menu
Note
:
Some of the functions might be unavailable in
certain sources. And for some models, certain options
are not available.
This section explores the menus and settings of your
TV. Each menu is outlined and detailed to help you get
the most from your TV. To access the menu system:
1.
In TV mode, press
MENU
on the remote control to
display the quick access list.
2.
Press
▲/▼
to select the desired item, then press
OK
/
►
to open the corresponding submenu.
3.
In submenus, use
◄/► and
OK
buttons
to make
the adjustments, or use
▲/▼
to select an item, use
OK
/
►
to enter and operate according to the on-
screen display or guide.
4.
Press
BACK
to return to the previous menu.
The quick access list includes the items below, they are
Picture Preset
,
Sound Preset
,
T-Link
,
Time Shift
,
PVR
,
Schedule List
and
Settings
.
Picture Preset
Press
OK
/
►
to display its submenus:
Use
◄/►
to scroll through the picture preset settings:
Standard
,
Dynamic
,
Natural
,
Movie
and
Personal
.
And then press
OK
to confirm the selection.
Sound Preset
Press
OK
/
►
to display its submenus:
Use
◄/►
to scroll through the sound preset settings:
Standard
,
Music
,
Movie
,
Clear Voice
and
Personal
.
And then press
OK
to confirm the selection.
T-Link
To search for CEC devices connected to the HDMI
sockets in your TV and enable auto power on and auto
standby between CEC devices.
Enable or disable T-Link
1.
Press
MENU
and select
T-Link > T-Link
.
2.
Press
OK
/
►
to display its submenus, and use
◄/►
to select
On
or
Off
to enable or disable T-Link.
Note
:
Below T-Link setting options will be available only
when
T-Link
is set to
On
.
Auto power on
: Enables the TV to automatically power
on when you power on a CEC device (e.g. DVD) with the
device’s remote. Select
On
to enable this function.
Auto standby
: Enables all CEC devices to automatically
go to the standby mode when you turn off the TV with the
TV remote. Select
On
to enable this function.
Note
: The CEC functions depend on the devices
connected and it is possible that some devices may not
interoperate correctly when connected to this TV. The user
manual or the manufacturer of the problematic devices
should be consulted for further information.
Time Shift
Note
:
This option is only available when
Time Shift
is set
to
On
:
Select
Settings > Channel > Time Shift
, press
OK
/► to enter and use
▲/▼
to set
Time Shift
to
On
.
Allows you to pause, fast forward and rewind live TV, so
you don’t have to miss any part of your favourite programs.
Before you use the function, connect a USB drive to the
TV first. For the first time, you should complete the disk
setup for the USB drive.
1.
Press
MENU
on the remote control and select
Time
Shift
, then press
OK
to confirm.
2.
Follow the directions on the screen to do the disk setup
if you use time shift for the first time.
3.
After the disk setup is done, time shift will start, and
the time shift menu displays on the screen.
4.
For later use, press
MENU
and select
Time Shift
.
press
OK
to display the time shift menu and operate
according to the on-screen prompt.
5.
Pressing
Stop
button stops the time shift and exits.
-
When the time shift menu disappears and only the
timing of the time shift remains on the screen, you can
press
OK
to call out the time shift menu.
Notes
:
- Before you plug the USB drive to TV, make sure
you have backed up the data on the drive to avoid
unforeseen malfunction and data loss.
- We recommend that you use a USB drive with at least
1GB free space and a disk speed faster than 5.0MB/
sec.
- The bigger the USB drive free space for time shift, the
bigger the recording length.
Quick Access of Time Shift
: Insert a USB disk, press
PLAY(►) on the remote control, it will access Time Shift
automatically.


