IT-85 Integrated amplifier
Owner’s Manual
VTL
11
7.
Connect the supplied power cord to the AC receptacle on the back of the IT-85. If
you need a replacement and you are not sure what the appropriate cord should be,
consult your authorized VTL dealer or the VTL factory customer support
department.
Caution
Before connecting the power cord into the wall outlet be sure
to read the next 2 very important sections on voltage setting and power
source for the IT-85
Voltage Setting
Your VTL IT-85 integrated amplifier has been set to the correct voltage for your
country where you made your purchase. The voltage setting is marked on the Serial
Number Badge located on the
back panel of your IT-85
.
Caution: Check to make sure that the voltage setting on your IT-85 is
correct for your local voltage rating before plugging in and turning on
your IT-85.
Power Source for the VTL IT-85 Integrated amplifier
Your IT-85 Integrated amplifier is a high-performance, high power amplifier, capable
of outputting up to 80 watts per channel. To assure best conditions for optimal
results, you should plug the unit directly into a wall AC outlet (if bi-amplifying you
should use one separate outlet for each amplifier). Do not plug your IT-85 into a light
extension cord or into the back of another component, as this will starve the IT-85 of
current and significantly impact the performance of your system.
See the chapter on
Specifications
for the power consumption requirements of
your IT-85.
Fitting the Batteries to the Remote Control
1.
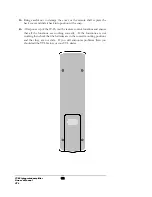
The back cover of the remote control is a sliding cover that is removable
by pressing down on the arrow and sliding the cover off in the direction of
the arrow to reveal the battery compartment. Remove the cover and put it
aside for re-installation later.
2.
Locate the battery holder and insert the two AA batteries (supplied) in the
marked positions, + to + and - to -.
Содержание IT-85
Страница 1: ...VTL IT 85 Integrated amplifier Owner sManual ...
Страница 3: ......

