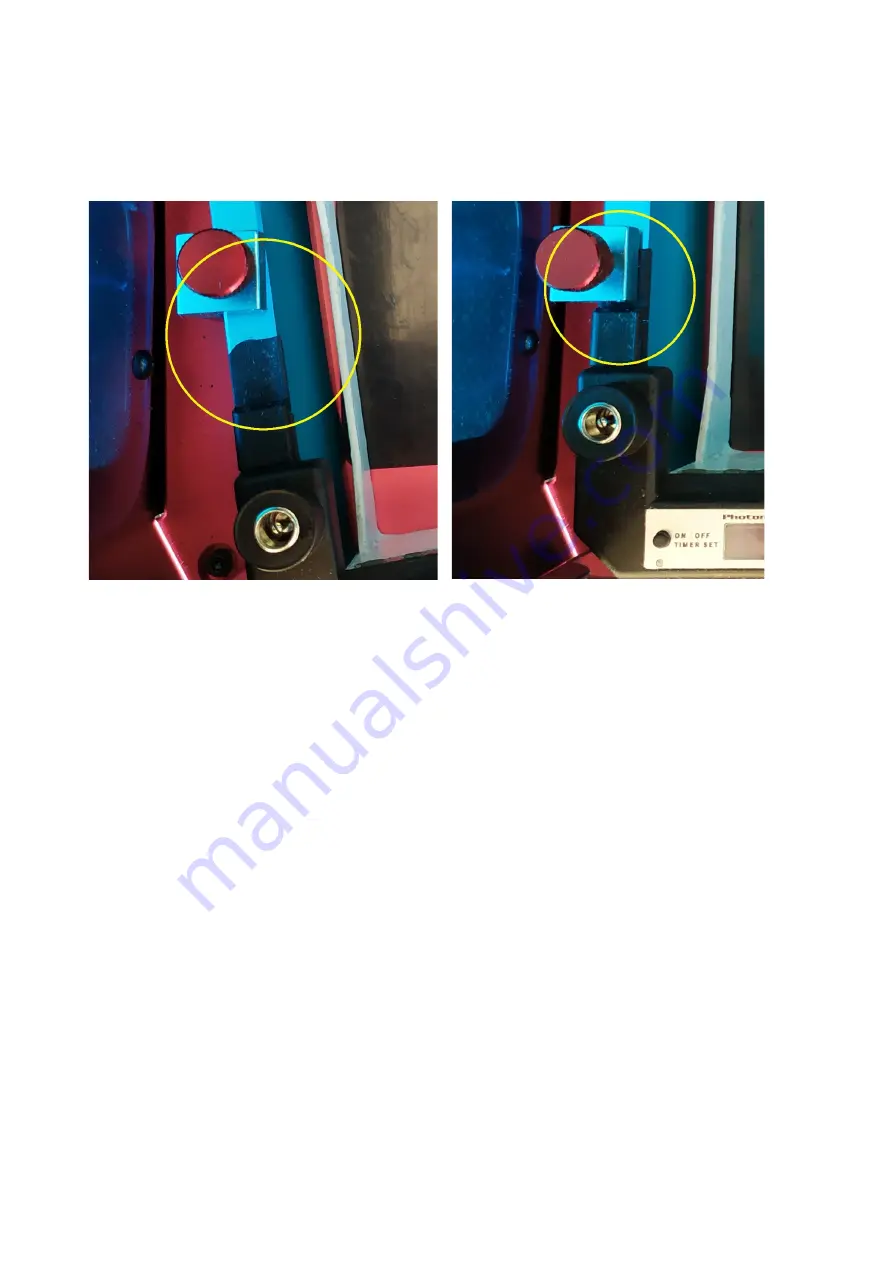
The protrusion in the chassis of the heater control unit must go over the screw hole of the vat, under
the screw which is inside the printer as shown on image below. The screw must be up before the vat
and the heater are put into the printer.
When the vat and the heater are in the correct place, you can tighten the screws. Be careful that the
vat, the heater and the screw are correctly aligned. Do not use much force.
Warning:
Wrongly
aligned vat thus heater will be hit by buildplate of the printer and cause fatal damage to printer’s
LCD, vat’s film and heater.
Other Printers
Put the vat into the printer. Put the heater into the vat in the same manner you put the vat, lowering
it from above the vat directly downwards so that the pin of the printer goes into the hole of the
heater chassis protrusion.
Connecting power
With the included or user supplied power adapter
Connect the power adapter’s 5.2mm plug into the power input jack. Set the cord so that it cannot go
near the buildplate when the plate goes down, and so that it comes out from between the printer’s
door and frame but does not prevent the door closing. If there is much daylight in room then
consider making of hole to rear panel of heater’s chassis and wire supply cable through it.
Connect the power adapter to a wall socket. The heater will be turned on; heating is OFF.


