background image


Building the Fuselage  

Build Steps: 
1.


Cut out and label the parts 

2.


Glue the doublers - Assemble the Battery Tray, skids, battery hatch and fuse bottom 

3.


Prepare/Hinge the Tail surfaces 

4.


Assemble the Fuselage 

5.


Assemble the Wings 

6.


Install the electronics 

7.

Apply the decals 

8.


Measurement checks. 

9.


Go Fly ! 


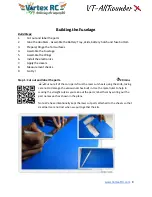
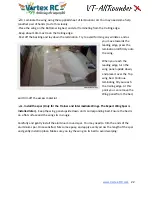
Step 1: Cut out and label the parts.

20 mins


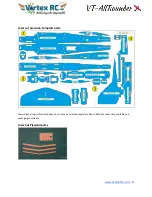
Cut out all of the coro parts from the laser cut sheets using the knife, taking 

care not to damage the various notches built in. Use the metal ruler to help in 
scoring the straight cuts.As you take out the parts, label them by writing out the 
part names each as shown in the plans. 
 
Note: We have intentionally kept the laser cut parts attached to the sheets so that 
small parts are not lost when we put together the kits. 


www.Vortex-RC.com

   8 

Содержание VT-AllRounder

Страница 1: ...does not fit properly please read the instructions and see pictures again to reorient align correctly before using any glue We have written this manual so that the kit can be built individually as well as by groups of students builders Please follow the build in the order as written below Additionally we have given 2 check mark places besides each step Check mark the first box when you complete th...

Страница 2: ...rmediate 465 sq in Expert 395 sq inches Recommended All out Flying weight Trainer 650gms Int Expert Wing 750 gms Wing loading Trainer 7 Oz Sq ft Int 8Oz Sq ft Expert 9 Oz Sq ft CG Location 65MM from Leading edge at Root Spar location Aileron Dimensions For Intermediate Wing 10cm from root 5 Cm From Tip Aileron width 4 Cm For Expert Wing 12cm from root 0Cm from tip extends till edge Aileron Width 4...

Страница 3: ...uired in Expert Wing o 2 Nos Wooden Spar Joiner Dowels Only for Expert Wing o 1 Nos Laser Cut Motor mount o 2 Nos Aluminium Wing Holding rods o 1 Nos Battery Strap o 1 Nos Pin and thread o 4 Nos Machine Screws o Velcro Hook and Loop Material o 1 Nos 320 Grit Sand Paper o 1 nos Hobby Knife o 2 Nos Decal Sheets Electronics Package Optional includes o 9 gm Servos 2 Nos for Trainer 3 Nos for Intermedi...

Страница 4: ... precision Coroplast parts You will get all parts illustrated above but it may be oriented separately due to different sheet sizes available and packaging constraints Laser Cut Plywood parts www Vortex RC com 4 ...

Страница 5: ...has parallel flutes which make the sheets very light and strong and crushes instead of breaking upon impact Coro bonds extremely well with CyanoAcrylate and epoxy These characteristics make it suitable for RC applications Some building techniques and styles are unique to building RC planes using Coro and can impart even greater strength when used properly Please read below and understand Coro has ...

Страница 6: ... and should be done carefully to avoid changing the airfoil shape of the wing We ship the wing panels in their original wing beds The wing beds not only provide protection during shipping but also should be used as jigs when laminating and sparring to reduce the chances of wing warping Hinging Technique Coro can be hinged easily Just follow the steps below to create strong clean and a flexible hin...

Страница 7: ...CA can bond skin easily and instantly Also CA fumes can irritate eyes and nose Try to build in an open space and use ventilation Coro flutes can drip CA Be careful when glueing coro as excess CA will drip out Use very little CA Only a drop or so is usually needed Building light is very important Try to use as little glue as possible yet ensure the joints are tight There are two ways in which you c...

Страница 8: ...ks 9 Go Fly Step 1 Cut out and label the parts 20 mins Cut out all of the coro parts from the laser cut sheets using the knife taking care not to damage the various notches built in Use the metal ruler to help in scoring the straight cuts As you take out the parts label them by writing out the part names each as shown in the plans Note We have intentionally kept the laser cut parts attached to the...

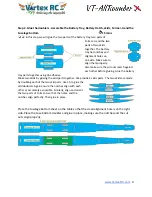
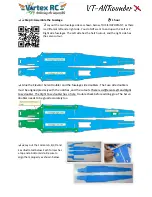
Страница 9: ...parts together using CA adhesive Make two skids by glueing the skid parts together We provide 4 skids parts The two skids are made by doubling each of the two skid parts Use CA to glue the skid doublers Again ensure the notches align with each other as accurately as possible Similarly align and orient the two parts of Former A so that the holes and the notches align perfectly Then glue in place Pl...

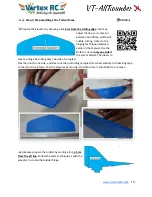
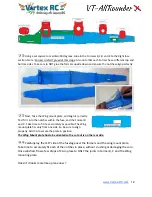
Страница 10: ...o cut out only one side of the coro material The idea is to create a hinge by cutting only one side of coroplast Flex the joint to one side and clear out the protruding coroplast material carefully Add packing tape to the joint to reinforce Test the elevator by moving it to both sides It should be free to move Likewise prepare the rudder by scoring a line 3 5 cm from the aft line Follow the same t...

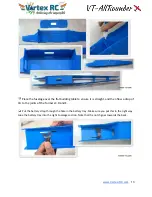
Страница 11: ...cutout Glue the Elevator Servo Doubler and the fuselage side doublers The Fuse side doublers must be aligned precisely with the notches and the cutouts There is a different Left and Right Fuse doubler The Right Fuse doubler has a hole Double check before adding glue The Servo doubler needs to be glued accurately too Lay out the Formers A B C D and E as illustrated below Each former has a top and a...

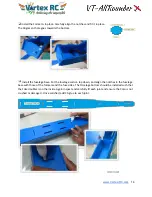
Страница 12: ... Former B and C Take time to fit it as accurately as possible The Wing mount plate fits only from one side So be sure to align properly Add CA to secure the plate in position The Wing Mount plate has to be oriented so the cut out is on the rear side Carefully lay the LEFT side of the fuselage over the formers and the wing mount plate Take time to accurately fit each of the notches in place without...

Страница 13: ... then flow a drop of CA to the joints of the formers C D and E Put the battery strap through the hole in the battery tray Make sure you put this in the right way Glue the battery tray into the right Fuselage section Note that the notch goes towards the back www Vortex RC com 13 ...

Страница 14: ...the fuselage section top down and align the notches in the fuselage base with those of the formers and the fuse sides The FUselage bottom should be installed such that the FUse doubler is on the inside Again inspect and carefully fit each joint and ensure the Coro is not crushed or damaged Once satisfied add CA glue to each joint www Vortex RC com 14 ...

Страница 15: ...ined above The battery hatch has to be prepared by scoring a line 2cm from the front Test fit the battery hatch and windshield Note Glue ONLY the front part of the hatch the rear part is left to open Glue the windshield piece securely Glue the Laser cut ply motor mount Be sure to align the holes accurately and glue in place www Vortex RC com 15 ...

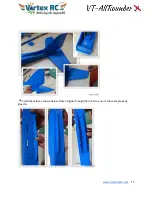
Страница 16: ...izer It is very important to glue in the Horizontal and Vertical stabilizers square and true Take your time to align these parts properly before adding glue Use the Supplied Pin and thread to ensure that the Stabiliser is perfectly centered as shown below Without using any glue slide the rudder through the notch in the stabilizer and carefully install the stabilizer in place The notches help align...

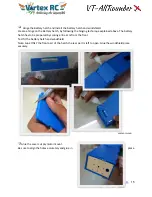
Страница 17: ...Install the skids as shown below Flow CA glue through the joints to ensure these are properly glued in www Vortex RC com 17 ...

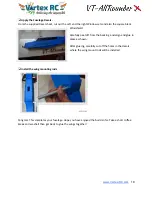
Страница 18: ...m the backing and align and glue in place as shown After glueing carefully cut off the holes in the decals where the wing mount rods will be installed Install the wing mounting rods Congrats This completes your fuselage Hope you have enjoyed the build so far Take a short coffee break and we shall then get back to glue the wings together www Vortex RC com 18 ...

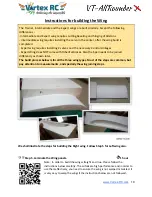
Страница 19: ...eds to be joined differently as shown later The build process below is for all the three wing types Most of the steps are common but pay attention to measurements and specially the wing joining steps We shall illustrate the steps for building the Right wing Follow Step 5 for Left wing also Step 5 Laminate the Wing panels 1 hour Note In order to build the wings straight and true Please follow the i...

Страница 20: ...ace A Take out the wing cores from their beds carefully Note that there is a Left wing and a right wing How do you identify There should be a R and a L written on the wing bed Also the root edges of the Trainer and Intermediate wings are cut at an angle to give the necessary dihedral Each wing panel has its own bed Do NOT mix this up Label the wings and beds using a marker pen You should have Wing...

Страница 21: ...you make a Bed R Top and Bed R Bottom C Lightly sand the wings before laminating to get a better adhesion Very gently and uniformly sand using the supplied sandpaper keeping the wing panel on its bed Idea is to just remove the thin outer brittle layer of foam After sanding clean up the wing with a cloth www Vortex RC com 21 ...

Страница 22: ... and place it over the Top wing bed Continue laminating till you reach the trailing edge At this point you can remove the Wing panel from the bed and trim off the excess material E Install the spar Only for the Trainer and Intermediate Wings The Expert Wing Spar is installed later Keep the wing panel upside down on its corresponding bed Ensure the bed is on a flat surface and the wing sits in snug...

Страница 23: ...s to bevel the bottom side so that the hinge line will be created on the top edge Put the aileron back side up draw a line parallel to the length of the aileron about 1 CM behind the leading edge Carefully cut out the lamination material from this line Sand carefully so that the bevel is created uniformly across the length of the aileron For Hinging Follow these 4 steps to create a slop free tight...

Страница 24: ...thicker braces can go forward of the spar and the other can go behind the the spar Place the left wing on its bed and prop up the other wing tip to set the correct dihedral angle For Trainer Wing 20Cm For Intermediate Wing 9 Cm use epoxy to glue the panels and the dihedral in place Double check this very carefully before gluing After glueing inspect the joint carefully and apply some packing tape ...

Страница 25: ...ide the aluminium rods After the Spar created test fit the spar in place and make sure the wing roots mate evenly at the center joint If not then lightly sand Once satisfied liberally mix up some epoxy and coat the entire length of the spar and also the wing root and install glue in place Leave the wing aside to cure Double check everything and leave the wing to cure Once cured apply some clear pa...

Страница 26: ...he Control horns are installed angled inwards to line up in a straight line with the control rod Installing the aileron servo For Expert Wing The expert wing requires a servo to be installed on each wing panel on the underside of the wing The servo should be installed about 40 cm from the root Servo extensions should be used to extend the wires out and the servo wire can routed in the groove pre c...

Страница 27: ...below The wing adaptors make a perfect seat for the wing and are cut precisely to give the correct dihedral angle and support to the wings Make sure the thin sides of the adaptor face towards each other You may need to trim the leading trailing edges of the adaptors slightly to fit the wing on the fuselage Whew Congrats your wing is now ready Just a few more checks and we should be ready to hit th...

Страница 28: ...he servo cutouts are designed to accommodate standard 9gm servos We have kept the cout outs a little small to allow for size variation amongst different brands Adjust the cut out using a knife for a snug fit When satisfied thread the servo wires through the holes in the formers and glue in place using little hot glue Tip Wrap the servos in some packing tape before glueing to make later removal eas...

Страница 29: ...levis on one end of the control rod using some hot glue Keeping the servo centered install it in the second outermost hole Now cut the rod about 2 Cm short of the control horn and while keeping the control surface neutral glue the other clevis also Install the Motor ESC and the Prop www Vortex RC com 29 ...

Страница 30: ... and that there is adequate throws This is very important The wing is held down by the supplied 4 rubber bands Install two rubber bands straight ie parallel to the fuse and the two rubber bands criss cross so that they lock down the first two bands Make sure your wing trailing edges have the fiberglass tape to avoid damage The battery should be installed in the front and strapped down tight Adjust...

Страница 31: ...Field packing checklist o Fuselage o Wings o Fully charged batteries o Radio o Neck Strap o Battery Tester o Toolbox containing Screwdriver Allen set Pliers scissors knife o Tapes Clear tape FIber Tape Double sided paper tape o Adhesives CA and 5 minute epoxy o Extra props and prop saver rubber bands o First Aid kit Believe me this is important Appendix B Preflight checklist o All servos are secur...

Страница 32: ...tions Adjustment 1 Control neutrals Fly model straight and level Adjust the transmitter trims for hands off straight and level flight Adjust clevises to center transmitter trims 2 Control throws Fly model and apply full deflection of each control in turn Check the response of each control Aileron Hi rate 3 rolls in 4 seconds Lo rate 3 rolls in 6 seconds Elevator Hi rate to give smooth square corne...

Страница 33: ...ght A No adjustment needed B Add right thrust C Reduce right thrust move thrust line left 7 Up Down Thrust Fly model on a normal path into any wind Parallel to strip at a distance of around 100m from you elevator trim should be neutral as per test No 3 Pull into a vertical climb neutralize elevator A Model continues straight up B Model pitches up goes towards top of model C Model pitches down goes...

Страница 34: ...plied rudder C Model rolls in opposite direction in both tests A Dihedral OK B Reduce dihedral C Increase dihedral 11 Elevator alignment for models with independ ent elevator halves Fly model as in test 6 and pull it up into an inside loop Roll inverted and repeat the above by pushing it up into an outside loop A No rolling tendency when elevator applied B Model rolls in same direction in both tes...

Страница 35: ...www Vortex RC com 35 ...

Отзывы: